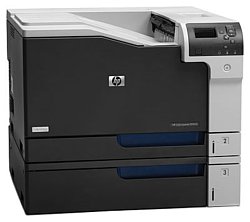
HP Color LaserJet Enterprise CP5525dn
Рейтинг

 Снят с производства
Тип устройства
Принтер
Технология печати
лазерная
Макс. формат
A3
Число страниц в месяц
120000
Скорость печати
A4
30
Цветность печати
цветная
Общие характеристики |
|
|---|---|
Тип |
лазерный/светодиодный |
Макс. формат |
A3 |
Технология печати |
лазерная |
Число страниц в месяц |
120 000 |
Область применения |
большой офис |
Размещение |
настольный |
Тип устройства |
Принтер |
Цветность печати |
цветная |
Печать фотографий |
|
Телефон |
|
Факс |
|
Копир |
|
Сканер |
|
Принтер |
|
Прямая печать |
|
Двусторонняя печать |
|
Пигментные чернила |
|
Печать без полей |
|
Система непрерывной подачи чернил |
|
Количество цветов |
4 |
Макс, разрешение для ч/б печати |
|
| По X | 600 |
| По Y | 600 |
Скорость ч/б печати |
|
| A4 | 30 |
Время выхода первого отпечатка |
|
| Цветн, | 10 |
| Ч/б | 10 |
Сканер |
|
Слайд-адаптер |
|
Стандарт WIA |
|
Стандарт TWAIN |
|
Отправка изображения по e-mail |
|
Расходные материалы |
|
Ресурс ч/б картриджа/тонера |
13 500 |
Ресурс цветного картриджа/тонера |
15 000 |
Количество картриджей |
4 |
Печать на: |
|
| Глянцевой бумаге |
|
| Матовой бумаге |
|
| Карточках |
|
| Пленках |
|
| Этикетках |
|
| Конвертах |
|
| Фотобумаге |
|
| Рулоне |
|
| CD/DVD |
|
Плотность бумаги |
|
| Минимальная | 60 |
| Максимальная | 220 |
Факс |
|
Цветной |
|
PC Fax |
|
Телефон |
|
Спикерфон |
|
Проводная трубка |
|
Беспроводная трубка |
|
АОН |
|
Caller ID |
|
Автоответчик |
|
Стандарт DECT |
|
Языки управления |
|
| PostScript 3 |
|
|
|
|
| PCL 6 |
|
| PCL 5c |
|
| PostScript |
|
| PPDS |
|
| PCL 5e |
|
| PostScript 2 |
|
Лотки |
|
Емкость лотка ручной подачи |
100 |
Подача бумаги |
|
| Стандартная | 850 |
| Максимальная | 2 350 |
Вывод бумаги |
|
| Стандартный | 300 |
Финишер |
|
Сортер |
|
Брошюровщик |
|
Степлер |
|
Сортировка со сдвигом |
|
Электронная сортировка |
|
Интерфейсы |
|
USB |
|
Веб-интерфейс |
|
Ethernet (RJ-45) |
|
Инфракрасный порт |
|
Устройство для чтения карт памяти |
|
RS-232 |
|
AirPrint |
|
LPT |
|
Bluetooth |
|
Wi-Fi 802.11n |
|
Wi-Fi |
|
FireWire (IEEE 1394) |
|
Версия USB |
2,0 |
Количество свободных слотов расширения |
1 |
Количество слотов расширения |
1 |
Память/Процессор |
|
Объем памяти |
1 024 |
Макс, объем памяти |
1 024 |
Частота процессора |
800 |
Дополнительная информация |
|
Работа от аккумулятора |
|
Экран |
|
Поддержка ОС |
|
| DOS |
|
| Linux |
|
| Mac OS |
|
| Windows |
|
Уровень шума |
|
| При работе | 49 |
Габариты |
|
Вес |
53,5 |
Ширина |
544 |
Глубина |
586 |
Высота |
465 |
Модули
PAPER DELIVERY ASSEMBLY
3x500PF external components
1x500PF PCA
1x500PF external components
PCAs
Internal components (4 of 9)
Internal components (7 of 9)
3x500PF PCAs
Right door assembly
1x250 cassette
1x500PF internal components
Internal components (3 of 9)
Internal components (8 of 9)
Internal components (1 of 9)
3x500PF internal components
3x500PF cassette
Internal components (9 of 9)
Internal components (6 of 9)
Internal components (2 of 9)
PAPER PICK-UP ASSEMBLY
External covers, panels, and doors
Internal components (5 of 9)
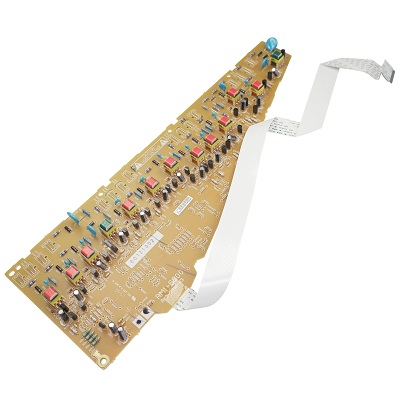
Детали Internal components (8 of 9)

| Деталь: | PAPER DELIVERY ASSEMBLY |
| Парткод: | RM1-6165-000CN |
| Деталь: | Cover, right corner (3x500PF) |
| Парткод: | RC2-9343-000CN |
| Деталь: | Cover, right lower, 1 (3x500PF) |
| Парткод: | RC2-9346-000CN |
| Деталь: | Cover, right lower, 2 (3x500PF) |
| Парткод: | RC2-9347-000CN |
| Деталь: | Cover, rear (3x500PF) |
| Парткод: | RC2-9348-000CN |
| Деталь: | Cover, left (3x500PF) |
| Парткод: | RC2-9349-000CN |
| Деталь: | Cover, left lower (3x500PF) |
| Парткод: | RC2-9350-000CN |
| Деталь: | Cover, rear lower (3x500PF) |
| Парткод: | RC2-9357-000CN |
| Деталь: | Right door assembly (3x500PF) |
| Парткод: | RM1-6953-000CN |
| Деталь: | Front lower cover assembly (3x500PF) |
| Парткод: | RM1-6958-000CN |
| Деталь: | Screw, stepped (3x500PF) |
| Парткод: | RS5-9099-000CN |
| Деталь: | Paper feeder driver PCA (1x500PF) |
| Парткод: | RM1-6987-000CN |
| Деталь: | Handle, lock, rear (1x500PF) |
| Парткод: | RC2-9303-000CN |
| Деталь: | Cover, right front (1x500PF) |
| Парткод: | RC2-9320-000CN |
| Деталь: | Link, right door, lower (1x500PF) |
| Парткод: | RC2-9327-000CN |
| Деталь: | Cover, rear (1x500PF) |
| Парткод: | RC2-9330-000CN |
| Деталь: | Cover, left (1x500PF) |
| Парткод: | RC2-9331-000CN |
| Деталь: | Cover, handle, lower (1x500PF) |
| Парткод: | RC2-9332-000CN |
| Деталь: | Link, right door, upper (1x500PF) |
| Парткод: | RC2-9335-000CN |
| Деталь: | Right door assembly (1x500PF) |
| Парткод: | RM1-6946-000CN |
| Деталь: | Cover, right lower assembly (1x500PF) |
| Парткод: | RM1-6948-000CN |
| Деталь: | Cover, upper front assembly (1x500PF) |
| Парткод: | RM1-6949-000CN |
| Деталь: | Toner remaining detect PCA |
| Парткод: | RM1-6779-000CN |
| Деталь: | Primary transfer high-voltage PCA |
| Парткод: | RM1-7004-000CN |
| Деталь: | Driver PCA (duplex model) |
| Парткод: | RM1-6742-000CN |
| Деталь: | Driver PCA (simplex model) |
| Парткод: | RM1-6783-000CN |
| Деталь: | DC Controller PCA (duplex model) |
| Парткод: | CE708-67902 |
| Цена: | 19 600 ₽ |
| Деталь: | DC Controller PCA (simplex model) |
| Парткод: | CE707-67906 |
| Деталь: | Secondary transfer high-voltage PCA |
| Парткод: | RM1-6802-000CN |
| Деталь: | Imaging high-voltage PCA |
| Парткод: | RM1-6800-000CN |
| Цена: | 14 900 ₽ |
| Деталь: | Environment sensor PCA |
| Парткод: | RK2-2884-000CN |
| Деталь: | Power switch PCA |
| Парткод: | RM1-6759-000CN |
| Деталь: | Low-voltage power supply PCA (110V) |
| Парткод: | RM1-6753-000CN |
| Деталь: | Low-voltage power supply PCA (220V) |
| Парткод: | RM1-6754-000CN |
| Деталь: | Inter connect board (ICB) PCA |
| Парткод: | CE707-67907 |
| Деталь: | Formatter PCA |
| Парткод: | CE707-69001 |
| Деталь: | Cover, main drive cable, lower |
| Парткод: | RC2-6574-000CN |
| Деталь: | Guide, main drive cable |
| Парткод: | RC2-6659-000CN |
| Деталь: | Main drive assembly, duplex model |
| Парткод: | RM1-7931-000CN |
| Деталь: | Main drive assembly, simplex model |
| Парткод: | RM1-6173-000CN |
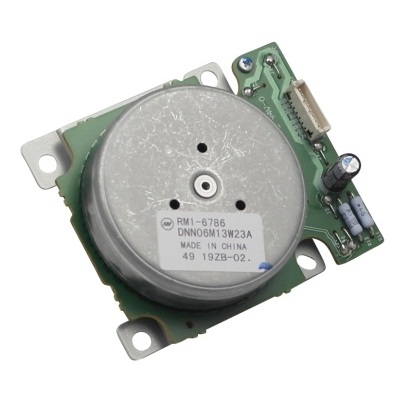
| Деталь: | DC MOTOR ASSEMBLY |
| Парткод: | RM1-6088-000CN |
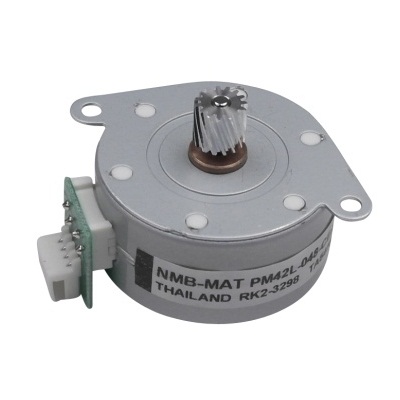
| Деталь: | Motor, stepping, DC, duplex model |
| Парткод: | RK2-3298-000CN |
| Цена: | 1 200 ₽ |
| Деталь: | Motor, stepping, DC, simplex model |
| Парткод: | RK2-3298-000CN |
| Цена: | 1 200 ₽ |
| Деталь: | Cable, feed joint, duplex model |
| Парткод: | RM1-6846-000CN |
| Деталь: | Spring, grounding, second-transfer high-voltage PCA |
| Парткод: | RU6-2772-000CN |
| Деталь: | Holder, secondary transfer HVT |
| Парткод: | RC2-6681-010CN |
| Деталь: | Cap, T2 contact, second-transfer high-voltage PCA |
| Парткод: | RC2-6691-000CN |
| Деталь: | Spring, contact, second-transfer high-voltage PCA |
| Парткод: | RU6-2771-000CN |
| Деталь: | Holder, secondary transfer, power dispatching |
| Парткод: | RC2-6682-000CN |
| Деталь: | Spring, grounding, second-transfer high-voltage PCA |
| Парткод: | RC2-6700-000CN |
| Деталь: | Link, ITB coupling release |
| Парткод: | RC2-6823-000CN |
| Деталь: | Spring, tension, duplex model |
| Парткод: | RU6-2671-000CN |
| Деталь: | Hook, duplexing spring, duplex model |
| Парткод: | RC2-6932-000CN |
| Деталь: | Gear, 25T, duplex model |
| Парткод: | RU6-0771-000CN |
| Деталь: | Cover, duplexing gear, duplex model |
| Парткод: | RC2-6931-000CN |
| Деталь: | Gear, 25T, duplex model |
| Парткод: | RU6-0772-000CN |
| Деталь: | Gear, 74T, duplex model |
| Парткод: | RU6-0773-000CN |
| Деталь: | PLATE, DUPLEXING DRIVE GEAR |
| Парткод: | RL1-2266-000CN |
| Деталь: | Support, developing coupling |
| Парткод: | RC2-6811-000CN |
| Деталь: | Cover, gear, simplex model |
| Парткод: | RC3-0688-000CN |
| Деталь: | Sensor, right door |
| Парткод: | WG8-5696-000CN |
| Цена: | 350 ₽ |
| Деталь: | Holder, door sensor, right |
| Парткод: | RC2-6645-000CN |
| Деталь: | Arm, ITB coupling release |
| Парткод: | RC2-6824-000CN |
| Деталь: | Rail, door link, rear lower |
| Парткод: | RC2-6635-000CN |
| Деталь: | Spring, tension, rear |
| Парткод: | RU6-2744-000CN |
| Деталь: | PLATE, RIGHT DOOR LINK, REAR |
| Парткод: | RC2-7273-000CN |
| Деталь: | Plate, right door link, fixed, rear |
| Парткод: | RL1-2282-000CN |
| Деталь: | SHAFT, RIGHT DOOR LINK |
| Парткод: | RU5-4979-000CN |
| Деталь: | Duct, fan, 1 |
| Парткод: | RC2-8388-000CN |
| Деталь: | LASER SCANNER ASSEMBLY |
| Парткод: | RM1-6122-070CN |
| Цена: | 19 600 ₽ |
| Деталь: | Seal, toner supporter guide 1 |
| Парткод: | RC2-7018-000CN |
| Деталь: | Toner feed assembly |
| Парткод: | RM1-6040-000CN |
| Деталь: | Guide, laser |
| Парткод: | RC2-6628-000CN |
| Деталь: | Holder, flat flexible cable |
| Парткод: | RC2-6655-000CN |
| Деталь: | Cable assembly, flat-flexible |
| Парткод: | RM1-6804-000CN |
| Деталь: | Seal, slide shutter |
| Парткод: | RC3-1014-000CN |
| Деталь: | Sheet, slide seal |
| Парткод: | RC3-1013-000CN |
| Деталь: | Label, ITB insert, FV |
| Парткод: | RU5-8804-000CN |
| Деталь: | Label, ITB insert, FH |
| Парткод: | RU5-8806-000CN |
| Деталь: | Feeder PCAs (3x500PF) |
| Парткод: | RM1-6989-000CN |
| Деталь: | Right door assembly, duplex model |
| Парткод: | RM1-6007-000CN |
| Деталь: | Right door assembly, simplex model |
| Парткод: | RM1-6138-000CN |
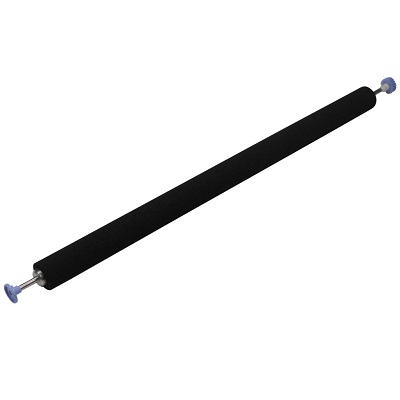
| Деталь: | Roller, secondary transfer, T2 (included in the service kit) |
| Парткод: | CE710-67904 |
| Деталь: | DOOR, RIGHT UPPER |
| Парткод: | RC2-7091-000CN |
| Деталь: | Roller, paper pick-up, Tray 1 (included in the service kit) |
| Парткод: | CE710-67906 |
| Деталь: | Lifter plate assembly, Tray 1 |
| Парткод: | RM1-6043-030CN |
| Деталь: | Separation pad, Tray 1 (included in the service kit) |
| Парткод: | CE710-67909 |
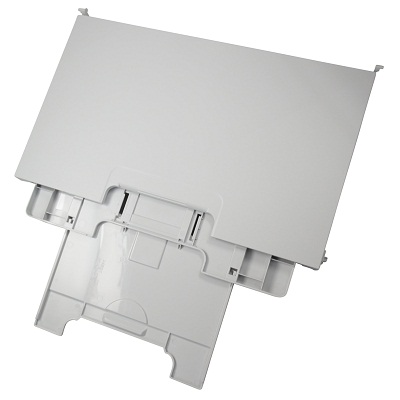
| Деталь: | Tray 1 (MP tray) assembly |
| Парткод: | RM1-6045-000CN |
| Цена: | 1 500 ₽ |
| Деталь: | CASSETTE |
| Парткод: | CE710-67906 |
| Деталь: | Switch, bottom (1x500PF) |
| Парткод: | WC2-5512-000CN |
| Деталь: | Motor, pick-up (1x500PF) |
| Парткод: | RK2-1331-000CN |
| Цена: | 2 500 ₽ |
| Деталь: | Lifter drive assembly (1x500PF) |
| Парткод: | RM1-3819-000CN |
| Деталь: | Cassette (1x500PF) |
| Парткод: | RM1-6942-000CN |
| Деталь: | Paper pick-up assembly (1x500PF) |
| Парткод: | RM1-6944-000CN |
| Деталь: | Paper feeder driver PCA (1x500PF) |
| Парткод: | RM1-6987-000CN |
| Деталь: | Roller, pick-up, paper feeder (included in service kit) |
| Парткод: | CE710-67908 |
| Деталь: | Roller, feed, paper feeder (included in service kit) |
| Парткод: | CE710-67908 |
| Деталь: | Label, cassette number (1x500PF) |
| Парткод: | RC2-9363-000CN |
| Деталь: | Connector, 8P (1x500PF) |
| Парткод: | VS1-7514-008CN |
| Деталь: | Drive assembly, duplex reverse, duplex model |
| Парткод: | RM1-6005-000CN |
| Деталь: | Drive assembly, simplex reverse, simplex model |
| Парткод: | RM1-6120-000CN |
| Деталь: | Guide, fuser, front |
| Парткод: | RC2-6546-000CN |
| Деталь: | Cover, cable, protective |
| Парткод: | RC2-6832-000CN |
| Деталь: | Fuser assembly, 110V (included in service kit) |
| Парткод: | RM1-6180-000CN |
| Деталь: | Fuser assembly, 220V (included in service kit) |
| Парткод: | RM1-6181-000CN |
| Деталь: | Guide, fuser, rear |
| Парткод: | RC2-6547-000CN |
| Деталь: | Fuser drive assembly |
| Парткод: | CE707-67904 |
| Деталь: | Fuser motor assembly |
| Парткод: | RM1-6074-000CN |
| Цена: | 5 000 ₽ |
| Деталь: | Gear assembly, fuser |
| Парткод: | RM1-7914-060CN |
| Деталь: | Cable, SB joint, low-voltage power supply, duplex model |
| Парткод: | RM1-6867-000CN |
| Деталь: | Spring, tension, registration sensor |
| Парткод: | RU6-2710-000CN |
| Деталь: | Support, frame, rear |
| Парткод: | RC2-7197-000CN |
| Деталь: | REGISTRATION SENSOR ASSEMBLY |
| Парткод: | RM1-7922-000CN |
| Деталь: | Support, frame, front |
| Парткод: | RC2-7196-000CN |
| Деталь: | Separation roller assembly (included in service kit) |
| Парткод: | CE710-67907 |
| Цена: | 8 500 ₽ |
| Деталь: | Connector, snap tight, black |
| Парткод: | VS1-7207-019CN |
| Деталь: | GUIDE, PAPER FEED |
| Парткод: | RC2-7297-000CN |
| Деталь: | Sensor, cassette last paper presence |
| Парткод: | RM1-6164-000CN |
| Деталь: | Cover, connector, lower |
| Парткод: | RC2-6642-000CN |
| Деталь: | GEAR, 18T/29T |
| Парткод: | RU6-0775-000CN |
| Деталь: | Label, fuser insert |
| Парткод: | RU6-8042-000CN |
| Деталь: | Holder, first power dispatching |
| Парткод: | RC2-6680-000CN |
| Деталь: | SPRING, CONTACT |
| Парткод: | RU6-2767-000CN |
| Деталь: | SPRING, CONTACT |
| Парткод: | RU6-2768-000CN |
| Деталь: | Guide, cross-member cable, rear |
| Парткод: | RC2-6588-000CN |
| Деталь: | Stopper, laser |
| Парткод: | RC2-6646-000CN |
| Деталь: | Guide, cross-member cable, front |
| Парткод: | RC2-6587-000CN |
| Деталь: | Spring, rod |
| Парткод: | RC2-6611-000CN |
| Деталь: | Cover, cable, right rear |
| Парткод: | RC2-8424-000CN |
| Деталь: | LIFTER DRIVE ASSEMBLY |
| Парткод: | RM1-6039-000CN |

| Деталь: | Auto close assembly |
| Парткод: | RM1-6036-000CN |
| Цена: | 1 200 ₽ |
| Деталь: | HOLDER, SWITCH |
| Парткод: | RC2-6666-000CN |
| Деталь: | CABLE, SWITCH |
| Парткод: | RM1-6830-000CN |
| Деталь: | Low voltage power supply assembly, 110V |
| Парткод: | RM1-6753-000CN |
| Деталь: | Low voltage power supply assembly, 220V |
| Парткод: | RM1-6754-000CN |
| Деталь: | GUIDE, CABLE |
| Парткод: | RC3-0684-000CN |
| Деталь: | Cable, low-voltage AC joint |
| Парткод: | RM1-6811-000CN |
| Деталь: | Cable, low-voltage power supply |
| Парткод: | RM1-6807-000CN |
| Деталь: | Cable, low-voltage power supply, test |
| Парткод: | RM1-6813-000CN |
| Деталь: | Cable, left, high-voltage power supply to low-voltage power supply |
| Парткод: | RM1-6833-000CN |
| Деталь: | Upper cartridge guide assembly |
| Парткод: | RM1-5990-000CN |
| Деталь: | Duct, front |
| Парткод: | RC2-7300-000CN |
| Деталь: | Stopper, inner door, 1 |
| Парткод: | RC2-6719-000CN |
| Деталь: | Stopper, inner door, 2 |
| Парткод: | RC2-6736-000CN |
| Деталь: | Door, inner, service kit includes all labels |
| Парткод: | CE70767904 |
| Деталь: | Cover, lower front |
| Парткод: | RC2-6737-000CN |
| Деталь: | SPRING, GROUNDING |
| Парткод: | RC2-7209-000CN |
| Деталь: | Hinge, inner door, left |
| Парткод: | RC2-6716-000CN |
| Деталь: | Hinge, inner door, right |
| Парткод: | RC2-6712-000CN |
| Деталь: | Rail, cartridge auxiliary |
| Парткод: | RC2-6724-000CN |
| Деталь: | Mount, cover arm, front |
| Парткод: | RC2-6735-000CN |
| Деталь: | Arm, front cover, 1 |
| Парткод: | RC2-6732-000CN |
| Деталь: | Mount, inner door toggle |
| Парткод: | RC2-6717-000CN |
| Деталь: | Arm, front cover, 2 |
| Парткод: | RC2-6733-000CN |
| Деталь: | MOUNT, STOPPER ARM |
| Парткод: | RC2-6745-000CN |
| Деталь: | Mount, inner door rail |
| Парткод: | RC2-6743-000CN |
| Деталь: | SPRING, COMPRESSION |
| Парткод: | RU6-2721-000CN |
| Деталь: | Lever, inner door pressure |
| Парткод: | RC2-6744-000CN |
| Деталь: | HINGE, FRONT COVER, LEFT |
| Парткод: | RC2-6713-000CN |
| Деталь: | Hinge, front cover, center |
| Парткод: | RC2-6738-000CN |
| Деталь: | HINGE, FRONT COVER, RIGHT |
| Парткод: | RC2-6715-000CN |
| Деталь: | COVER, GUIDE |
| Парткод: | RC2-7204-000CN |
| Деталь: | Guide, arm, front |
| Парткод: | RC2-6632-000CN |
| Деталь: | LEVER, PUSH |
| Парткод: | RC2-7198-000CN |
| Деталь: | LEVER, LIFT, 2 |
| Парткод: | RC2-7200-000CN |
| Деталь: | MICROSWITCH |
| Парткод: | WC4-5251-000CN |
| Деталь: | Motor, stepping, DC (3x500PF) |
| Парткод: | RK2-1331-000CN |
| Цена: | 2 500 ₽ |
| Деталь: | Rail, cassette, right (3x500PF) |
| Парткод: | RL1-1390-000CN |
| Деталь: | Rail, cassette, left (3x500PF) |
| Парткод: | RL1-1391-000CN |
| Деталь: | Cable, paper pick-up option (3x500PF) |
| Парткод: | RM1-3575-000CN |
| Деталь: | Cable, multisensor (3x500PF) |
| Парткод: | RM1-3647-000CN |
| Деталь: | Cable, door open switch (3x500PF) |
| Парткод: | RM1-3651-000CN |
| Деталь: | Lifter drive assembly (3x500PF) |
| Парткод: | RM1-3819-000CN |
| Деталь: | Cassette (3x500PF) |
| Парткод: | RM1-6942-000CN |
| Деталь: | Paper pick-up assembly (3x500PF) |
| Парткод: | RM1-6944-000CN |
| Деталь: | Feeder PCA (3x500PF) |
| Парткод: | RM1-6989-000CN |
| Деталь: | Cable, engine interface (3x500PF) |
| Парткод: | RM1-6991-000CN |
| Деталь: | Cable, PCA joint (3x500PF) |
| Парткод: | RM1-6992-000CN |
| Деталь: | Switch, button (3x500PF) |
| Парткод: | WC2-5512-000CN |
| Деталь: | Roller, pick-up (included in the service kit |
| Парткод: | CE710-67908 |
| Деталь: | Paper feed roller assembly (included in the service kit |
| Парткод: | CE710-67908 |
| Деталь: | Caster, double lock, front (3x500PF) |
| Парткод: | RC1-9896-000CN |
| Деталь: | Caster, rear (3x500PF) |
| Парткод: | RC1-9917-000CN |
| Деталь: | Connector, 8P (3x500PF) |
| Парткод: | VS1-7500-008CN |
| Деталь: | Label, cassette number (3x500PF) |
| Парткод: | RC3-1824-000CN |
| Деталь: | Cassette (3x500PF) |
| Парткод: | RM1-6942-000CN |
| Деталь: | Clamp, edge, D |
| Парткод: | RC2-6674-000CN |
| Деталь: | GUIDE, CABLE, RIGHT |
| Парткод: | RC2-6842-000CN |
| Деталь: | GUIDE, CABLE, UPPER |
| Парткод: | RC2-6841-000CN |
| Деталь: | Cable, PNL-H-HI |
| Парткод: | RM1-6849-000CN |
| Деталь: | Spacer, DC controller PCA |
| Парткод: | VT2-5176-004CN |
| Деталь: | Guide, DC cont. support cable |
| Парткод: | RC2-6665-000CN |
| Деталь: | Cable, primary transfer |
| Парткод: | RM1-6822-000CN |
| Деталь: | CABLE, REAR |
| Парткод: | RM1-6863-000CN |
| Деталь: | Formatter case |
| Парткод: | RM1-6065-000CN |
| Деталь: | Plate, FFC protective |
| Парткод: | RC2-9687-000CN |
| Деталь: | Holder, paper pick-up connector |
| Парткод: | RC2-6638-000CN |
| Деталь: | Connector, 8-pin, paper-pick-up |
| Парткод: | VS1-7514-008CN |
| Деталь: | Plate, box pillar |
| Парткод: | RC2-6673-000CN |
| Деталь: | Guide, imaging HVT cable |
| Парткод: | RC2-6661-000CN |
| Деталь: | Cover, imaging HVT cable |
| Парткод: | RC2-6573-000CN |
| Деталь: | Cross-member, cover, left |
| Парткод: | RC2-6760-000CN |
| Деталь: | Holder, formatter fan |
| Парткод: | RC2-6648-000CN |
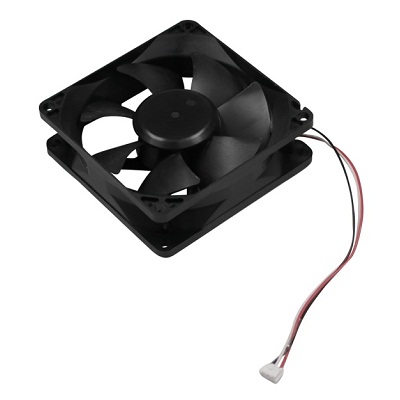
| Деталь: | Fan, formatter |
| Парткод: | RK2-3301-000CN |
| Цена: | 2 600 ₽ |
| Деталь: | CORE, RING |
| Парткод: | WE8-6639-000CN |
| Деталь: | IT belt guide rail assembly |
| Парткод: | RM1-6018-000CN |
| Деталь: | IT belt guide rail R1 assembly |
| Парткод: | RM1-6037-000CN |
| Деталь: | Toner collection unit (included in the service kit) |
| Парткод: | CE980-67901 |
| Деталь: | Arm, waste toner, left |
| Парткод: | RC2-7035-000CN |
| Деталь: | Cover, waste toner, 3 |
| Парткод: | RC2-6963-000CN |
| Деталь: | Plate, arm reinforcement |
| Парткод: | RC2-9649-000CN |
| Деталь: | Arm, waste toner, right |
| Парткод: | RC2-7036-000CN |
| Деталь: | SPRING, TENSION |
| Парткод: | RU6-2831-000CN |
| Деталь: | Waste toner cover assembly |
| Парткод: | RM1-6012-000CN |
| Деталь: | Cover, waste toner, 2 |
| Парткод: | RC2-6962-000CN |
| Деталь: | SHUTTER, EXHAUST |
| Парткод: | RC2-7010-000CN |
| Деталь: | SPRING, COMPRESSION |
| Парткод: | RU6-2683-000CN |
| Деталь: | Guide, fuser AC cable |
| Парткод: | RC2-6693-000CN |
| Деталь: | Guide, LVT cable |
| Парткод: | RC2-6662-000CN |
| Деталь: | CLAMP, EDGE |
| Парткод: | RC2-6663-000CN |
| Деталь: | Gear, link worm |
| Парткод: | RU6-0795-000CN |
| Деталь: | ITB guide rail assembly |
| Парткод: | RM1-6019-000CN |
| Деталь: | GUIDE, SLIDE |
| Парткод: | RC2-7203-000CN |
| Деталь: | SLIDER, PUSH |
| Парткод: | RC2-7201-000CN |
| Деталь: | LEVER, LIFT, 1 |
| Парткод: | RC2-7199-000CN |
| Деталь: | Cover, main cross-member cable |
| Парткод: | RC2-6650-000CN |
| Деталь: | Guide, main cross-member cable |
| Парткод: | RC2-6600-000CN |
| Деталь: | Label, ITB set, RH |
| Парткод: | RU5-8807-000CN |
| Деталь: | Rail, ITB guide |
| Парткод: | RC2-7185-000CN |
| Деталь: | Label, ITB, RV |
| Парткод: | RU5-8805-000CN |
| Деталь: | Rail, ITB guide, F3 |
| Парткод: | RC2-7193-000CN |
| Деталь: | Guide, inside cable |
| Парткод: | RC2-6589-000CN |
| Деталь: | ITB assembly (included in the service kit includes transfer roller) |
| Парткод: | CE710-67903 |
| Деталь: | Fan, power supply |
| Парткод: | RK2-2276-000CN |
| Цена: | 650 ₽ |
| Деталь: | Holder, power supply fan |
| Парткод: | RC2-7299-000CN |
| Деталь: | HOLDER, INTERLOCK SWITCH |
| Парткод: | RC2-6689-000CN |
| Деталь: | Fan, fuser |
| Парткод: | RK2-2728-000CN |
| Цена: | 1 100 ₽ |
| Деталь: | HOLDER, DUPLEXING FAN |
| Парткод: | RC2-8357-000CN |
| Деталь: | SPRING, LEAF, GROUNDING |
| Парткод: | RC2-7092-000CN |
| Деталь: | Cover, handle guide |
| Парткод: | RC2-6670-000CN |
| Деталь: | PAPER PICK-UP ASSEMBLY |
| Парткод: | RM1-7916-000CN |
| Деталь: | Paper pick-up roller assembly (included in service kit) |
| Парткод: | CE707-67903 |
| Деталь: | COVER, TOP |
| Парткод: | RM1-7148-000CN |
| Деталь: | Door, toner collection unit access |
| Парткод: | RC2-7034-000CN |
| Деталь: | CABLE, USB |
| Парткод: | RK2-2901-000CN |
| Деталь: | COVER, REAR |
| Парткод: | RM1-7147-000CN |
| Деталь: | COVER, RIGHT REAR |
| Парткод: | RM1-7142-000CN |
| Деталь: | Cover, handle, lower-right, rear |
| Парткод: | RC2-6626-000CN |
| Деталь: | Cover, handle, lower-right, front |
| Парткод: | RC2-6627-000CN |
| Деталь: | Cover, right front assembly (includes control panel) |
| Парткод: | RM1-7144-000CN |
| Цена: | 2 600 ₽ |
| Деталь: | Cover, front assembly |
| Парткод: | RM1-7133-000CN |
| Деталь: | Cover, handle, lower-left |
| Парткод: | RC2-6625-000CN |
| Деталь: | Cover, left assembly |
| Парткод: | RM1-7143-000CN |
| Цена: | 2 200 ₽ |
| Деталь: | LOCK, DOOR LINK, RIGHT |
| Парткод: | RC2-7234-000CN |
| Деталь: | Link, right door, 2 rear |
| Парткод: | RC2-7236-000CN |
| Деталь: | Link, right door, 2 front |
| Парткод: | RC2-7233-000CN |
| Деталь: | DUCT, JOINT |
| Парткод: | RC2-8360-000CN |
| Деталь: | Plate, right door link, fixed, front |
| Парткод: | RL1-2281-000CN |
| Деталь: | HINGE, RIGHT DOOR, FRONT |
| Парткод: | RC2-7094-000CN |
| Деталь: | PLATE, RIGHT DOOR LINK, FRONT |
| Парткод: | RC2-7272-000CN |
| Деталь: | Spring, tension, front |
| Парткод: | RU6-2727-000CN |
| Деталь: | RAIL, DOOR LINK, FRONT LOWER |
| Парткод: | RC2-6634-000CN |
Коды ошибок
10.0X.Y0
10.22.50
10.22.51
10.22.52
10.23.50
10.23.51
10.23.52
10.23.70
10.XX.34
10.XX.40
10.XX.41
10.XX.70
13.00.00
13.A3.FF
13.B2.9Z
13.B9.CZ
13.D3.DZ
13.WX.EE
13.WX.FF
13.WX.YZ
20.00.00
21.00.00
32.1C.XX
32.21.00
40.00.01
40.00.02
40.00.03
40.00.04
40.00.05
41.02.00
41.03.YZ
41.05.YZ
41.07.YZ
42.XX.YY
47.00.XX
47.01.XX
47.02.XX
47.03.XX
47.04.XX
47.05.00
47.06.XX
47.WX.YZ
50.1
50.2
50.3
50.4
50.7
50.8
50.9
50.A
50.B
51.00.20
51.00.21
51.00.22
51.00.23
52.00.00
52.20.00
54.00.03
54.00.06
54.00.14
54.00.19
54.01.05
54.06.21
54.0X.07
54.0X.0B
54.0X.0C
54.0X.0D
54.11.05
54.12.05
55.00.YY
55.0X.YY
56.00.YY
57.00.01
57.00.02
57.00.03
59.00.04
59.00.30
59.00.90
59.00.A0
59.00.C0
59.00.F0
59.05.50
59.05.70
59.05.80
59.06.50
59.06.60
59.06.70
59.06.80
59.07.50
59.07.60
59.07.70
59.07.80
59.08.50
59.08.60
59.08.70
59.08.80
60.00.02
60.00.03
60.00.05
60.00.06
61.00.01
62.00.00
70.00.00
80.0X.YY
98.00.01
98.00.02
98.00.03
98.00.04
99.00.01
99.00.02
99.00.03
99.00.04
99.00.05
99.00.06
99.00.07
99.00.08
99.00.09
99.00.10
99.00.11
99.00.12
99.00.13
99.00.14
99.XX.YY
Описание
| Error code: | 10.0X.Y0 |
| Display: | 10.0X.Y0 Supply memory error |
| Description: | The product cannot read or write to at least one print cartridge memory tag or a memory tag is missing from a print cartridge. Memory error • 10.00.00 (event code) Black print cartridge E-label missing • 10.00.10 (event code) Black print cartridge. |
| Remedy: | 1. Remove, and then reinstall the toner cartridge. 2. If the error reappears, turn the power off, and then on. 3. Check the cartridge e-label. If it is damaged, replace the cartridge. 4. If the error persists, replace the toner cartridge. |
| Error code: | 10.22.50 |
| Display: | 10.22.50 |
| Description: | The transfer kit life was reset above the order threshold. A new ITB was installed. |
| Remedy: | No action necessary. |
| Error code: | 10.22.51 |
| Display: | 10.22.51 |
| Description: | The transfer kit life was reset above the replace threshold. A new ITB was installed. |
| Remedy: | No action necessary. |
| Error code: | 10.22.52 |
| Display: | 10.22.52 |
| Description: | The transfer kit life was reset above the reset threshold. A new ITB was installed. |
| Remedy: | No action necessary. |
| Error code: | 10.23.50 |
| Display: | 10.23.50 |
| Description: | The fuser kit life was reset above the order threshold. |
| Remedy: | No action necessary. |
| Error code: | 10.23.51 |
| Display: | 10.23.51 |
| Description: | The fuser kit life was reset above the replace threshold. |
| Remedy: | No action necessary. |
| Error code: | 10.23.52 |
| Display: | 10.23.52 |
| Description: | The fuser kit life was reset above the reset threshold. |
| Remedy: | No action necessary. |
| Error code: | 10.23.70 |
| Display: | 10.23.70 printing past very low |
| Description: | The printer indicates when the fuser kit is very low. The actual remaining fuse kit life might vary. |
| Remedy: | If print quality is no longer acceptable, the customer must order and pay for a replacement fuser assembly (fuser kit). TIP: Advise the customer that HP recommends that they have replacement supplies available to install when the print quality is no longer acceptable. |
| Error code: | 10.XX.34 |
| Display: | 10.XX.34 Used Supply In Use |
| Description: | The print cartridge is used. • 10.00.34 (event code) Black print cartridge |
| Remedy: | NOTE: Removing a cartridge from one product and then installing it in a different product (for testing functionality) will cause this event code. |
| Error code: | 10.XX.40 |
| Display: | 10.XX.40 Genuine HP Supplies Installed |
| Description: | A genuine HP print cartridge has been installed. • 10.00.40 (event code) Black print cartridge |
| Remedy: | No action necessary. |
| Error code: | 10.XX.41 |
| Display: | 10.XX.41 Unsupported Supply In Use |
| Description: | The installed print cartridge is for a different product. • 10.00.41 (event code) Black print cartridge |
| Remedy: | Remove the print cartridge, and then install the correct cartridge for this product. |
| Error code: | 10.XX.70 |
| Display: | 10.XX.70 Printing past very low |
| Description: | The product indicates when a supply level is very low. The actual remaining print cartridge life might vary. You do not need to replace the print cartridge at this time unless print quality is no longer acceptable. • 10.00.70 (event code) Black print cartridge |
| Remedy: | If print quality is no longer acceptable, replace the print cartridge. See the parts chapter in the service manual for the correct cartridge part number. |
| Error code: | 13.00.00 |
| Display: | 13.00.00 |
| Description: | Generic jam event code. |
| Remedy: | Check the printer for a jam. See the clear jams section in the service manual. |
| Error code: | 13.A3.FF |
| Display: | 13.A3.FF |
| Description: | Residual Media Jam in Tray 3. This jam occurs when residual media is detected at the Tray 3 feed sensor (PS432). |
| Remedy: | 1. Open Tray 3, remove any jammed paper, and then close the tray. 2. Open and close the upper right door to allow the printer to attempt to clear the jam. 3. Remove the paper from the tray and check that the paper tray size guides are properly set and that the tray is not over filled with paper. 4. Make sure that the Tray 3 pickup, feed, and separation roller are installed correctly and show no damage or wear. 5. Clean or replace the pickup/feed rollers as needed. Use a damp, lint-free cloth to gently clean the rollers. 6. Check the connectors at the sensor, feed motor, and the DC controller PCA. 7. Open the following menus: • Administration • Troubleshooting • Diagnostic Tests 8. Test PS432 using the Tray/Bin Manual sensor test to verify that the sensors are functioning correctly. 9. Run the Tray 3 pickup/feed motor drive test to verify that the feed motor is functioning correctly (listen for the motor to activate). If it is not, replace the optional paper feeder. 10. If either of the previous steps fail, elevate the issue to HP for possible printer replacement. NOTE: On-site technicians should check ALL connections on the Paper feed controller PCA before elevating the issue. |
| Error code: | 13.B2.9Z |
| Display: | 13.WX.YZ Jam below control panel |
| Description: | Page at duplex switchback jam. Z = the source tray number |
| Remedy: | Check the product for a jam. |
| Error code: | 13.B9.CZ |
| Display: | 13.WX.YZ Fuser wrap jam |
| Description: | Fuser wrap jam This jam occurs when the paper disappears from the fuser output sensor before a designated amount of time after the paper reached the fuser output sensor (It is determined that the paper is being wrapped around the fuser roller). Z = fuser mode 1 = Normal auto sense 2 = Normal non-auto sense 3 = Light 1 to 3 4 = Heavy 1 5 = Heavy 2 6 = Heavy 3 7 = Glossy 1 8 = Glossy 2 9 = Glossy 3 A = Glossy film |
| Remedy: | Clear the jam. |
| Error code: | 13.D3.DZ |
| Display: | 13.D3.DZ |
| Description: | Late to duplex re-feed jam Z = fuser mode |
| Remedy: | Check the product for a jam. |
| Error code: | 13.WX.EE |
| Display: | 13.WX.EE |
| Description: | This jam occurs when a door is opened during printing. 13.AA.EE (event code) Tray 3, 4, or 5 door open 13.AB.EE (event code) Tray 4, 5, or 6 door open 13.BA.EE (event code) Front door open 13.BB.EE (event code) Right door openA |
| Remedy: | Make sure that the doors are fully closed. |
| Error code: | 13.WX.FF |
| Display: | 13.WX.FF |
| Description: | Power on residual paper jam. This jam occurs when the paper exists at any of the paper path jam sensors at power on or door close. Due to the current FW timing requirements, the displayed jam code is always 13.FF.FF, only the event log will have 13.WX.FF 13.B9.FF (event code) Fuser output sensor - PS700 13.A3.FF (event code) Tray 3 feed sensor - SR4 13.A4.FF (event code) Tray 4 feed sensor - SR7 13.A5.FF (event code) Tray 5 feed sensor - SR10 13.A6.FF (event code) Tray 6 feed sensor - SR10 13.FF.FF (event code) Multiple sensors |
| Remedy: | Clear the jam. |
| Error code: | 13.WX.YZ |
| Display: | 13.WX.YZ Jams inside lower right door |
| Description: | A jam exists inside the lower right door. |
| Remedy: | Clear the jam. |
| Error code: | 20.00.00 |
| Display: | 20.00.00 Insufficient memory <device> |
| Description: | Insufficient memory: <Device> Event log error message 20.00.00. The product does not have enough memory to print the page. The product received more data than can fit in the available memory. You might have tried to transfer too many macros, soft fonts, or complex graphics. |
| Remedy: | Touch the OK button to print the transferred data. Some data might be lost. Reduce the page complexity or add product memory. |
| Error code: | 21.00.00 |
| Display: | 21.00.00 Page Too Complex Event log error message 21.00.00. |
| Description: | Page Too Complex Event log error message 21.00.00. The product displays this message to indicate that the page decompression process was too slow for the product. |
| Remedy: | Touch the OK button to continue. There may be some data loss on the page that was being formatted when the error occurred. |
| Error code: | 32.1C.XX |
| Display: | 32.1C.XX |
| Description: | XX 32.1C.05 (event code) The restore job ticket was submitted with invalid credentials.32.1C.06 (event code) The backup job ticket was submitted with invalid credentials.32.1C.07 (event code) Backup restore permissions error. There was an error during the creation, read, or write of the restore file.32.1C.08 (event code) Not enough disk space to perform backup/restore or network share issue. There was an error during the creation, read, or write of the backup file.32.1C.09 (event code) Tried to restore a backup file that was not valid for this product. The data in the backup file specified in the restore job ticket is no longer valid due to a corruption of the data or no loner present.32.1C.0A (event code) Backup file is invalid. The data in the backup file specified in the restore job ticket is no longer valid due to a corruption of the data or no loner present.32.1C.0D (event code) Backup/restore failed, auto-reboot failed, or the product might be busy.32.1C.11 (event code) Backup/restore timeout while communicating with the engine. The backup was aborted because the product is busy.32.1C.13 (event code) and 32.1C.14 (event code) Not enough space exists to perform the backup. The backup was aborted because the disk is at a critical level or full. Scheduled backup failure.32.1C.15 (event code) Restore aborted because the backup file was created by a previous version of firmware no longer supported by the feature.32.1C.2E (event code) The restore was aborted because the product is busy.32.1C.2F (event code) Reset failure32.1C.40 (event code) The backup operation completed successfully (informational).32.1C.41 (event code) The backup operation encountered an error (informational).32.1C.42 (event code) The backup operation completed, but with a warning message (informational).32.1C.43 (event code) A component in the backup file is not supported by the current version of firmware and will not be restored (informational).32.1C.44 (event code) A component in the backup file is not transferable to another product and will not be restored (informational). 32.1C.45 (event code) Some data was not included in the backup file (informational).32.1C.46 (event code) An expected component could not be found and was thus not backed up. Because components should be known on backups, this code is a warning (informational).32.1C.47 (event code) Some data was not restored from the backup file (informational).32.1C.48 (event code) The backup job ticket was submitted using an invalid network path.32.1C.49 (event code) The backup job ticket was submitted with a bad encryption.32.1C.4A (event code) An error occurred when creating the temporary directories used to store the backup files in transition to and from the compressed (ZIP) file.32.1C.56 (event code) Reset aborted. Backup/restore in progress (informational).32.1C.57 (event code) Reset aborted (informational).32.1C.58 (event code) Unknown reset error (informational).32.1C.60 (event code) The restore operation completed successfully (informational).32.1C.61 (event code) The restore operation encountered an error.32.1C.62 (event code) The restore operation completed, but with a warning message.32.1C.68 (event code) The restore job ticket was submitted using an invalid network path.32.1C.69 (event code) The restore job ticket was submitted with a bad encryption personal identification number (PIN).32.1C.6A (event code) An error occurred when creating the temporary directories used to store the restore files in transition to and from the compressed (ZIP) file. 32.1C.6D (event code) An unusual error occurred when running the restore. |
| Remedy: | 32.1C.05 (event code) Verify the credentials that were submitted. Check the domain, user name, and password.32.1C.06 (event code) Verify the credentials that were submitted. Check the domain, user name, and password.32.1C.07 (event code) Retry the job.32.1C.08 (event code)• Retry the job.• Remove stored jobs and retry.• Use a larger capacity storage device.• Check the network share. Remove any stored jobs, and then retry. If the error persists, try using a larger capacity storage device and check the network share settings.32.1C.09 (event code) Use a valid backup file.32.1C.0A (event code) Use a valid backup file. Reboot, and then observe the state of the product. If the error persists, perform a partition clean from the Preboot menu.32.1C.0D (event code) Reboot, and then retry the backup/restore.32.1C.11 (event code) Wait until the product is idle, and then try again.32.1C.13 (event code) and 32.1C.14 (event code) Free up disk space, and then try again.32.1C.15 (event code) - Use the current backup file.32.1C.2E (event code) Wait until the product is idle, and then try again. Turn the product off then on, and then retry.32.1C.2F (event code) Turn the product off then on, and then retry.32.1C.40 (event code) No action necessary.32.1C.41 (event code) No action necessary.32.1C.42 (event code) No action necessary.32.1C.43 (event code) No action necessary.32.1C.44 (event code) No action necessary.32.1C.45 (event code) No action necessary.32.1C.46 (event code) No action necessary.32.1C.47 (event code) No action necessary.32.1C.48 (event code) Check that a share was provided as part of the network path (not blank). Check that the server and the share exists. Check that the user has permission to access the share on the provided server.32.1C.49 (event code) Verify that the encryption personal identification number (PIN) meets the restrictions for the product.32.1C.4A (event code) Retry the job. If this does not resolve the issue, turn the product off then on again and retry the job. If the error persists, perform a Partial Clean using the Preboot menu.32.1C.56 (event code) No action necessary.32.1C.57 (event code) No action necessary.32.1C.58 (event code) No action necessary.32.1C.60 (event code) No action necessary.32.1C.61 (event code) Review the error log to see specific details about the failure.32.1C.62 (event code) Review the error log to see specific details about the failure.32.1C.68 (event code) Check that a share was provided as part of the network path (not blank). Check that the server and the share exist. Check that the user has permission to access the share on the provided server. Check that the path includes the compressed (ZIP) file name as part of the path32.1C.69 (event code) Verify the encryption personal identification number (PIN) is the same PIN used to encrypt the backup file.32.1C.6A (event code) Retry the job.32.1C.6D (event code) Retry the job. |
| Error code: | 32.21.00 |
| Display: | 32.21.00 |
| Description: | Corrupt firmware in external accessory |
| Remedy: | Turn the product off, then on, and retry. If the error persists, clear the firmware image from the active partition by using the Partial Clean item in the Preboot menu |
| Error code: | 40.00.01 |
| Display: | 40.00.01 USB I/O buffer overflow To continue, touch “OK” |
| Description: | USB I/O buffer overflow To continue, touch “OK” The USB buffer has overflowed. |
| Remedy: | 1. Touch the OK button to print the transferred date (some data might be lost). 2. Check the host configuration. |
| Error code: | 40.00.02 |
| Display: | 40.00.02 Embedded I/O buffer overflow To continue, touch “OK” |
| Description: | Embedded I/O buffer overflow To continue, touch “OK” The product has experienced a JetDirect buffer overflow. |
| Remedy: | 1. Touch the OK button to print the transferred date (some data might be lost).2. Check the host configuration. |
| Error code: | 40.00.03 |
| Display: | 40.00.03 EIO <X> buffer overflow To continue, touch “OK” |
| Description: | EIO <X> buffer overflow To continue, touch “OK” Too much data was sent to the EIO card in the specified slot (x). An incorrect communications protocol might be in use. |
| Remedy: | Touch the OK button to print the transferred date (some data might be lost). |
| Error code: | 40.00.04 |
| Display: | 40.00.04 EIO <X> bad transmission To continue, touch “OK” |
| Description: | EIO <X> bad transmission To continue, touch “OK” The connection between the product and the USB device has been broken. |
| Remedy: | 1. Touch the OK button to clear the error message and continue printing.2. Remove, and then reinstall the USB device. |
| Error code: | 40.00.05 |
| Display: | 40.00.05 Embedded I/O bad transmission To continue, touch “OK” |
| Description: | Embedded I/O bad transmission To continue, touch “OK” The USB device has been removed. |
| Remedy: | 1. Touch the OK button to clear the error message (data will be lost).2. Install the USB device. |
| Error code: | 41.02.00 |
| Display: | 41.02.00 Error |
| Description: | A beam detected misprint error occurred. |
| Remedy: | 1. To clear the error message, touch OK.2. If the error persists, turn the printer off, and then on again.3. Verify that the toner cartridge is in good condition and the shutter works properly. Swap toner cartridge to test as needed.4. If the error returns, check the wire harness from the laser/scanners to the DC controller.5. If the error persists, replace the laser scanner assembly and the Laser Scanner Cable. |
| Error code: | 41.03.YZ |
| Display: | 41.03.YZ Unexpected size in tray <X> |
| Description: | Unexpected size in tray <X> The product detected a different paper size than expected. Y = Type, Z = Tray• Y = 0 Size mismatch. Detected media is longer or shorter than expected.• Y = A Size mismatch. Detected media too long.• Y = B Size mismatch. Detected media too short.• Y = C Size mismatch. Inter-page gap error.• Z = D Source is the duplexer.• Z = 1 Source is Tray 1.• Z = 2 Source is Tray 2.• Z = 3 Source is Tray 3. |
| Remedy: | 1. Touch OK to use another tray.2. Make sure that the tray is loaded with the correct paper size and that the sliding paper guides are correctly adjusted.3. Use the Tray/Bin manual sensor test to verify that the cassette media switch is correctly functioning.4. If the issue persists, replace the Mech kit. |
| Error code: | 41.05.YZ |
| Display: | 41.05.YZ Unexpected type in tray <X> |
| Description: | The printer can detect the type of paper in the paper path, and it adjusts the print mode accordingly. Tray X is loaded with a media type (transparencies, envelopes, etc.) that is different than what they tray is configured to use. Y = Expected type, Z = Detected type • Y = 0: Photo Media (1, 2, or 3) • Y = 1: Auto Sense (Normal) • Y = 2: Normal (typed not from Auto Sense) • Y = 3: Light media 1, 2, or 3 mode • Y = 4: Heavy media 1 • Y = 5: Heavy media 2 • Y = 6: Heavy media 3 • Y = 7: Glossy media 1 • Y = 8: Glossy media 2 • Y = 9: Glossy media 3 • Y = A: Glossy film • Y = B: OHT • Y = C: Label • Y = D: Envelope 1, 2, or 3 mode • Y = E: Rough • Y = F: Other mode • Z = 0: Photo Media (1, 2, or 3) • Z = 1: Auto Sense (Normal) • Z = 2: Normal (typed not from Auto Sense) • Z = 3: Light media 1, 2, or 3 mode • Z = 4: Heavy media 1 • Z = 5: Heavy media 2 • Z = 6: Heavy media 3 • Z = 7: Glossy media 1 • Z = 8: Glossy media 2 • Z = 9: Glossy media 3 • Z = A: Glossy film • Z = B: OHT • Z = C: Label • Z = D: Envelope 1, 2, or 3 mode • Z = E: Rough • Z = F: Other mode |
| Remedy: | 1. Load the tray with the size and type of paper indicated, or use another tray if available.2. If this message displays and the tray is loaded with the correct paper type, check the print driver settings to make sure they match the tray type settings.3. Check all application and printer settings to make sure that the Type setting is correct.4. Clean the Media sensor.5. If the error persists, elevate issue for printer replacement. |
| Error code: | 41.07.YZ |
| Display: | 41.07.YZ Error To continue, press OK |
| Description: | A media transportation error has occurred. Y = 0 Photo media 1, Photo media 2, Photo media 3, Designated media 2, Designated media 3, or N/ A, typed or AutoSense Y = 1 AutoSense (Normal): special case distinguished from typed Normal Y = 2 Normal: typed (not AutoSense) Y = 3 Light media 1, 2, or 3: typed or AutoSense Y = 4 Heavy media 1: typed or AutoSense Y = 5 Heavy media 2: typed or AutoSense Y = 6 Heavy media 3: typed or AutoSense Y = 7 Glossy media 1: typed or AutoSense Y = 8 Glossy media 2: typed or AutoSense Y = 9 Glossy media 3: typed or AutoSense Y = A Glossy film: typed or AutoSense Y = B OHT: typed or AutoSense Y = C Label Y = D Envelope 1, Envelope 2, or Envelope 3 Y = E Rough (designated media 1): typed or AutoSense Z = 1 Tray 1 Z = 2 Tray 2 Z = 3 Tray 3 |
| Remedy: | Turn the product off, and then on. If the error persists, replace the DC controller PCA. |
| Error code: | 42.XX.YY |
| Display: | 42.XX.YY Error Event Log message |
| Description: | Error Event Log message Internal system failure. |
| Remedy: | 1. Turn the product off, then on, and then retry.2. If the error persists, clear the firmware image from the active partition by using the Partial Clean item in the Preboot menu. |
| Error code: | 47.00.XX |
| Display: | 47.00.XX |
| Description: | Back channel internal error. |
| Remedy: | 1. Turn the product off, and then on again.2. Resend the print job.3. If the error persists, clear the active partition by using the Partial Clean item in the Preboot menu. |
| Error code: | 47.01.XX |
| Display: | 47.01.XX |
| Description: | Image transformer internal error. |
| Remedy: | 1. Turn the product off, and then on again.2. Resend the print job.3. If the error persists, clear the active partition by using the Partial Clean item in the Preboot menu. |
| Error code: | 47.02.XX |
| Display: | 47.02.XX |
| Description: | Job parser internal error. |
| Remedy: | 1. Turn the product off, and then on again.2. Resend the print job.3. If the error persists, clear the active partition by using the Partial Clean item in the Preboot menu. |
| Error code: | 47.03.XX |
| Display: | 47.03.XX |
| Description: | Print job internal error. |
| Remedy: | 1. Turn the product off, and then on again.2. Resend the print job.3. If the error persists, clear the active partition by using the Partial Clean item in the Preboot menu. |
| Error code: | 47.04.XX |
| Display: | 47.04.XX |
| Description: | Print spooler 9100 internal error. |
| Remedy: | 1. Turn the product off, and then on again.2. Resend the print job.3. If the error persists, clear the active partition by using the Partial Clean item in the Preboot menu. |
| Error code: | 47.05.00 |
| Display: | 47.05.00 |
| Description: | Print spooler framework internal error. |
| Remedy: | 1. Turn the product off, and then on again.2. Resend the print job.3. If the error persists, clear the active partition by using the Partial Clean item in the Preboot menu. |
| Error code: | 47.06.XX |
| Display: | 47.06.XX |
| Description: | Print application internal error. |
| Remedy: | 1. Turn the product off, and then on again.2. Resend the print job.3. If the error persists, clear the active partition by using the Partial Clean item in the Preboot menu. |
| Error code: | 47.WX.YZ |
| Display: | 47.WX.YZ Printer Calibration Failed To continue, touch “OK” |
| Description: | Printer Calibration Failed To continue, touch gOKh The device is unable to access or implement one of the image patterns files. Y = Calibration type, Z = Event• 47.FC.00 (event code) Color plane registration (CPR) Image not found at system initialization• 47.FC.01 (event code) CPR Store Image failure• 47.FC.02 (event code) CPR Image not found• 47.FC.03 (event code) CPR Print engine execution failure• 47.FC.10 (event code) Consecutive Dmax Dhalf Image not found at system initialization• 47.FC.11 (event code) Consecutive Dmax Dhalf Store image failure• 47.FC.12 (event code) Consecutive Dmax Dhalf Image not found• 47.FC.13 (event code) Consecutive Dmax Dhalf Print engine execution failure• 47.FC.20 (event code) Error Diffusion Image not found at system initialization• 47.FC.21 (event code) Error Diffusion Store image failure • 47.FC.22 (event code) Error Diffusion Image not found• 47.FC.23 Error Diffusion Print engine execution failure• 47.FC.30 0 (event code) Drum Speed Adjustment Image not found at system initialization• 47.FC.31 (event code) Drum Speed Adjustment Store image failure• 47.FC.32 (event code) Drum Speed Adjustment Image not found• 47.FC.33 (event code) Drum Speed Adjustment Print engine execution failure• 47.FC.40 (event code) Pulse Width Modulation Image not found at system initialization• 47.FC.41 (event code) Pulse Width Modulation Store image failure• 47.FC.42 (event code) Pulse Width Modulation Image not found• 47.FC.43 (event code) Pulse Width Modulation Print engine execution failure |
| Remedy: | 1. Turn the product off, and then on again.2. If the error persists over multiple power cycles frequently and consistently on a unit then do the following.• In the Administration/Troubleshooting/Diagnostics, run the hard disk tests to validate health of the device. Fix any issue found with the mass storage device3. If the error persists, reload the firmware.4. If the error persists, clear the active partition by using the Partial Clean item in the Preboot menu then reload the firmware. |
| Error code: | 50.1 |
| Display: | 50.1 FUSER ERROR |
| Description: | AC power is not being provided to the fuser assembly. AC voltage is necessary to generate heat in the fuser assembly. |
| Remedy: | 1. Verify that the fuser power cable at the back of the device is connected and the ECU is fully seated. 2. If the message persists, replace the fuser assembly. |
| Error code: | 50.2 |
| Display: | 50.<X> Fuser To continue turn off then on |
| Description: | A fuser error has occurred. fuser warm up service. |
| Remedy: | - Turn the product off, and then on. - Reseat the connection to the fuser and the DC controller. - Replace the fuser. - Replace the upper cable guide assembly. - Replace the low voltage power supply. - Replace the DC controller |
| Error code: | 50.3 |
| Display: | 50.<X> Fuser To continue turn off then on |
| Description: | A fuser error has occurred. high fuser temperature |
| Remedy: | - Turn the product off, and then on. - Reseat the connection to the fuser and the DC controller. - Replace the fuser. - Replace the upper cable guide assembly. - Replace the low voltage power supply. - Replace the DC controller |
| Error code: | 50.4 |
| Display: | 50.<X> Fuser To continue turn off then on |
| Description: | A fuser error has occurred.f aulty fuser. |
| Remedy: | - Turn the product off, and then on. - Reseat the connection to the fuser and the DC controller. - Replace the fuser. - Replace the upper cable guide assembly. - Replace the low voltage power supply. - Replace the DC controller |
| Error code: | 50.7 |
| Display: | 50.X FUSER ERROR To continue turn off then on |
| Description: | A fuser error has occurred. fuser pressure release malfunction |
| Remedy: | 1. Turn the device off, and allow it to cool. 2. Verify that the correct model of fuser is installed. 3. Verify that the correct voltage fuser is installed. 4. Reinstall the fuser, and check the connection between the fuser and the high-voltage power supply. Replace the high-voltage power supply if the connector is damaged. 5. Replace the fuser. Replace the dc controller PCA. See DC controller PCA on page 357. 7. Replace the high-voltage power supply. |
| Error code: | 50.8 |
| Display: | 50.X FUSER ERROR To continue turn off then on |
| Description: | A fuser error has occurred. low fuser temperature |
| Remedy: | 1. Turn the device off, and allow it to cool. 2. Verify that the correct model of fuser is installed. 3. Verify that the correct voltage fuser is installed. 4. Reinstall the fuser, and check the connection between the fuser and the high-voltage power supply. Replace the high-voltage power supply if the connector is damaged. 5. Replace the fuser. Replace the dc controller PCA. See DC controller PCA on page 357. 7. Replace the high-voltage power supply. |
| Error code: | 50.9 |
| Display: | 50.X FUSER ERROR To continue turn off then on |
| Description: | A fuser error has occurred. high fuser temperature |
| Remedy: | 1. Turn the device off, and allow it to cool. 2. Verify that the correct model of fuser is installed. 3. Verify that the correct voltage fuser is installed. 4. Reinstall the fuser, and check the connection between the fuser and the high-voltage power supply. Replace the high-voltage power supply if the connector is damaged. 5. Replace the fuser. Replace the dc controller PCA. See DC controller PCA on page 357. 7. Replace the high-voltage power supply. |
| Error code: | 50.A |
| Display: | 50.WX.YZ Fuser error To continue |
| Description: | The fuser has experienced an error. W = fuser error code, X = fuser mode, Y = previous printer sleep state, Z = next printer sleep state Low fuser temperature 3 |
| Remedy: | 1. Remove and then reseat the fuser. Make sure there is no residual paper in the fuser. Make sure the device is not located in front of a vent or window where cool air may interfere with the ability of the fuser to heat up. 2. Check the product power source. Make sure the power source meets product requirements. Make sure this is the only device using the circuit. 3. Replace the fuser. 4. Check the connector (J704) between the fuser and the printer. If it is damaged, replace the fuser drive assembly or fuser. 5. If this product has been previously serviced, check the connector (J131) on the DC controller PCA and the connectors (J109 and J110) on the power line between the low-voltage power supply assembly and the fuser. |
| Error code: | 50.B |
| Display: | 50.WX.YZ Fuser error To continue |
| Description: | The fuser has experienced an error. W = fuser error code, X = fuser mode, Y = previous printer sleep state, Z = next printer sleep state High fuser temperature 3 |
| Remedy: | 1. Remove and then reseat the fuser. 2. Check the paper type setting using the product menus and in the printer driver. Making sure that they match and are correct for the type of media being used. 3. Replace the fuser. 4. Check the connector (J704) between the fuser and the printer. If it is damaged, replace the fuser drive assembly or fuser. 5. If this product has been previously serviced, check the connector (J131) on the DC controller PCA. |
| Error code: | 51.00.20 |
| Display: | 51.00.20 Laser Scanner Error - Laser malfunction Sens |
| Description: | A printer laser scanner error occurred. |
| Remedy: | 1. Reconnect the connector (J1) on the laser driver PCA and connector J209 on the DC controller PCA. 2. Reconnect the connector (J151) on the laser scanner assembly and connector J234 on the DC controller PCA. 3. Reconnect the intermediate connector (J23) of the laser scanner. 4. If the error persists, replace the laser/scanner. 5. If the error persists, replace the upper cable guide assembly. 6. If the error persists, replace the DC controller. |
| Error code: | 51.00.21 |
| Display: | 51.00.YY Error |
| Description: | Laser/scanner error YY = 20 or 21 Cyan/black laser/scanner error (C/K) YY = 22 or 23 Yellow/magenta laser/scanner error (Y/M)tate |
| Remedy: | 1. Check the connector (J501) on the laser/scanner driver PCA and the connector (J111) on the DC controller PCA. 2. If the error persists, replace the C/K laser/scanner. |
| Error code: | 51.00.22 |
| Display: | 51.00.YY Error |
| Description: | Laser/scanner error YY = 20 or 21 Cyan/black laser/scanner error (C/K) YY = 22 or 23 Yellow/magenta laser/scanner error (Y/M)tate |
| Remedy: | 1. Check the connector (J501) on the laser/scanner driver PCA and the connector (J110) on the DC controller PCA. 2. If the error persists, replace the Y/M laser/scanner. |
| Error code: | 51.00.23 |
| Display: | 51.00.YY Error |
| Description: | Laser/scanner error YY = 20 or 21 Cyan/black laser/scanner error (C/K) YY = 22 or 23 Yellow/magenta laser/scanner error (Y/M)tate |
| Remedy: | 1. Check the connector (J501) on the laser/scanner driver PCA and the connector (J110) on the DC controller PCA. 2. If the error persists, replace the Y/M laser/scanner. |
| Error code: | 52.00.00 |
| Display: | 52.00.00 Scanner Startup error |
| Description: | A printer laser scanner startup error occurred. |
| Remedy: | 1. Reconnect the connector (J151) on the laser scanner assembly and connector J234 on the DC controller PCA. 2. Reconnect the intermediate connector (J23) of the laser scanner. 3. Run the scanner motor drive test in the actuator drive mode to verify that the scanner motor is functioning correctly. If it is not, replace the laser scanner assembly. 4. If the error persists, replace the DC controller. |
| Error code: | 52.20.00 |
| Display: | 52.XX.00 Error To continue turn off then on |
| Description: | Laser/scanner error Laser/scanner rotation error |
| Remedy: | 1. Reconnect connector (J145) on the laser/scanner. 2. Reconnect connectors (J86 and J93) on the DC controller. 3. Use the scanner motor (M108) drive test in the component test to verify that the scanner motor is properly functioning. If it is not, replace the laser/scanner. NOTE: Listen for a high pitched whine from the motor. 4. If the error persists, replace the laser/scanner. |
| Error code: | 54.00.03 |
| Display: | 54.00.03 (EVENT LOG ONLY) |
| Description: | Environmental sensor abnormality warning |
| Remedy: | 1. Turn the product off, and then on. 2. If the environment sensor has been removed or replaced, check the connector from tray 1 to the environment sensor and the connector (J223) on the DC controller PCA. 3. If the error persists, replace the environment sensor assembly. 4. If the error persists, replace the right door assembly. |
| Error code: | 54.00.06 |
| Display: | 54.XX.YY Error |
| Description: | A sensor error has occurred Registration density sensor failure |
| Remedy: | 1. Open and close the right door (or turn on and then off the power switch) to perform the color plane registration. 2. If the error persists, replace the registration density sensor assembly. |
| Error code: | 54.00.14 |
| Display: | 54.XX.YY Error |
| Description: | A sensor error has occurred Registration density sensor failure |
| Remedy: | 1. Open and close the right door (or turn on and then off the power switch) to perform the color plane registration. 2. If the error persists, replace the registration density sensor assembly. |
| Error code: | 54.00.19 |
| Display: | 54.XX.YY Error |
| Description: | A sensor error has occurred Registration density sensor failure |
| Remedy: | 1. Open and close the right door (or turn on and then off the power switch) to perform the color plane registration. 2. If the error persists, replace the registration density sensor assembly. |
| Error code: | 54.01.05 |
| Display: | 54.XX.YY Error |
| Description: | A sensor error has occurred Media sensor is out of calibration range |
| Remedy: | 1. Turn the product off, and then clean the media sensor with a lint-free cloth. Turn the product on. 2. If the error persists, replace the paper pickup assembly. |
| Error code: | 54.06.21 |
| Display: | 54.06.21 error |
| Description: | A sensor error has occurred. Primary laser/scanner beam detect abnormality. |
| Remedy: | 1. Turn the printer off, and then on. 2. If the printer has had parts removed or replace, check the connector (J161 and J162) on the DC controller PCA. 3. If the error persists, replace the laser/scanner assembly. |
| Error code: | 54.0X.07 |
| Display: | 54.0X.07 (EVENT LOG ONLY) |
| Description: | The printer experienced a Drum home position sensor error. • 54.05.07: Black Drum • 54.06.07: Cyan Drum • 54.07.07: Magenta Drum • 54.08.07: Yellow Drum |
| Remedy: | 1. Turn the printer off and then on.2. Reconnect the connector (J114) on the DC controller PCA.3. Replace the Main Drive Assembly. |
| Error code: | 54.0X.0B |
| Display: | 54.XX.YY Error |
| Description: | A sensor error has occurred Density sensor out of range error or Dhalf calibration failure X = 0 black, X = 1 cyan, X = 2 magenta, X = 3 yellow |
| Remedy: | 1. Check the supplies status page to make sure the toner cartridges are not past their useful life. 2. Check the ITB for damage. 3. Make sure the CPR sensor is not contaminated with toner or paper dust. Clean the sensor with compressed air and soft brush. 4. If error persists, replace the registration sensor assembly. |
| Error code: | 54.0X.0C |
| Display: | 54.XX.YY Error |
| Description: | A sensor error has occurred Density sensor out of range error or Dhalf calibration failure X = 0 black, X = 1 cyan, X = 2 magenta, X = 3 yellow |
| Remedy: | 1. Check the supplies status page to make sure the toner cartridges are not past their useful life. 2. Check the ITB for damage. 3. Make sure the CPR sensor is not contaminated with toner or paper dust. Clean the sensor with compressed air and soft brush. 4. If error persists, replace the registration sensor assembly. |
| Error code: | 54.0X.0D |
| Display: | 54.XX.YY Error |
| Description: | A sensor error has occurred Optical memory element abnormal or CPR sensor out of range X = 0 black, X = 1 cyan, X = 2 magenta, X = 3 yellow |
| Remedy: | 1. Check the supplies status page to make sure the toner cartridges are not past their useful life. 2. Check the ITB for damage. 3. Make sure the CPR sensor is not contaminated with toner or paper dust. Clean the sensor with compressed air and soft brush. 4. If error persists, replace the registration sensor assembly. |
| Error code: | 54.11.05 |
| Display: | 54.XX.YY Error |
| Description: | A sensor error has occurred. Media Sensor is not functioning properly |
| Remedy: | 1. Clean the media sensor with a lint-free cloth and then turn the product off and then on. 2. 54.11.05: If the error persists replace the paper pickup assembly. The threshold level for the media sensor (Media Sensor Value) is located on a label on the paper pickup assembly. Use the Service menu to input this value into the product memory after replacing the paper pickup assembly. -or- 54.12.05: If the error persists replace the right door assembly. 3. 54.11.05: If the product has had parts removed or replace check the connector (J542) on the media sensor and the connector (J112) on the DC controller PCA. -or- 54.12.05: If the product has had parts removed or replace check the connector (J114) on the media sensor and the connector (J152) on the DC controller PCA. |
| Error code: | 54.12.05 |
| Display: | 54.XX.YY Error |
| Description: | A sensor error has occurred. Media Sensor is not functioning properly |
| Remedy: | 1. Clean the media sensor with a lint-free cloth and then turn the product off and then on. 2. 54.11.05: If the error persists replace the paper pickup assembly. The threshold level for the media sensor (Media Sensor Value) is located on a label on the paper pickup assembly. Use the Service menu to input this value into the product memory after replacing the paper pickup assembly. -or- 54.12.05: If the error persists replace the right door assembly. 3. 54.11.05: If the product has had parts removed or replace check the connector (J542) on the media sensor and the connector (J112) on the DC controller PCA. -or- 54.12.05: If the product has had parts removed or replace check the connector (J114) on the media sensor and the connector (J152) on the DC controller PCA. |
| Error code: | 55.00.YY |
| Display: | 55.00.YY DC controller error To continue turn off then on |
| Description: | DC controller PCA error - 55.00.01 (event code) DC controller memory error - 55.00.03 (event code DC controller no engine response - 55.00.04 (event code DC controller communications timeout |
| Remedy: | Turn the product off, and then on. If the error persists, replace the DC controller PCA. |
| Error code: | 55.0X.YY |
| Display: | 55.0X.YY DC controller error To continue turn off then on |
| Description: | DC controller PCA error - 55.01.06 (event code) NVRAM memory data error warning - 55.02.06 (event code) NVRAM memory access error warning |
| Remedy: | Turn the product off, and then on. If the error persists, replace the DC controller PCA. |
| Error code: | 56.00.YY |
| Display: | 56.00.YY Error |
| Description: | Optional paper trays communication error occurred. |
| Remedy: | 1. Turn the product off, and then on. 2. If the error persists, reseat the optional paper trays (HCO and HCI).. 3. Check the input connectors for damage. If a connector is damaged, replace the connector. |
| Error code: | 57.00.01 |
| Display: | 57.00.01 to.continue.off.on |
| Description: | Main fan (FM1) failure. |
| Remedy: | 1. Turn the printer off, and then on. Listen for fan noise on the right side of the printer. If no noise is heard, replace the main fan (FM1). 2. If the fan has been removed or replaced, check the connector (J372 and J341) on the High voltage PCA and (J133) on the DC controller PCA. 3. If the error persists, replace the main fan (FN101). |
| Error code: | 57.00.02 |
| Display: | 57.00.02 to.continue.off.on |
| Description: | Sub fan (FM2) failure. |
| Remedy: | 1. Turn the printer off, and then back on. Listen for fan noise coming from the left side of the printer. The fan should turn on approximately 1.5 minutes after power on. 2. If no noise is heard, replace fan FM2. 3. If the fan has been removed or replaced, check connector J661 on the sub fan and J147 on the DC Controller. |
| Error code: | 57.00.03 |
| Display: | 57.00.03 Error To continue turn off then on |
| Description: | Rear delivery fan (FM-3B) malfunction (M830 only) |
| Remedy: | 1. Turn the product off, and then on. 2. Listen for fan noise at the left side, upper back of the product. 3. If no noise is heard, make sure that the connectors (J1453B and J1451B) on the intermediate PCA and connector (J205) on the DC controller are connected correctly and undamaged. 4. If the error persists, replace the delivery fan assembly.. |
| Error code: | 59.00.04 |
| Display: | 59.00.YY Error To continue, turn off then on |
| Description: | Printing error |
| Remedy: | Fuser motor (M2) start up error or fuser motor (M2) rotational error---preasure roller, delivery roller, fuser pressurization, primary transfer roller disengaement 1. Use the fuser motor (M2) drive test in the component test to verify that the fuser motor is properly functioning. If it is not, replace the fuser motor assembly. 2. If the product has been serviced, check the connector (J15) on the fuser motor and the connector (J17) on the DC controller PCA. |
| Error code: | 59.00.30 |
| Display: | 59.00.YY Error - To.continue.off.on |
| Description: | A motor error has occurred. • YY = Motor |
| Remedy: | Fuser motor (M1) failure. 1. Use the fuser motor (M1) drive test in the Component test to verify that the motor is properly functioning. If test fails, replace the fuser. 2. If the motor has been removed or replaced, check connector J712 on the fuser motor M1 and connector J146 on the DC Controller. 3. If the error persists, replace the fuser motor M1. |
| Error code: | 59.00.90 |
| Display: | 59.00.YY Error To continue turn off then on |
| Description: | Printing error TB motor (M1) start up error or ITB motor (M1) abnormal rotational error |
| Remedy: | 1. Use the ITB motor (M1) drive test in the component test to verify that the ITB motor is properly functioning. If it is not, replace the ITB motor assembly. 2. If the product has been serviced, check the connector (J517) on the ITB motor and the connector (J81) on the DC controller PCA. |
| Error code: | 59.00.A0 |
| Display: | 59.00.YY Error To continue turn off then on |
| Description: | Printing error TB motor (M1) start up error or ITB motor (M1) abnormal rotational error |
| Remedy: | 1. Use the ITB motor (M1) drive test in the component test to verify that the ITB motor is properly functioning. If it is not, replace the ITB motor assembly. 2. If the product has been serviced, check the connector (J517) on the ITB motor and the connector (J81) on the DC controller PCA. |
| Error code: | 59.00.C0 |
| Display: | 59.00.YY Error To continue turn off then on |
| Description: | Printing error Developer alienation motor (M6) error |
| Remedy: | 1. Use the developer engagement and disengagement drive test in the component test to verify that the disengagement mechanism is properly functioning. If it is not, replace the ITB motor assembly. 2. Use the sensor test in the Manual sensor test to verify that the developer disengagement sensor (PS11) is properly functioning. If it is not, replace the main drive assembly. 3. If the product has been serviced, check the connector (J518) on the developer disengagement motor, the connector (J1005) on the driver PCA and the connector (J91) on the DC controller PCA. |
| Error code: | 59.00.F0 |
| Display: | 59.00.YY Error To continue turn off then on |
| Description: | Printing error T1 alienation mechanism failure |
| Remedy: | 1. Make sure that the ITB is correctly installed. 2. Use the T1 roller alienation switch (SW5) test in the Manual sensor test to verify that the switch is properly functioning. If it is not, replace the main drive assembly. 3. Use the T1 roller engagement and disengagement drive test in the component test to verify that the T1 roller disengagement mechanism is properly functioning. If it is not, replace the fuser drive assembly. 4. If the product has been serviced, check the connector (J181) on the DC controller PCA. |
| Error code: | 59.05.50 |
| Display: | 59.05.50 |
| Description: | A printer motor error occurred. Main motor error. Drum motor start up error |
| Remedy: | 1. Turn the product off, and then on. 2. Run the drum motor test in the actuator drive mode to make sure that the drum motor is functioning correctly. If it is not, replace the drum motor. 3. Check the connector (J60) of the drum motor and connector (J222) on the DC controller PCA. 4. If grinding or clicking noises occur with the error, there might be other parts of the drive assembly causing the issue. • Registration assembly • Drum feed drive assembly • PIU of Tray 2 and Tray 3 5. If this is the suspected cause and the exact part causing the issue cannot be determined, all three parts should be replaced at the same time. 6. If no noises are associated with the error and the drum motor has already been replaced, replace the DC controller.l |
| Error code: | 59.05.70 |
| Display: | 59.0X.70 Error To continue turn off then on |
| Description: | Motor abnormal rotation Black developer motor abnormal start up error (ITB motor; M1) |
| Remedy: | 1. Use the ITB drum motor (M1) drive test in the Component test to verify that the motor is properly functioning. If it is not, replace the ITB motor assembly. 2. If the product has been serviced, check the connector (J517) on the ITB motor and the connector (J81) on the DC controller PCA. |
| Error code: | 59.05.80 |
| Display: | 59.0X.80 Error To continue turn off then on |
| Description: | Developer motor failure Black developer motor failure error (ITB motor; M1) |
| Remedy: | 1. Use the ITB drum motor (M1) drive test in the Component test to verify that the motor is properly functioning. If it is not, replace the ITB motor assembly. 2. If the product has been serviced, check the connector (J517) on the ITB motor and the connector (J81) on the DC controller PCA. |
| Error code: | 59.06.50 |
| Display: | 59.0X.50 Error To continue turn off then on |
| Description: | Motor startup error X= 5 black, X = 6 cyan, X = 7 magenta, X = 8 yellow CMY drum motor (M2) start up error |
| Remedy: | 1. Use the drum motor (M2) drive test in the Component test to verify that the motor is properly functioning. If it is not, replace the drum motor assembly. 2. If the product has been serviced, check the connector (J515) on the drum motor and the connector (J81) on the DC controller PCA. |
| Error code: | 59.06.60 |
| Display: | 59.0X.60 Error To continue turn off then on |
| Description: | Motor rotational error X= 5 black, X = 6 cyan, X = 7 magenta, X = 8 yellow |
| Remedy: | CMY drum motor (M2) rotation error 1. Use the drum motor (M2) drive test in the Component test to verify that the motor is properly functioning. If it is not, replace the drum motor assembly. 2. If the product has been serviced, check the connector (J515) on the drum motor and the connector (J81) on the DC controller PCA. |
| Error code: | 59.06.70 |
| Display: | 59.0X.70 Error To continue turn off then on |
| Description: | Motor abnormal rotation CMY developer motor (M3) abnormal start up error |
| Remedy: | 1. Use the developer motor (M3) drive test in the Component test to verify that the motor is properly functioning. If it is not, replace the developer motor assembly. 2. If the product has been serviced, check the connector (J514) on the developer motor and the connector (J81) on the DC controller PCA. |
| Error code: | 59.06.80 |
| Display: | 59.0X.80 Error To continue turn off then on |
| Description: | Developer motor failure CMY developer motor (M3) failure error |
| Remedy: | 1. Use the developer motor (M3) drive test in the Component test to verify that the motor is properly functioning. If it is not, replace the developer motor assembly. 2. If the product has been serviced, check the connector (J514) on the developer motor and the connector (J81) on the DC controller PCA. |
| Error code: | 59.07.50 |
| Display: | 59.0X.50 Error To continue turn off then on |
| Description: | Motor startup error X= 5 black, X = 6 cyan, X = 7 magenta, X = 8 yellow CMY drum motor (M2) start up error |
| Remedy: | 1. Use the drum motor (M2) drive test in the Component test to verify that the motor is properly functioning. If it is not, replace the drum motor assembly. 2. If the product has been serviced, check the connector (J515) on the drum motor and the connector (J81) on the DC controller PCA. |
| Error code: | 59.07.60 |
| Display: | 59.0X.60 Error To continue turn off then on |
| Description: | Motor rotational error X= 5 black, X = 6 cyan, X = 7 magenta, X = 8 yellow |
| Remedy: | CMY drum motor (M2) rotation error 1. Use the drum motor (M2) drive test in the Component test to verify that the motor is properly functioning. If it is not, replace the drum motor assembly. 2. If the product has been serviced, check the connector (J515) on the drum motor and the connector (J81) on the DC controller PCA. |
| Error code: | 59.07.70 |
| Display: | 59.0X.70 Error To continue turn off then on |
| Description: | Motor abnormal rotation CMY developer motor (M3) abnormal start up error |
| Remedy: | 1. Use the developer motor (M3) drive test in the Component test to verify that the motor is properly functioning. If it is not, replace the developer motor assembly. 2. If the product has been serviced, check the connector (J514) on the developer motor and the connector (J81) on the DC controller PCA. |
| Error code: | 59.07.80 |
| Display: | 59.0X.80 Error To continue turn off then on |
| Description: | Developer motor failure CMY developer motor (M3) failure error |
| Remedy: | 1. Use the developer motor (M3) drive test in the Component test to verify that the motor is properly functioning. If it is not, replace the developer motor assembly. 2. If the product has been serviced, check the connector (J514) on the developer motor and the connector (J81) on the DC controller PCA. |
| Error code: | 59.08.50 |
| Display: | 59.0X.50 Error To continue turn off then on |
| Description: | Motor startup error X= 5 black, X = 6 cyan, X = 7 magenta, X = 8 yellow CMY drum motor (M2) start up error |
| Remedy: | 1. Use the drum motor (M2) drive test in the Component test to verify that the motor is properly functioning. If it is not, replace the drum motor assembly. 2. If the product has been serviced, check the connector (J515) on the drum motor and the connector (J81) on the DC controller PCA. |
| Error code: | 59.08.60 |
| Display: | 59.0X.60 Error To continue turn off then on |
| Description: | Motor rotational error X= 5 black, X = 6 cyan, X = 7 magenta, X = 8 yellow |
| Remedy: | CMY drum motor (M2) rotation error 1. Use the drum motor (M2) drive test in the Component test to verify that the motor is properly functioning. If it is not, replace the drum motor assembly. 2. If the product has been serviced, check the connector (J515) on the drum motor and the connector (J81) on the DC controller PCA. |
| Error code: | 59.08.70 |
| Display: | 59.0X.70 Error To continue turn off then on |
| Description: | Motor abnormal rotation CMY developer motor (M3) abnormal start up error |
| Remedy: | 1. Use the developer motor (M3) drive test in the Component test to verify that the motor is properly functioning. If it is not, replace the developer motor assembly. 2. If the product has been serviced, check the connector (J514) on the developer motor and the connector (J81) on the DC controller PCA. |
| Error code: | 59.08.80 |
| Display: | 59.0X.80 Error To continue turn off then on |
| Description: | Developer motor failure CMY developer motor (M3) failure error |
| Remedy: | 1. Use the developer motor (M3) drive test in the Component test to verify that the motor is properly functioning. If it is not, replace the developer motor assembly. 2. If the product has been serviced, check the connector (J514) on the developer motor and the connector (J81) on the DC controller PCA. |
| Error code: | 60.00.02 |
| Display: | 60.00.02 Tray 2 lifting error |
| Description: | Lifter driver assembly Tray 2 failure A tray lift motor error has occurred. |
| Remedy: | 1. On the product control panel, open the following menus: • Administration • Troubleshooting • Diagnostic Tests 2. Use the Tray/Bin manual sensor test to make sure that the Tray 2 paper (PS1409 and PS1410) surface sensors are functioning correctly. 3. If this part has been removed or replaced, check the connector (J221) on the DC controller PCA and interconnect J21. 4. If the error persists, replace the lifter drive assembly (Tray 2). |
| Error code: | 60.00.03 |
| Display: | 60.00.03 Tray 3 lifting error |
| Description: | Lifter driver assembly Tray 3 failure A tray lift motor error has occurred. |
| Remedy: | 1. On the product control panel, open the following menus: • Administration • Troubleshooting • Diagnostic Tests 2. Use the Tray/Bin manual sensor test to make sure that the Tray 3 paper (PS1411 and PS1412) surface sensors are functioning correctly. 3. If this part has been removed or replaced, check the connector (J221) on the DC controller PCA and interconnect J21. 4. If the error persists, replace the lifter drive assembly (Tray 3).e d |
| Error code: | 60.00.05 |
| Display: | 60.00.05 Tray 5 lifting error |
| Description: | Lifter driver assembly Tray 5 failure A tray lift motor error has occurred. |
| Remedy: | 1. On the product control panel, open the following menus: • Administration • Troubleshooting • Diagnostic Tests 2. Use the Tray/Bin manual sensor test to make sure that the Tray 5 paper (PS3201 and PS3203) surface sensors are functioning correctly. 3. If this part has been removed or replaced, check the connector (J3015) on the HCI controller PCA J917. 4. If the error persists, replace the lifter drive assembly (Tray 5). |
| Error code: | 60.00.06 |
| Display: | 60.00.0Y Tray <Y> lifting error |
| Description: | The indicated tray has not lifted into the paper feed position. Media input Tray 5 lift-up motor (M82) failure or media input Tray 6 lift-up motor (M92) failure NOTE: The Tray 5 and Tray 6 motors, sensors, and connectors numbers depend on the input device configuration. |
| Remedy: | 1. Use the Tray 5 paper surface sensor (SR82) or Tray 6 paper surface sensor (SR92) test in the Tray/Bin manual sensor test to verify that the sensor is properly functioning. If it is not, replace the lifter drive assembly. 2. Open and close Tray 5 or Tray 6 and listen at the back of the product for the sound of the lifter motor (M82 or M92) operating. If it does not operate, replace the lifter drive assembly. 3. If the product has been serviced, check the connector (J2003) on the paper feeder controller PCA, the intermediate connector (J702), and the connector (J2006) on the paper feeder controller PCA. TIP: Check the connector (J2006) on the paper feeder controller PCA associated with the tray. 4. If the error persists, replace the cassette tray. |
| Error code: | 61.00.01 |
| Display: | 61.00.01 |
| Description: | Print Engine Error 61.00.02 Print Engine Error 61.00.03 Print Engine Error The print engine has encountered an error. The payload data will be included which will be with the error code, and string. Service_Station_Cap_Home_Long (6100000D) Paper_Load_Tray1_Pick_Motor (6100002D) Paper_Load_Pick_Tire_Index_Sensor (6100002E) Service_Station_Cap_Home_Short (6100000E) SS_Restricted_Movement_Error (61000011) Lift_Restricted_Movement_Error (61000012) Carriage_Restricted_Movement_Error (61000013) Service_Move_To_Tranny_State (610000C8) DPU_Printbar_Crash_Into_Service_Station (610000D3) DPU_Service_Station_Under_Print_Bar (610000D4) Printbar_Clutch_Slippage (61000035) Service_Station_Pen_Too_Cold (6100000B) Service_Station_Home_Failure (6100000C) Service_Carriage_Home_Invalid (610000C9) Pen_Start_Up_Spits_Already_Done (6100004E) |
| Remedy: | 1. Turn the power off on the product by pressing the power button and holding it for more than 3 seconds.2. Unplug power cord from back of product and wait 30 seconds.3. Plug power cord back into product. 4. Turn the power on to the product using power button. 5. If the error condition is cleared then the issue is resolved, if not continue to step 6. 6. Repeat steps 1 & 2. 7. Remove the formatter, check formatter thoroughly for any loose connections and reseat them, then reinstall the formatter. 8. Repeat steps 3 & 4. 9. If the error condition is cleared then the issue is resolved, if issue is not resolved replace the Mech Kit. NOTE: It is critical to either print the event log after power cycle clears issue, or access the event log through EWS and capture the 8 character fail code value corresponding to the 61.00.0X and log it into the case. Look for the last 61.00.0x error that occurred which also has the 8 character value under the text . This value is critical in HP understanding the failure and debugging potential field issues. |
| Error code: | 62.00.00 |
| Display: | 62.00.00 To continue turn off the on. |
| Description: | Internal system failure. |
| Remedy: | Turn the printer off, and then on. If the error persists, reload the firmware. If the error still persists, perform a firmware upgrade. If the firmware upgrade does not resolve the problem, replace the hard disk. |
| Error code: | 70.00.00 |
| Display: | 70.00.00 Error To continue turn off then on |
| Description: | DC controller failure. |
| Remedy: | 1. Turn the printer off, and then on.2. If the error persists, replace the DC controller. |
| Error code: | 80.0X.YY |
| Display: | 80.0X.YY Embedded Jetdirect Error |
| Description: | An Embedded HP JetDirect print server critical error has occurred. • 80.01.80: (event log) No heartbeat • 80.01.81: (event log) Reclaim timeout • 80.01.82: (event log) Invalid data length • 80.01.8B: (event log) Invalid max outstanding packet header field • 80.01.8C: (event log) Invalid channel mapping response • 80.03.01: (event log) No PGP buffers • 80.03.02: (event log) Channel table full • 80.03.03: (event log) Producer index not reset • 80.03.04: (event log) Consumer index not reset • 80.03.05: (event log) Queue position size too small • 80.03.06: (event log) Transport overflow • 80.03.07: (event log) No overflow packets • 80.03.08: (event log) Invalid identify response • 80.03.09: (event log) Invalid channel map return status • 80.03.10: (event log) Invalid reclaim return status • 80.03.12: (event log) Datagram invalid buffer • 80.03.13: (event log) Max stream channels • 80.03.14: (event log) Max datagram channels • 80.03.15: (event log) Card reset failed • 80.03.16: (event log) Self-test failure • 80.03.17: (event log) Unknown PGP packet • 80.03.18: (event log) Duplicate I/O channel |
| Remedy: | 1. Turn the printer off, and then on.2. Remove the RJ45 cable.3. Turn the printer off, and then on.4. Reconnect the RJ45 cable.5. If the error persists, replace the formatter. |
| Error code: | 98.00.01 |
| Display: | 98.00.01 Corrupt data in firmware volume |
| Description: | Data corrupt has occurred in the firmware volume. |
| Remedy: | 1. Turn the product off, and then on. 2. Use the Clean Disk item in the Preboot menu. 3. Reload the firmware. 98.00.02 Corrupt data in the solutions volume |
| Error code: | 98.00.02 |
| Display: | 98.00.02 Corrupt data in the solutions volume |
| Description: | Corrupt data in the solutions volume Data corruption has occurred in the solutions volume. |
| Remedy: | 1. Turn the product off, and then on.2. Use the Clean Disk item in the Preboot menu.3. Reload the firmware. |
| Error code: | 98.00.03 |
| Display: | 98.00.03 Corrupt data in the configuration volume |
| Description: | Corrupt data in the configuration volume Data corrupt has occurred in the configuration volume. |
| Remedy: | 1. Turn the product off, and then on.2. Download the firmware again, and then attempt the upgrade again.3. Use the Clean Disk item in the Preboot menu.4. Reload the firmware. |
| Error code: | 98.00.04 |
| Display: | 98.00.04 Corrupt data in the job data volume |
| Description: | Corrupt data in the job data volume Data corrupt has occurred in the job data volume. |
| Remedy: | 1. Turn the product off, and then on.2. Rerun the file erase function. |
| Error code: | 99.00.01 |
| Display: | 99.00.01 Upgrade not performed file is corrupt |
| Description: | Upgrade not performed file is corrupt A remote firmware upgrade (RFU) was not performed. This is a CRC error in the firmware image (bad image). |
| Remedy: | Download the RFU file, and then attempt the upgrade again. |
| Error code: | 99.00.02 |
| Display: | 99.00.02 Upgrade not performed time-out during receive |
| Description: | Upgrade not performed timeout during receive A remote firmware upgrade (RFU) was not performed. The issue is an I/O timeout when reading the header number and size. It indicates a problem with the network environment, not the product. |
| Remedy: | The most common cause is an issue with the network environment. Make sure that there is a good network connection to the product, and then attempt the firmware upgrade again, or upgrade using the USB walk-up port. |
| Error code: | 99.00.03 |
| Display: | 99.00.03 Upgrade not performed error writing to disk |
| Description: | Upgrade not performed error writing to disk A remote firmware upgrade (RFU) was not performed. This is a disk error. It might indicate a problem or a hard disk failure. It might be necessary to check the connection to the hard disk or replace the hard disk. |
| Remedy: | 1. Download the RFU file, and then attempt the upgrade again.2. If the error persists, run the Clean Disk process from the Preboot menu. You will need to download the firmware from the Preboot menu.3. If the error persists, replace the hard disk. |
| Error code: | 99.00.04 |
| Display: | 99.00.04 Upgrade not performed time-out during receive |
| Description: | Upgrade not performed timeout during receive A remote firmware upgrade (RFU) was not performed. The issue is an I/O timeout when reading the header. |
| Remedy: | The most common cause is an issue with the network environment. Make sure that there is a good network connection to the product, and then attempt the firmware upgrade again, or upgrade using the USB walk-up port. |
| Error code: | 99.00.05 |
| Display: | 99.00.05 Upgrade not performed time-out during receive |
| Description: | Upgrade not performed timeout during receive A remote firmware upgrade (RFU) was not performed. The issue is an I/O timeout when reading image data. |
| Remedy: | The most common cause is an issue with the network environment. Make sure that there is a good network connection to the product, and then attempt the firmware upgrade again, or upgrade using the USB walk-up port. |
| Error code: | 99.00.06 |
| Display: | 99.00.06 Upgrade not performed error reading upgrade |
| Description: | Upgrade not performed error reading upgrade A remote firmware upgrade (RFU) was not performed. The issue is an unexpected read error when reading the header number and size. |
| Remedy: | 1. Download the RFU file, and then attempt the upgrade again.2. If the error persists, replace the hard disk. |
| Error code: | 99.00.07 |
| Display: | 99.00.07 Upgrade not performed error reading upgrade |
| Description: | Upgrade not performed error reading upgrade A remote firmware upgrade (RFU) was not performed. The issue is an unexpected read error when reading the rest of the header. |
| Remedy: | 1. Download the RFU file, and then attempt the upgrade again.2. If the error persists, replace the hard disk. |
| Error code: | 99.00.08 |
| Display: | 99.00.08 Upgrade not performed error reading upgrade |
| Description: | Upgrade not performed error reading upgrade A remote firmware upgrade (RFU) was not performed. The issue is an unexpected read error when reading image data. |
| Remedy: | 1. Download the RFU file, and then attempt the upgrade again.2. If the error persists, replace the hard disk. |
| Error code: | 99.00.09 |
| Display: | 99.00.09 Upgrade canceled by user |
| Description: | Upgrade canceled by user A remote firmware upgrade (RFU) was not performed. The RFU was canceled by the user. |
| Remedy: | Resend the RFU. |
| Error code: | 99.00.10 |
| Display: | 99.00.10 Upgrade canceled by user |
| Description: | Upgrade canceled by user A remote firmware upgrade (RFU) was not performed. The RFU was canceled by the user when reading the header number and size. |
| Remedy: | Resend the RFU. |
| Error code: | 99.00.11 |
| Display: | 99.00.11 Upgrade canceled by user |
| Description: | Upgrade canceled by user A remote firmware upgrade (RFU) was not performed. The RFU was canceled by the user when reading the rest of the header. |
| Remedy: | Resend the RFU. |
| Error code: | 99.00.12 |
| Display: | 99.00.12 Upgrade not performed the file is invalid |
| Description: | Upgrade not performed the file is invalid A remote firmware upgrade (RFU) was not performed. The header number is 1, but the header size does not match version 1 size. |
| Remedy: | Download the RFU file again. Make sure that you download the file for the correct product model, and then resend the RFU. |
| Error code: | 99.00.13 |
| Display: | 99.00.13 Upgrade not performed the file is invalid |
| Description: | Upgrade not performed the file is invalid A remote firmware upgrade (RFU) was not performed. The header number is 2, but the header size does not match version 2 size. |
| Remedy: | Download the RFU file again. Make sure that you download the file for the correct product model, and then resend the RFU. |
| Error code: | 99.00.14 |
| Display: | 99.00.14 Upgrade not performed the file is invalid |
| Description: | Upgrade not performed the file is invalid A remote firmware upgrade (RFU) was not performed. The file is invalid. |
| Remedy: | Download the RFU file again. Make sure that you download the file for the correct product model, and then resend the RFU. |
| Error code: | 99.XX.YY |
| Display: | 99.XX.YY |
| Description: | A message of this form indicates a firmware installation error. |
| Remedy: | Reload the firmware. |
