
HP LaserJet Enterprise MFP M525
Рейтинг


Модули
COVERS
DF and scanner assemblies (525dn and 525f models)
Internal assemblies 3
Internal assemblies 5
Internal assemblies 4
Keyboard (M525c model)
500-sheet input tray (Tray 3 and Tray 4)
CONTROL PANEL ASSEMBLY
Document feeder and scanner assemblies (525c models)
Scanner assemblies
Internal assemblies 6
Internal assemblies 2
ADF assemblies
Internal assemblies 1
Детали Internal assemblies 6
| Деталь: | Cover, right assembly |
| Парткод: | RM1-8498-000CN |
| Цена: | 3 400 ₽ |
| Деталь: | COVER, RIGHT REAR |
| Парткод: | RC2-7673-000CN |
| Цена: | 1 300 ₽ |
| Деталь: | Cover, handle, right |
| Парткод: | RC2-7675-000CN |
| Цена: | 1 800 ₽ |
| Деталь: | Cover, formatter |
| Парткод: | RC3-1863-000CN |
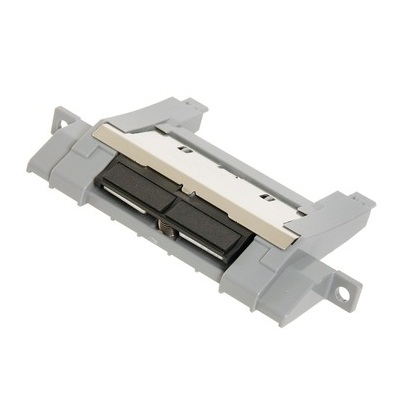
| Деталь: | Door, cartridge assembly (CSR A) |
| Парткод: | RM1-8502-000CN |
| Цена: | 2 200 ₽ |
| Деталь: | Cover, multipurpose assembly |
| Парткод: | CF116-67917 |
| Деталь: | Multipurpose lifting plate assembly |
| Парткод: | RM1-6325-000CN |
| Цена: | 500 ₽ |
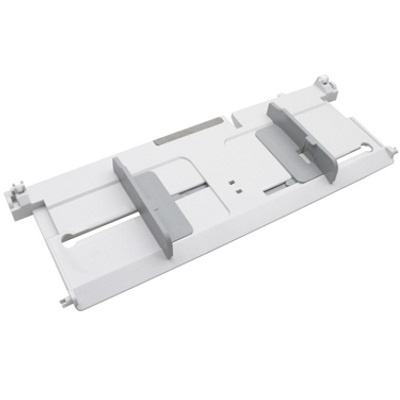
| Деталь: | Cover, top assembly |
| Парткод: | RM1-8516-000CN |
| Цена: | 5 400 ₽ |
| Деталь: | Cover, left assembly |
| Парткод: | RM1-8517-000CN |
| Цена: | 3 300 ₽ |
| Деталь: | Cover, rear assembly |
| Парткод: | RM1-8518-000CN |
| Цена: | 3 500 ₽ |
| Деталь: | Cover, dummy |
| Парткод: | RC3-1920-000CN |
| Цена: | 500 ₽ |
| Деталь: | Cover, staple assembly |
| Парткод: | RM1-8520-000CN |
| Деталь: | Document feeder whole unit kit (CSR N) |
| Парткод: | CF116-67910 |
| Деталь: | Scanner whole unit (CSR N) |
| Парткод: | CF116-67918 |
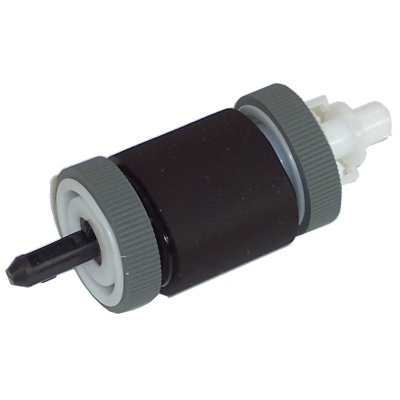
| Деталь: | REGISTRATION ROLLER ASSEMBLY |
| Парткод: | RM1-8507-000CN |
| Цена: | 7 000 ₽ |
| Деталь: | Roller, multipurpose |
| Парткод: | RL1-2412-000CN |
| Цена: | 650 ₽ |
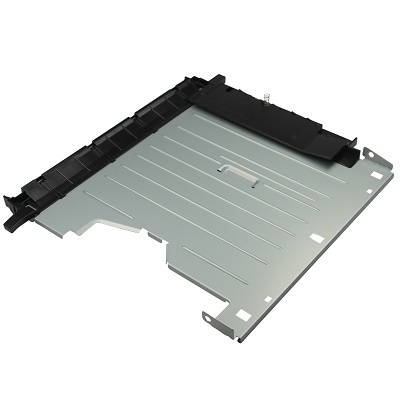
| Деталь: | Transfer lower guide assembly |
| Парткод: | RM1-6315-000CN |
| Цена: | 1 200 ₽ |
| Деталь: | Cassette, Tray 2 |
| Парткод: | RM1-8512-000CN |
| Деталь: | Base plate roller assembly (CSR A) |
| Парткод: | RM1-6306-000CN |
| Цена: | 390 ₽ |
| Деталь: | ROLLER, TRANSFER |
| Парткод: | RM1-6321-000CN |
| Цена: | 2 000 ₽ |

| Деталь: | Pad, multipurpose separation |
| Парткод: | RC2-8575-000CN |
| Цена: | 500 ₽ |
| Деталь: | Separation holder assembly |
| Парткод: | RM1-6303-000CN |
| Цена: | 800 ₽ |

| Деталь: | Fan, main |
| Парткод: | RK2-2416-000CN |
| Цена: | 1 000 ₽ |
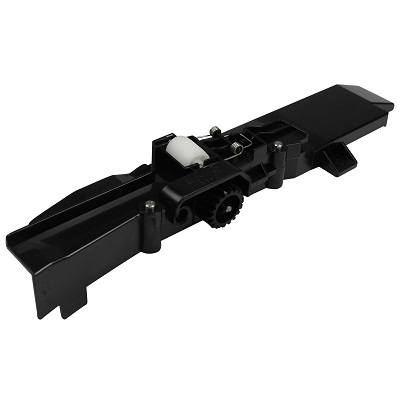
| Деталь: | Tray 2, paper pickup assembly |
| Парткод: | RM1-8505-000CN |
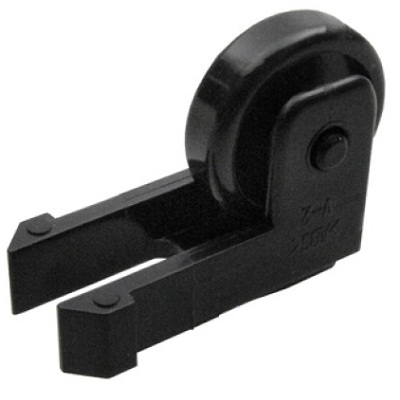
| Деталь: | Idler roller assembly |
| Парткод: | RM1-8506-000CN |
| Цена: | 750 ₽ |
| Деталь: | Multipurpose sensor PCA |
| Парткод: | RM1-8621-000CN |
| Цена: | 1 400 ₽ |
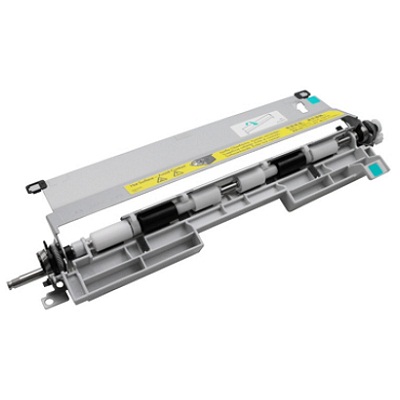
| Деталь: | Fuser assembly (universal) |
| Парткод: | RM1-8508-000CN |
| Деталь: | Low voltage power supply assembly |
| Парткод: | RM1-8514-000CN |
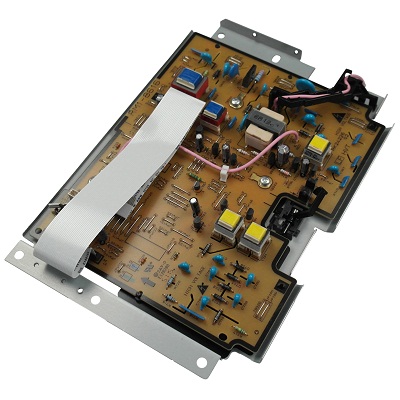
| Деталь: | DC controller PCA |
| Парткод: | RM1-8615-000CN |
| Деталь: | INTERLOCK SWITCH ASSEMBLY |
| Парткод: | RM1-8499-000CN |
| Цена: | 1 000 ₽ |
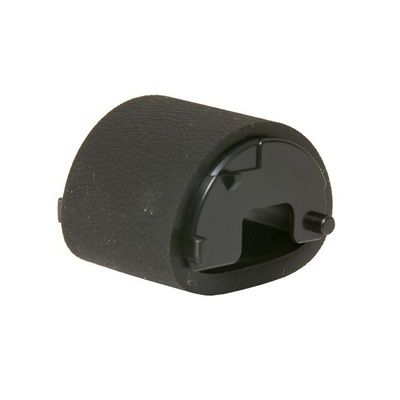
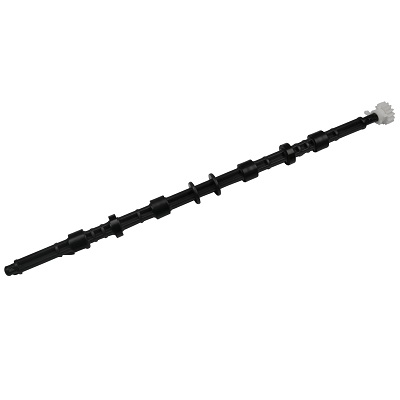
| Деталь: | Tray pickup roller assembly |
| Парткод: | RM1-6323-000CN |
| Цена: | 800 ₽ |
| Деталь: | Stapler assembly (no cable) |
| Парткод: | 5851-0786 |
| Деталь: | Stapler cable |
| Парткод: | CF116-60106 |
| Деталь: | Fax cradle, black plastic (CSR A) |
| Парткод: | 5851-0672 |
| Деталь: | Hard drive, bracket |
| Парткод: | 5851-3453 |
| Деталь: | Fax, cable (CSR A) |
| Парткод: | 5851-3499 |
| Деталь: | Fax, cable, Israel (CSR A) |
| Парткод: | 8120-8913 |
| Деталь: | Fax, cable, rest of the world (CSR A) |
| Парткод: | 8121-0811 |
| Деталь: | Fax, cable, Switzerland (CSR A) |
| Парткод: | 8121-0844 |
| Деталь: | Formatter, standard |
| Парткод: | CF105-69001 |
| Деталь: | Formatter, standard (China only) |
| Парткод: | CF116-67921 |
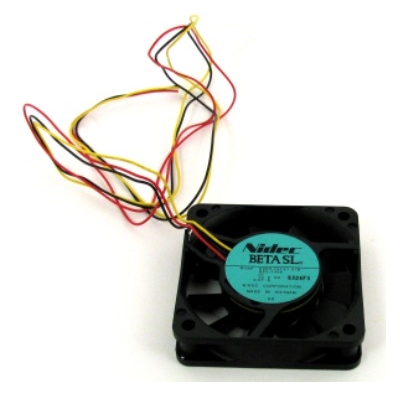
| Деталь: | FAN, SUB |
| Парткод: | RK2-1499-000CN |
| Цена: | 1 800 ₽ |
| Деталь: | Lower paper feed guide |
| Парткод: | RM1-6263-000CN |
| Цена: | 750 ₽ |
| Деталь: | PAPER FEED GUIDE ASSEMBLY |
| Парткод: | RM1-6270-000CN |
| Деталь: | Position-guide assembly |
| Парткод: | RM1-6273-000CN |
| Цена: | 650 ₽ |
| Деталь: | High-voltage power supply PCA |
| Парткод: | RM1-8519-000CN |
| Цена: | 3 800 ₽ |
| Деталь: | Top sensor PCA |
| Парткод: | RM1-8617-000CN |
| Цена: | 800 ₽ |
| Деталь: | Paper width sensor PCA |
| Парткод: | RM1-8618-000CN |
| Цена: | 700 ₽ |
| Деталь: | SWITCH ASSEMBLY |
| Парткод: | RM1-8515-000CN |
| Цена: | 800 ₽ |
| Деталь: | Pendulum service kit |
| Парткод: | RM1-6598-000CN |
| Деталь: | Keyboard assembly English (M525c model) |
| Парткод: | 5851-5380 |
| Деталь: | Keyboard assembly United Kingdom (M525c model) |
| Парткод: | 58515008 |
| Деталь: | Optional 500-sheet tray and feeder unit |
| Парткод: | CE530-69001 |
| Деталь: | Base plate roller assembly (CSR A) |
| Парткод: | RM1-6306-000CN |
| Цена: | 390 ₽ |
| Деталь: | Separation holder assembly |
| Парткод: | RM1-6303-000CN |
| Цена: | 800 ₽ |
| Деталь: | Cassette,Tray 3/4 (CSR A) |
| Парткод: | RM1-6279-000CN |
| Деталь: | Control panel assembly kit (525dn and 525f models) |
| Парткод: | CD644-67916 |
| Деталь: | Control panel assembly kit (525c models) |
| Парткод: | CD644-67920 |
| Деталь: | Control-panel cable |
| Парткод: | CF116-60105 |
| Деталь: | Document feeder whole unit (M525c model) |
| Парткод: | CF116-67922 |
| Деталь: | Control panel (M525c model |
| Парткод: | CD644-67920 |
| Деталь: | Scanner whole unit (M525c model) |
| Парткод: | CF116-67924 |
| Деталь: | FFC, control-panel keyboard (M525c model) |
| Парткод: | CD644-60113 |
| Деталь: | e-Duplex assembly, document feeder (M525c model) |
| Парткод: | 5851-5022 |
| Деталь: | Cover, ADF cable (asset chimney) |
| Парткод: | 5851-0630 |
| Деталь: | Cover, rear scanner (rear cover) |
| Парткод: | CF116-40002 |
| Деталь: | PCA, scanner memory |
| Парткод: | CF116-67923 |
| Деталь: | Cave light |
| Парткод: | CF116-60104 |
| Деталь: | Tray sensor PCA |
| Парткод: | RM1-8620-000CN |
| Цена: | 1 500 ₽ |
| Деталь: | Fuser motor assembly |
| Парткод: | RM1-8523-000CN |
| Цена: | 1 200 ₽ |
| Деталь: | PAPER DELIVERY ROLLER ASSEMBLY |
| Парткод: | RM1-6301-000CN |
| Цена: | 320 ₽ |
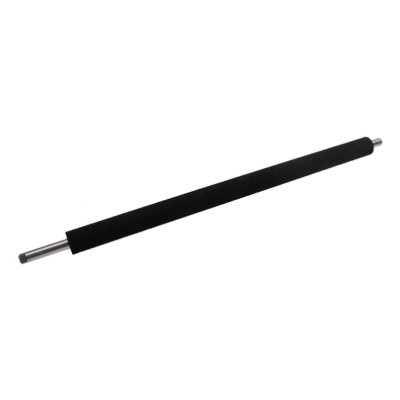
| Деталь: | Face-down roller assembly |
| Парткод: | RM1-6311-000CN |
| Цена: | 700 ₽ |

| Деталь: | Photo interrupter, IC |
| Парткод: | WG8-5935-000CN |
| Цена: | 900 ₽ |
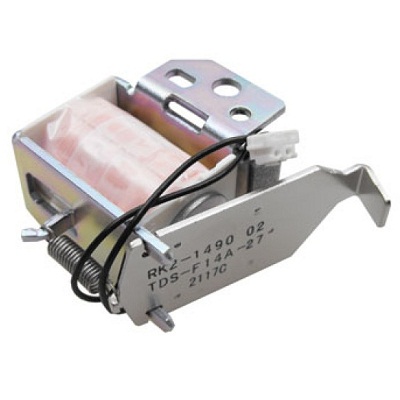
| Деталь: | Tray 1 solenoid |
| Парткод: | RK2-1490-000CN |
| Цена: | 550 ₽ |
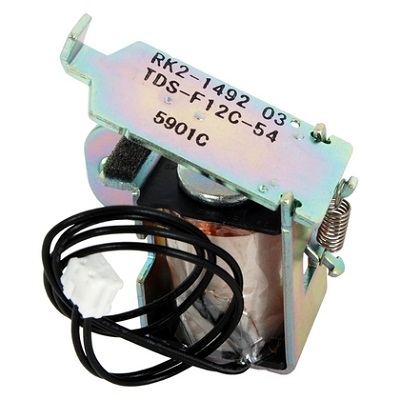
| Деталь: | Tray 2 solenoid |
| Парткод: | RK2-1492-000CN |
| Цена: | 190 ₽ |
| Деталь: | ADF SEPARATION PAD SPRING |
| Парткод: | 5851-4879 |
| Цена: | 2 500 ₽ |
| Деталь: | ADF cover, bogie |
| Парткод: | CC355-40013 |
| Деталь: | ADF hinge assembly |
| Парткод: | Q7404-60024 |
| Деталь: | Cover, ADF rear (cover rear) |
| Парткод: | Q7404-40007 |
| Деталь: | Cover, ADF front (cover front) |
| Парткод: | Q7404-40030 |
| Деталь: | Cover, hatch |
| Парткод: | Q7404-40006 |
| Деталь: | Assy-harness (ADF cable) |
| Парткод: | Q7404-50007 |
| Деталь: | Mylar kit |
| Парткод: | 5851-4998 |
| Деталь: | Tag holder assembly |
| Парткод: | RM1-8521-000CN |
| Цена: | 1 500 ₽ |
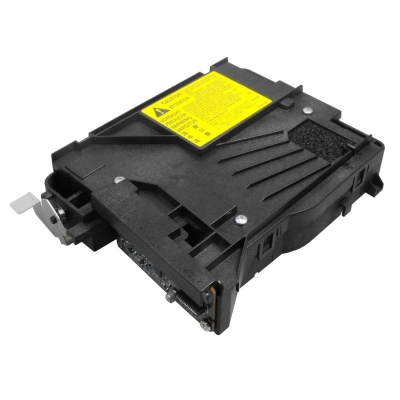
| Деталь: | Laser/scanner |
| Парткод: | RM1-6322-000CN |
| Цена: | 10 300 ₽ |
| Деталь: | STOPPER, BUSHING ARM |
| Парткод: | RC2-7928-000CN |
| Цена: | 320 ₽ |
| Деталь: | CABLE, FLAT |
| Парткод: | RK2-4218-000CN |
| Деталь: | Sensor, environmental PCA |
| Парткод: | RM1-8622-000CN |
| Цена: | 700 ₽ |
Коды ошибок
10.0X.Y0
10.23.50
10.23.51
10.23.52
10.23.70
10.XX.34
10.XX.40
10.XX.70
10.YY.15
11.00.YY
13.A3.D3
13.A3.D4
13.A3.FF
13.A4.FF
13.B2.D1
13.B2.D2
13.B2.DD
13.B2.FF
13.B2.XX
13.B9.AX
13.B9.CX
13.B9.DX
13.B9.FF
13.BA.EE
13.D3.DX
13.D3.FF
13.DA.EE
13.E1.XX
20.00.00
21.00.00
30.01.23
30.01.36
30.01.43
30.01.YY
30.WX.YZ
31.01.47
31.03.22
31.13.03
31.WX.10
31.WX.15
33.WX.YZ
40.00.01
41.02.00
41.03.YZ
49.XX.YY
50.WX.YZ
51.00.YY
52.XX.00
54.XX.YY
55.XX.YY
56.00.YY
57.00.0X
58.00.04
59.00.00
59.00.20
62.00.00
69.X
70.00.00
81.WX.00
81.WX.YZ
89.19.5C
98.00.01
98.01.00
99.XX.YY
Описание
| Error code: | 10.0X.Y0 |
| Display: | 10.0X.Y0 Supply memory error |
| Description: | The product cannot read or write to at least one print cartridge memory tag or a memory tag is missing from a print cartridge. Memory error • 10.00.00 (event code) Black print cartridge E-label missing • 10.00.10 (event code) Black print cartridge. |
| Remedy: | 1. Remove, and then reinstall the toner cartridge. 2. If the error reappears, turn the power off, and then on. 3. Check the cartridge e-label. If it is damaged, replace the cartridge. 4. If the error persists, replace the toner cartridge. |
| Error code: | 10.23.50 |
| Display: | 10.23.50 |
| Description: | The fuser kit life was reset above the order threshold. |
| Remedy: | No action necessary. |
| Error code: | 10.23.51 |
| Display: | 10.23.51 |
| Description: | The fuser kit life was reset above the replace threshold. |
| Remedy: | No action necessary. |
| Error code: | 10.23.52 |
| Display: | 10.23.52 |
| Description: | The fuser kit life was reset above the reset threshold. |
| Remedy: | No action necessary. |
| Error code: | 10.23.70 |
| Display: | 10.23.70 printing past very low |
| Description: | The printer indicates when the fuser kit is very low. The actual remaining fuse kit life might vary. |
| Remedy: | If print quality is no longer acceptable, the customer must order and pay for a replacement fuser assembly (fuser kit). TIP: Advise the customer that HP recommends that they have replacement supplies available to install when the print quality is no longer acceptable. |
| Error code: | 10.XX.34 |
| Display: | 10.XX.34 Used Supply In Use |
| Description: | The print cartridge is used. • 10.00.34 (event code) Black print cartridge |
| Remedy: | NOTE: Removing a cartridge from one product and then installing it in a different product (for testing functionality) will cause this event code. |
| Error code: | 10.XX.40 |
| Display: | 10.XX.40 Genuine HP Supplies Installed |
| Description: | A genuine HP print cartridge has been installed. • 10.00.40 (event code) Black print cartridge |
| Remedy: | No action necessary. |
| Error code: | 10.XX.70 |
| Display: | 10.XX.70 Printing past very low |
| Description: | The product indicates when a supply level is very low. The actual remaining print cartridge life might vary. You do not need to replace the print cartridge at this time unless print quality is no longer acceptable. • 10.00.70 (event code) Black print cartridge |
| Remedy: | If print quality is no longer acceptable, replace the print cartridge. See the parts chapter in the service manual for the correct cartridge part number. |
| Error code: | 10.YY.15 |
| Display: | 10.YY.15 Install <supply> |
| Description: | The indicated supply has been removed or installed incorrectly. • 10.00.70 (event code) Black print cartridge • 10.23.15 (event code) Fuser kit |
| Remedy: | Replace or install the indicated supply. See the parts chapter in the service manual for the correct supply or kit part number. |
| Error code: | 11.00.YY |
| Display: | 11.00.YY Internal clock error |
| Description: | The product real time clock has experienced an error. 01=dead clock 02=dead real time clock |
| Remedy: | Whenever the product is turned off and then turned on again, set the time and date at the control panel. If the error persists, you might need to replace the formatter. |
| Error code: | 13.A3.D3 |
| Display: | 13.A3.D3 |
| Description: | Jam In Tray 3 This jam occurs when the media does not reach the Tray 3A feed sensor (PS1404) in the designated amount of time after the start of media pick-up from Tray 3. This is a no-pick jam from Tray 3. |
| Remedy: | 1. Open Tray 3, remove any jammed paper, and then close the tray. 2. Open and close the upper right door to allow the product to attempt to clear the jam. 3. Make sure that the Tray 3 pickup, feed, and separation roller are installed correctly and show no damage or wear. 4. Clean or replace the pickup/feed rollers as needed. 5. Check the connectors at the sensor, feed motor, and the DC controller PCA. 6. Check connector (J221) on the DC controller PCA and interconnect J21. 7. Open the following menus: • Administration • Troubleshooting • Diagnostic Tests 8. Test PS1404 using the Tray/Bin Manual sensor test to verify that the sensors are functioning correctly. 9. Run the Tray 3 pickup/feed motor drive test to verify that the feed motor is functioning correctly. If it is not, replace the pickup assembly. 10. If the error persists, replace the paper pickup assembly. |
| Error code: | 13.A3.D4 |
| Display: | 13.WX.YZ Jam in middle right door |
| Description: | Late to path jam from Tray 3 This jam occurs when the paper does not reach the Tray 3 feed sensor (SR1) in designated amount of time. |
| Remedy: | Clear the jam. |
| Error code: | 13.A3.FF |
| Display: | 13.A3.FF |
| Description: | Residual Media Jam in Tray 3. This jam occurs when residual media is detected at the Tray 3 feed sensor (PS432). |
| Remedy: | 1. Open Tray 3, remove any jammed paper, and then close the tray. 2. Open and close the upper right door to allow the printer to attempt to clear the jam. 3. Remove the paper from the tray and check that the paper tray size guides are properly set and that the tray is not over filled with paper. 4. Make sure that the Tray 3 pickup, feed, and separation roller are installed correctly and show no damage or wear. 5. Clean or replace the pickup/feed rollers as needed. Use a damp, lint-free cloth to gently clean the rollers. 6. Check the connectors at the sensor, feed motor, and the DC controller PCA. 7. Open the following menus: • Administration • Troubleshooting • Diagnostic Tests 8. Test PS432 using the Tray/Bin Manual sensor test to verify that the sensors are functioning correctly. 9. Run the Tray 3 pickup/feed motor drive test to verify that the feed motor is functioning correctly (listen for the motor to activate). If it is not, replace the optional paper feeder. 10. If either of the previous steps fail, elevate the issue to HP for possible printer replacement. NOTE: On-site technicians should check ALL connections on the Paper feed controller PCA before elevating the issue. |
| Error code: | 13.A4.FF |
| Display: | 13.A4.FF |
| Description: | Residual Media Jam in Tray 4. This jam occurs when residual media is detected at the Tray 4 feed sensor (PS432). |
| Remedy: | 1. Open Tray 4, remove any jammed paper, and then close the tray. 2. Open and close the upper right door to allow the printer to attempt to clear the jam. 3. Remove the paper from the tray and check that the paper tray size guides are properly set and that the tray is not over filled with paper. 4. Make sure that the Tray 4 pickup, feed, and separation roller are installed correctly and show no damage or wear. 5. Clean or replace the pickup/feed rollers as needed. Use a damp, lint-free cloth to gently clean the rollers. 6. Check the connectors at the sensor, feed motor, and the DC controller PCA. 7. Open the following menus: • Administration • Troubleshooting • Diagnostic Tests 8. Test PS432 using the Tray/Bin Manual sensor test to verify that the sensors are functioning correctly. 9. Run the Tray 4 pickup/feed motor drive test to verify that the feed motor is functioning correctly (listen for the motor to activate). If it is not, replace the optional paper feeder assembly. 10. If either of the previous steps fail, elevate the issue to HP for possible printer replacement. NOTE: On-site technicians should check ALL connections on the Paper feed controller PCA before elevating the issue. |
| Error code: | 13.B2.D1 |
| Display: | 13.B2.Dz |
| Description: | Media delay jam at registration sensor PS4. This jam occurs when the media does not reach the Registration sensor (PS4) in the designated amount of time after the Tray 1 feed sensor (PS2502) sensed the leading edge when printing from Tray 1. |
| Remedy: | 1. Open the front and right doors and clear the jam in the indicated area. Inspect the paper path and make sure that no paper is blocking the paper path. 2. Check the registration assembly for proper orientation. Replace the registration assembly as needed. 3. Open the following menus: • Administration • Troubleshooting • Diagnostic Tests 4. Test the TOP sensor (PS4) using the Tray/Bin manual sensor test to verify that the sensor is functioning correctly. If it is not, replace the registration sensor assembly. 5. Touch Component Test. 6. Run the Tray 2 intermediate feed motor (M3) drive test to verify that the feed motor is functioning correctly. If it is not, replace the pickup assembly. 7. If the error only occurs when duplexing, check the duplexer for blockage or damage and replace as needed. |
| Error code: | 13.B2.D2 |
| Display: | 13.B2.Dz |
| Description: | Media delay jam at registration sensor PS4. This jam occurs when the media does not reach the Registration sensor (PS4) in the designated amount of time after the Tray 2C feed sensor (PS8) sensed the leading edge when printing from Tray 2. |
| Remedy: | 1. Open the front and right doors and clear the jam in the indicated area. Inspect the paper path and make sure that no paper is blocking the paper path. 2. Check the registration assembly for proper orientation. Replace the registration assembly as needed. 3. Open the following menus: • Administration • Troubleshooting • Diagnostic Tests 4. Test the TOP sensor (PS4) using the Tray/Bin manual sensor test to verify that the sensor is functioning correctly. If it is not, replace the registration sensor assembly. 5. Touch Component Test. 6. Run the Tray 2 intermediate feed motor (M3) drive test to verify that the feed motor is functioning correctly. If it is not, replace the pickup assembly. 7. If the error only occurs when duplexing, check the duplexer for blockage or damage and replace as needed. |
| Error code: | 13.B2.DD |
| Display: | 13.B2.Dz |
| Description: | Media delay jam at registration sensor PS4. This jam occurs when the media does not reach the Registration sensor (PS4) in the designated amount of time after leaving the Duplex Wait Point when duplexing. |
| Remedy: | 1. Open the front and right doors and clear the jam in the indicated area. Inspect the paper path and make sure that no paper is blocking the paper path. 2. Check the registration assembly for proper orientation. Replace the registration assembly as needed. 3. Open the following menus: • Administration • Troubleshooting • Diagnostic Tests 4. Test the TOP sensor (PS4) using the Tray/Bin manual sensor test to verify that the sensor is functioning correctly. If it is not, replace the registration sensor assembly. 5. Touch Component Test. 6. Run the Tray 2 intermediate feed motor (M3) drive test to verify that the feed motor is functioning correctly. If it is not, replace the pickup assembly. 7. If the error only occurs when duplexing, check the duplexer for blockage or damage and replace as needed. |
| Error code: | 13.B2.FF |
| Display: | 13.B2.FF Jam in top cover |
| Description: | Media residual jam in top cover at image area. Paper present at SR2 at power on or after clearing jam. |
| Remedy: | 1. Open top cover and check for media jammed in feed area. 2. Check under toner cartridge at transfer area, make sure everything is properly seated. 3. Test the top of page sensor (SR2). 4. If the sensor fails test, elevate the issue to HP for possible printer replacement. NOTE: On-site technicians should check the following connections on the DC controller PCA to ensure they are properly seated and connected before elevating the issue. (J151, J110, J144) |
| Error code: | 13.B2.XX |
| Display: | 13.B2.XX |
| Description: | Media late to registration sensor. • 13.B2.D3: Paper input delay jam 1 (paper remained at the registration sensor longer than legalsized media would.) Tray 3; registration or Top sensor. • 13.B2.D4: Paper input stay jam 1 (paper remained at the registration sensor longer than legalsized media would.) Tray 4; registration or Top sensor |
| Remedy: | Recovery steps: 1. Remove Tray 2. 2. Remove jammed paper if present. 3. Open top cover. 4. Remove the toner cartridge. 5. Lift the green flaps for access. 6. Remove jammed paper if present. 7. Reinstall cartridge and then close the top cover. Troubleshooting and parts: 1. Check the paper path for any jammed paper. Clear the jam. 2. Make sure that the paper meets HP specifications. 3. Use the product control panel or the HP Embedded Web Server to make sure that the tray is configured for the media size and type. 4. Paper sensor associated with this message: TOP Sensor PS215. Use the Manual sensor test to test the sensor. If the sensor is not working, replace the Top sensor PCA (RM1-8617-000CN). |
| Error code: | 13.B9.AX |
| Display: | 13.B9.AX |
| Description: | 13.B9.A2, 13.B9.A3, 13.B9.A4, 13.B9.A5, or 13.B9.AB Fuser delivery stay jam 1 (paper stayed at fuser output sensor longer than it should; fuser output.) Fuser modes • A2.Normal fuser mode • A3.Light 1/2 fuser mode • A4.Heavy 1 fuser mode • A5.Heavy 2 fuser mode • AB-Overhead transparency fuser mode |
| Remedy: | Recovery steps: 1. Open the rear door to second position. 2. Remove jammed paper if present. 3. Close the rear door. Troubleshooting and parts: 1. Clear the paper path of any jammed paper. 2. Make sure that the paper meets HP specifications. 3. Paper Sensor associated with this message: PS2. |
| Error code: | 13.B9.CX |
| Display: | 13.B9.CX |
| Description: | 13.B9.C2, 13.B9.C3, 13.B9.C4, 13.B9.C5, or 13.B9.CB Wrap jam 1 (paper first detected at fuser output sensor and then disappears from sensor before it should; fuser output . paper is wrapped around the fuser.) Fuser mode • C2.Normal fuser mode • C3.Light 1/2 fuser mode • C4.Heavy 1 fuser mode • C5.Heavy 2 fuser mode • CB-Overhead transparency fuser modes |
| Remedy: | NOTE: Pre-printed paper, overhead transparency, and labels must meet product specifications. Make sure that labels were not previously put through a printer, and that there are no adhesive areas exposed. Recovery steps: 1. Open the rear door to second position. 2. Open top cover. 3. Remove the toner cartridge. 4. Remove jammed paper if present. 5. Reinstall cartridge and then close the top cover. 6. Close the rear door. Troubleshooting and parts: 1. Make sure that the paper meets HP specifications. 2. Make sure that the tray is configured for the media size and type. Use the product control panel to check the product configuration, and check the Print Driver (from the application that causes the error). 3. Replace the fuser |
| Error code: | 13.B9.DX |
| Display: | 13.B9.DX |
| Description: | 13.B9.D1, 13.B9.D2, 13.B9.D3, 13.B9.D4, or 13.B9.DD Fuser delivery delay jam 1 (paper did not reach the fuser output sensor in time; fuser output.) • D1.Tray 1 • D2.Tray 2 • D3.Tray 3 • D4.Tray 4 • DD-Duplexer |
| Remedy: | Recovery steps: 1. Open the rear door to second position. 2. Open top cover. 3. Remove the toner cartridge. 4. Remove jammed paper if present. 5. Reinstall cartridge and then close the top cover. 6. Close the rear door. Troubleshooting and parts: 1. Remove all paper and check for residual pieces that could cause the jams. 2. Make sure that the paper meets HP specifications. 3. Paper sensor associated with this message: PS2. Use the Manual sensor test to test the sensor. If the sensor is not working, replace the fuser. 4. If the sensor is working correctly, the error only occurs on a duplex job, and the media is jammed before the fuser with only one side fused, replace the pendulum assembly (RM1-6598-000CN). |
| Error code: | 13.B9.FF |
| Display: | 13.B9.FF |
| Description: | Residual Media jam Fuser Output Sensor. Paper present at SR13 after specified time limit or on power up. |
| Remedy: | 1. Open the top and rear cover and clear the jam in the indicated area. 2. Close the covers to allow the printer to attempt to clear the jam. 3. Verify the media meets HP specification for the printer. 4. Remove the fuser and inspect the fuser sleeve, pressure roller, and delivery roller for blockage and/or damage. Replace the fuser as needed. CAUTION: The fuser might be HOT. 5. Open the following menus: • Administration • Troubleshooting • Diagnostic Tests 6. Test the Fuser Delivery sensor (SR13) using the manual sensor test to verify the sensor is functioning correctly. If it is not, replace the fuser. 7. Run the Fuser motor drive test to verify that the Fuser Drive and Gears are functioning correctly. If they are not, elevate the issue to HP for possible printer replacement. |
| Error code: | 13.BA.EE |
| Display: | 13.BA.EE |
| Description: | This jam occurs when the engine front door (SW8) is opened during printing. |
| Remedy: | 1. Close the front door. 2. Check the projection tabs of the front door that engage the door sensor (SW8). If damaged, replace the appropriate part. 3. Use the Manual sensor test to activate the door switch. Replace the switch if it is not functioning correctly. 4. Check connector J302 on the DC controller PCA and connector J3 on SW8. |
| Error code: | 13.D3.DX |
| Display: | 13.D3.DX |
| Description: | 13.D3.D2, 13.D3.D3, 13.D3.D4, 13.D3.D5, or 13.D3.DB Duplex re-feed jam 1 (paper did not reach the duplex sensor in time; duplexer.) Fuser modes • D2.Normal fuser mode • D3.Light 1/2 fuser mode • D4.Heavy 1 fuser mode • D5.Heavy 2 fuser mode • DB-Overhead transparency fuser mode |
| Remedy: | Recovery steps 1. Open the rear door to second position. 2. Remove jammed paper if present. 3. Close the rear door. Troubleshooting and parts 1. Remove all paper and check for residual pieces that could cause the media not to move along the paper path. 2. Make sure that the paper meets HP specifications. 3. Paper sensor associated with this message: PS4. Replace the photointerrupter (WG8-5935-000CN or the top cover assembly (RM1-8516-000CN). |
| Error code: | 13.D3.FF |
| Display: | 13.D3.FF or 13.B2.FF |
| Description: | Residual Media in Paper path jam 1 or 2 (paper detected in the paper path.) When the product power is turned on, paper remains in the paper path, triggering the duplex sensor. • 13.D3.FF: Duplexer. • 13.B2.FF: Registration or Top sensor. |
| Remedy: | Recovery steps: 1. Remove Tray 2. 2. Remove jammed paper if present. 3. Use the green button to lower the duplex tray. 4. Remove jammed paper if present. 5. Close the duplex tray. 6. Reinstall Tray 2. Troubleshooting and parts 1. Make sure that there are no residual pieces of paper are in the paper path that could cause the paper to jam in this area. 2. Make sure that the media meets specification in both type and size for duplexing. Minimum paper size is 210 x 280 mm (8.27 x 11 inches)to 216 x 356 mm (8.5 x 14 inches). 3. Perform a paper sensor test and confirm correct operation of all sensors. In particular, check the Duplexer Paper Sensor in the following manner: a. At the start of the Paper Sensor Test, the duplexer sensor (third digit of the four in the upper left of the display) should be “0” (at the start of the test, all four digits should be “0”.) b. Remove the cassette and release the duplexer pan, when in the pan is in its full down position, the duplexer sensor digit should be “1”. c. If the sensor flag is manually moved, it the digit should show a “1” when the flag is in the full down position, a “0’ as the flag moves to the middle position and a “1” when the flag is in the full up position. d. If the sensor does not respond as described above, replace the HVPS assembly (RM1-6280-000CN). e. If the sensor is working properly, the error only happens on a duplex job, and the media is jammed in the rear door or in the fuser with only one side printed, replace the pendulum assembly (RM1-6598-000CN). f. If the error persists, replace the lower paper feed guide (P/N RM1-6263-000CN). |
| Error code: | 13.DA.EE |
| Display: | 13.BA.EE or 13.DA.EE |
| Description: | Door open jam 1 (Door opens during print job.) When the product power is turned on, paper remains in the paper path, triggering the duplex sensor. • 13.BA.EE: Toner door. • 13.DA.EE: Rear door |
| Remedy: | Close all doors |
| Error code: | 13.E1.XX |
| Display: | 13.E1.XX |
| Description: | 13.E1.D2, 13.E1.D3, 13.E1.D4, 13.E1.D5, or 13.E1.DB Fuser delivery delay jam 2 (paper did not reach the output bin full sensor in time; output bin full.) Fuser modes • E2.Normal fuser mode • E3.Light 1/2 fuser mode • E4.Heavy 1 fuser mode • E5.Heavy 2 fuser mode • EB-Overhead transparency fuser mode |
| Remedy: | Recovery steps: 1. Open the rear door to second position. 2. Remove jammed paper if present. 3. Close the rear door. Troubleshooting and parts: 1. Remove all paper and check for residual pieces that could cause the media not to move along the paper path. 2. Make sure that the paper meets HP specifications. 3. Paper sensor associated with this message: PS4. Replace the photointerrupter (WG8-5935-000CN or the top cover assembly (RM1-8516-000CN). |
| Error code: | 20.00.00 |
| Display: | 20.00.00 Insufficient memory <device> |
| Description: | Insufficient memory: <Device> Event log error message 20.00.00. The product does not have enough memory to print the page. The product received more data than can fit in the available memory. You might have tried to transfer too many macros, soft fonts, or complex graphics. |
| Remedy: | Touch the OK button to print the transferred data. Some data might be lost. Reduce the page complexity or add product memory. |
| Error code: | 21.00.00 |
| Display: | 21.00.00 Page Too Complex Event log error message 21.00.00. |
| Description: | Page Too Complex Event log error message 21.00.00. The product displays this message to indicate that the page decompression process was too slow for the product. |
| Remedy: | Touch the OK button to continue. There may be some data loss on the page that was being formatted when the error occurred. |
| Error code: | 30.01.23 |
| Display: | 30.01.23 Scanner calibration failure |
| Description: | The scanner calibration failed. |
| Remedy: | 1. Turn the product off, and then on again. 2. After the product warms up, repeat the calibration process. 3. If the error persists, replace the scanner. |
| Error code: | 30.01.36 |
| Display: | 30.01.36 Upgrade Error try downloading upgrade again |
| Description: | Upgrade Error Try downloading upgrade again Scanner firmware upgrade error. |
| Remedy: | 1. Re-send the scanner firmware upgrade. 2. If the error persists, replace the SCB. |
| Error code: | 30.01.43 |
| Display: | 30.01.43 Scanner memory failure |
| Description: | Scanner memory failure Scan memory error. |
| Remedy: | 1. Turn the product off, and then on again. 2. If the error persists, turn the product off, and then re-seat the formatter. 3. If the error persists, replace the formatter. |
| Error code: | 30.01.YY |
| Display: | 30.01.YY Scanner failure |
| Description: | • 30.01.06 (event code): Scanner fan error • 30.01.41 (event code): Internal communication error involving the copy processor board (CPB) on the formatter • 30.01.42 (event code): Internal communication error |
| Remedy: | • 30.01.06 (event code) 1. Turn the product off and then on. 2. Check the fan, and reconnect any loose cables. 3. If the error persists, replace the fan or the scanner control board. • 30.01.41 (event code) 1. Turn the product off and then on. 2. Reseat the formatter. 3. If the error persists, replace the formatter. • 30.01.42 (event code) 1. Turn the product off and then on. 2. Check the cables connecting the scanner control board. 3. If this error occurs after a formatter, fax card or hard disk has been replaced, check that the formatter is fully seated and the "smiley face" is illuminated. Check the fax card for proper seating on the formatter. If it is not properly seated, it can prevent the formatter from seating properly. 4. If the error persists, replace the scanner control board. |
| Error code: | 30.WX.YZ |
| Display: | 30.WX.YZ Scanner fan failureoccurred. |
| Description: | The product has detected a problem with the scanner. This error occurs when there is a CPB memory failure and the formatter needs to be replaced. |
| Remedy: | 1. Turn power off then on. 2. If the error persists, replace the formatter. |
| Error code: | 31.01.47 |
| Display: | 31.01.47 Document feeder not detected |
| Description: | Document feeder not detected The document feeder was not detected, the document feeder might not be connected. The flatbed glass is still available for scanning. |
| Remedy: | 1. Turn the product off and then on. 2. If error persists, replace document feeder NOTE: Before replacing the document feeder, technicians should verify that the connections between the document feeder and the product are fully seated. Check One flat cable (callout 1), one ground screw (callout 2), and five connectors (callout 3). |
| Error code: | 31.03.22 |
| Display: | 31.03.22 Scanner calibration failure |
| Description: | Scanner calibration failure Backside illumination calibration failure. |
| Remedy: | 1. Turn the product off, and then on again. 2. After the product warms up, repeat the calibration process. Device Maintenance / Calibrate-Cleaning / Calibrate Scanner 3. If the error persists, clean the scanner glass and calibration strips. NOTE: Dust might appear on the underside of the glass, but this cannot be cleaned. a. Press the power button to turn the product off, and then disconnect the power cable from the electrical outlet. b. Open the scanner lid. c. Use a soft, lint-free cloth moistened with water to clean the calibration white strips and reflector plate (see call-outs). Also clean the document feeder glass, flatbed glass and plastic lid backing. NOTE: If needed, lens cleaner or nonabrasive glass cleaner can be applied to the cloth before cleaning the glass. Spray only onto the cloth and not directly onto the glass or device. Do not spray water or glass cleaner on the glass as it can seep under it and possibly damage the printer. Do not use abrasives, acetone, benzene, ethyl alcohol, or carbon tetrachloride on the glass; these can damage it and/or leave residue on the glass resulting in degraded copy/scan quality. 4. If the error persists, replace the Integrated Scanning Assembly (ISA). |
| Error code: | 31.13.03 |
| Display: | 31.13.03 Document feeder pick error |
| Description: | The document feeder cannot pick up paper. |
| Remedy: | 1. Open the document feeder top cover. 2. Remove all paper found. 3. Remove the remaining pages from the document feeder input tray. 4. Close the document feeder top cover. 5. Place the jammed page on top of any remaining pages, and reinsert them into the document feeder. 6. Align the paper guides with both edges on the paper. 7. Touch the Start button to continue. Check the paper guides, check and clean the rollers and separation pad, and test the registration sensor. If the error persists, replace pickup roller assembly, separation pad, or document feeder. |
| Error code: | 31.WX.10 |
| Display: | 31.WX.10 Scanner failure |
| Description: | The product has detected a scanner ADF fan error. |
| Remedy: | 1. Turn the product off and then on. 2. If the error persists, replace the ADF fan. |
| Error code: | 31.WX.15 |
| Display: | 31.WX.15 Jam in document feeder |
| Description: | Originals are jammed inside the document feeder top cover. |
| Remedy: | 1. Open the document feeder top cover. 2. Remove all paper found. 3. Rotate the green wheel to remove any additional paper. 4. Remove the remaining pages from the document feeder input tray. 5. Close the document feeder top cover. 6. Place the jammed page on top of any remaining pages, and reinsert them into the document feeder. 7. Align the paper guides with both edges of the paper. 8. Touch the Start button to continue. |
| Error code: | 33.WX.YZ |
| Display: | 33.WX.YZ Used board/disk installed |
| Description: | An encrypted board or disk with existing data previously locked to a different product has replaced the original. If you continue, data is permanently lost. |
| Remedy: | • To save the data on the board or disk, turn the product off. Replace the board or disk with another board or disk. • To delete the data on the board or disk and continue, touch the OK button. |
| Error code: | 40.00.01 |
| Display: | 40.00.01 USB I/O buffer overflow To continue, touch “OK” |
| Description: | USB I/O buffer overflow To continue, touch “OK” The USB buffer has overflowed. |
| Remedy: | 1. Touch the OK button to print the transferred date (some data might be lost). 2. Check the host configuration. |
| Error code: | 41.02.00 |
| Display: | 41.02.00 Error |
| Description: | A beam detected misprint error occurred. |
| Remedy: | 1. To clear the error message, touch OK.2. If the error persists, turn the printer off, and then on again.3. Verify that the toner cartridge is in good condition and the shutter works properly. Swap toner cartridge to test as needed.4. If the error returns, check the wire harness from the laser/scanners to the DC controller.5. If the error persists, replace the laser scanner assembly and the Laser Scanner Cable. |
| Error code: | 41.03.YZ |
| Display: | 41.03.YZ Unexpected size in tray <X> |
| Description: | Unexpected size in tray <X> The product detected a different paper size than expected. Y = Type, Z = Tray• Y = 0 Size mismatch. Detected media is longer or shorter than expected.• Y = A Size mismatch. Detected media too long.• Y = B Size mismatch. Detected media too short.• Y = C Size mismatch. Inter-page gap error.• Z = D Source is the duplexer.• Z = 1 Source is Tray 1.• Z = 2 Source is Tray 2.• Z = 3 Source is Tray 3. |
| Remedy: | 1. Touch OK to use another tray.2. Make sure that the tray is loaded with the correct paper size and that the sliding paper guides are correctly adjusted.3. Use the Tray/Bin manual sensor test to verify that the cassette media switch is correctly functioning.4. If the issue persists, replace the Mech kit. |
| Error code: | 49.XX.YY |
| Display: | 49 Error, Turn off then on |
| Description: | Error To continue turn off then on A firmware error occurred. Corrupted print jobs, software application issues, non-product specific print drivers, poor quality USB or network cables, bad network connections or incorrect configurations, invalid firmware operations, or unsupported accessories can cause this error. |
| Remedy: | 1. Turn the product off, and then on. 2. If the error persists, check the following: • The error might be caused by a network connectivity problem, such as a bad interface cable, a bad USB port, or an invalid network configuration setting. • The error might be caused by the print job, due to an invalid print driver, a problem with the software application, or a problem with the file being printed. • Upgrading the product firmware might help resolve the error. See the product user guide for more information. When a 49 error occurs, the user sees a 49.XXXX message on the control panel (where XXXX is replaced by a combination of letters and numbers). A 49 error might happen at any time for multiple reasons. Although some types of 49 errors can be caused by hardware failures, it is more common for 49 errors to be caused by printing a specific document or performing some task on the product. 49 errors most often occur when a product is asked to perform an action that the product firmware is not capable of and might not have been designed to comply with, such as: • Printing files with unsupported programming commands • A unique combination of user environment and user interactions with the product • Interfacing with a third-party solution that was not designed to work with the product • Specific timing, network traffic, or concurrent processing of jobs Each of these interactions could cause the product firmware to initiate an action that the product cannot accomplish. In situations like this, the product might present the error if it has no other option. When these errors occur, the only way to recover is to turn the product`s power off and back on. NOTE: LaserJet formatter PCAs are rarely the root cause of 49 service errors. Please do not replace the formatter or flash unless troubleshooting has identified the formatter as the root cause. If the error persists, continue troubleshooting with the flowcharts for either Intermittent or Persistent 49 error troubleshooting (whichever is appropriate) in document c03122817, gHP LaserJet FutureSmart Devices - 49 Error Troubleshooting (Persistent and Intermittent). |
| Error code: | 50.WX.YZ |
| Display: | 50.WX.YZ Fuser error |
| Description: | The fuser has experienced an error. W = fuser error code, X = fuser mode, Y = previous printer sleep state, Z = next printer sleep state |
| Remedy: | W = 1 or W = 2: Low fuser temperature 1 or fuser warm-up failure 1. Reinstall the fuser. Check the connector (J128) between the fuser and the product. If it is damaged, replace the fuser. 2. W = 1: Reconnect the connector (J82) on the DC controller PCA. -or- W = 2: Reconnect the connectors (J53, J54 and J82) on the DC controller PCA. 3. Replace the fuser. 4. W = 2: Reconnect the connector (J62) on the low-voltage power supply PCA. 5. If the error persists, replace the low-voltage power supply. W = 3: High fuser temperature 1 1. Reinstall the fuser. Check the connector (J128) between the fuser and the product. If it is damaged, replace the fuser. 2. Reconnect the connector (J82) on the DC controller PCA. 3. Replace the fuser. 4. If the error persists, replace the low-voltage power supply. W = 4: Drive circuit fault 1. Check the power source. Make sure the power source meets product requirements. NOTE: If the power source does not meet the power frequency requirement of 40 to 70Hz, the fuser temperature control does not work properly and causes this error. 2. Reconnect the connector (J53) on the DC controller PCA. 3. If the error persists, replace the low-voltage power supply. W = 7: Fuser pressure-release mechanism failure 1. Reinstall the fuser. Check the connector (J128) between the fuser and the product. If it is damaged, replace the fuser. 2. Check the fuser pressure-release sensor flag. If it is damaged, replace the fuser. 3. Reconnect the connector (J221) of the fuser motor and the connector (J89) on the DC controller PCA. 4. Use the fuser motor (M299) drive test in the component test to verify that the fuser motor is properly functioning. If it is not, replace the fuser motor. 5. Replace the fuser. W = 8: Low fuser temperature 2 1. Reinstall the fuser. Check the connector (J128) between the fuser and the product. If it is damaged, replace the fuser. 2. Reconnect the connector (J54) on the DC controller PCA. 3. Replace the fuser. 4. Reconnect the connector (J62) on the low-voltage power supply PCA. 5. If the error persists, replace the low-voltage power supply. W = 9: High fuser temperature 2 1. Reinstall the fuser. Check the connector (J128) between the fuser and the product. If it is damaged, replace the fuser. 2. Reconnect the connector (J54) on the DC controller PCA. 3. Replace the fuser. 4. Reconnect the connector (J62) on the low-voltage power supply PCA. 5. If the error persists, replace the low-voltage power supply. |
| Error code: | 51.00.YY |
| Display: | 51.00.YY Error |
| Description: | An error with the laser/scanner assembly has occurred in the product. • YY = 10: Beam detect error • YY = 19: Laser malfunction • YY = 20: Black laser scanner errort |
| Remedy: | 51.00.10: 1. Turn the product off and then on. 2. Check the flat flexible cable (FFC) connections to the laser scanners. 3. Check the connectors at the DC controller, and at the laser scanner. 4. Replace the laser scanner. 51.00.19: 1. Turn the product off and then on. 2. Check the connectors on the laser scanner. 3. Replace the laser scanner. 51.00.20: 1. Perform the laser scanner component tests in the Troubleshooting menu. Verify that you can hear the motor rotate. 2. If you cannot hear the motor rotate, verify that connectors are fully seated on the DC controller PCA. 3. Verify that the connector J12 on the laser/scanner assembly is securely attached. 4. If the error persists, replace the black laser scanner. |
| Error code: | 52.XX.00 |
| Display: | 52.XX.00 |
| Description: | Laser/scanner error. • XX = 00 laser/scanner motor startup error. • XX = 20 Laser/scanner rotation error. |
| Remedy: | 1. Reconnect connector (J802) on the laser/scanner. 2. Reconnect connectors (J162) on the DC controller. 3. Use the scanner motor (M3) drive test in the Component Test to verify that the scanner motor is properly functioning. If it is not, replace the laser/scanner. NOTE: Listen for a high pitched whine from the motor. 4. If the error persists, replace the laser/scanner. |
| Error code: | 54.XX.YY |
| Display: | 54.XX.YY |
| Description: | A sensor error has occurred. |
| Remedy: | 54.00.03: Environmental sensor failure 1. Turn the product off and then on. 2. If the environment sensor has been removed or replaced check the connector on the environment sensor, and the connector on the DC controller PCA. 3. If the error persists, replace the environment sensor assembly. 54.00.04: Engine temperature sensor 1 abnormality warning 1. Turn the product off and then on. |
| Error code: | 55.XX.YY |
| Display: | 55.XX.YY DC CONTROLLER ERROR |
| Description: | A temporary printing error occurred. |
| Remedy: | 1. Turn the product off and then on. 2. Remove any third-party memory or USB device, and then turn the product off and then on. 3. Remove and then reinstall the formatter. 4. If the error persists, remove the formatter and perform an engine test. If the engine test page fails to print, replace the DC controller. If the engine test page prints, replace the formatter. |
| Error code: | 56.00.YY |
| Display: | 56.00.YY Error |
| Description: | Optional paper trays communication error occurred. |
| Remedy: | 1. Turn the product off, and then on. 2. If the error persists, reseat the optional paper trays (HCO and HCI).. 3. Check the input connectors for damage. If a connector is damaged, replace the connector. |
| Error code: | 57.00.0X |
| Display: | 57.00.0X Error |
| Description: | A fan error has occurred. |
| Remedy: | Turn the product off, and then on. |
| Error code: | 58.00.04 |
| Display: | 58.00.04 Error |
| Description: | The printer experienced a low voltage power supply unit malfunction. |
| Remedy: | 1. Turn the printer off and then back on. NOTE: This error might be caused by source power related issues. Determine if the area where the printer is located has experienced brown outs or is subject to power quality issues. 2. Ensure printer is plug into dedicated power outlet. 3. If error persists, replace the power supply unit. |
| Error code: | 59.00.00 |
| Display: | 59.00.00 or 59.00.10 Error |
| Description: | Feed motor (M101) failure (start-up or rotational). |
| Remedy: | 1. Use the feed motor (M101) drive test in the Component test to verify that the motor is properly functioning. If is not, replace the feed motor (M101). 2. If the product has been serviced, check the connector (J191) on the feed motor and the connector (J91) on the DC controller PCA. 3. Replace the feed motor (M101). |
| Error code: | 59.00.20 |
| Display: | 59.00.YY Error - To.continue.off.on |
| Description: | A motor error has occurred. • YY = Motor |
| Remedy: | Feed motor (M2) failure). 1. Reconnect the connector (J711) on the feed motor and the connector (J171) on the DC controller PCA. 2. Use the feed motor (M2) drive test in the Component test to verify that the motor is properly functioning. If is not, replace the feed motor (M2). |
| Error code: | 62.00.00 |
| Display: | 62.00.00 To continue turn off the on. |
| Description: | Internal system failure. |
| Remedy: | Turn the printer off, and then on. If the error persists, reload the firmware. If the error still persists, perform a firmware upgrade. If the firmware upgrade does not resolve the problem, replace the hard disk. |
| Error code: | 69.X |
| Display: | 69.X ERROR |
| Description: | A printing error occurred. |
| Remedy: | • Turn the product off and then on. • If the message persists, contact an HPauthorized service or support provider. |
| Error code: | 70.00.00 |
| Display: | 70.00.00 Error To continue turn off then on |
| Description: | DC controller failure. |
| Remedy: | 1. Turn the printer off, and then on.2. If the error persists, replace the DC controller. |
| Error code: | 81.WX.00 |
| Display: | 81.WX.00 Wireless Network Error |
| Description: | Wireless Network Error To continue turn off then on A wireless network component on the product has failed. 81.02.00 Wireless network Event 81.07.00 Internal Wireless Networking event |
| Remedy: | 1. Turn the product off then on. 2. Turn the product off, reseat the wireless network component and turn the product back on. 3. If error persists, replace the wireless network component. |
| Error code: | 81.WX.YZ |
| Display: | 81.WX.YZ Embedded JetDirect Error |
| Description: | Embedded Jetdirect Error To continue turn off then on The product experienced an embedded HP Jetdirect print server critical error. 81.01.00 EIO Event 81.03.00 Access Point Wireless Network event 81.04.00 JetDirect inside Network event 81.06.00 Internal EIO Networking event 81.08.00 Internal Access Point Wireless Network event 81.09.00 Internal JetDirect inside Network event |
| Remedy: | 1. Turn the product off then on.2. Turn the product off, reseat the EIO accessory and turn the product back on.3. If error persists replace the formatter. |
| Error code: | 89.19.5C |
| Display: | 89.19.5C Error |
| Description: | This is a temporary firmware error that occurs every twenty-one days for the M500 and M600 products. This error does not indicate any problem with the product. NOTE: If the product power is turned off and then on again before twenty-one days elapse, this error will not occur. |
| Remedy: | 1. Turn the product power off and then on again to clear the error. 2. Perform a firware upgrade. |
| Error code: | 98.00.01 |
| Display: | 98.00.01 Corrupt data in firmware volume |
| Description: | Data corrupt has occurred in the firmware volume. |
| Remedy: | 1. Turn the product off, and then on. 2. Use the Clean Disk item in the Preboot menu. 3. Reload the firmware. 98.00.02 Corrupt data in the solutions volume |
| Error code: | 98.01.00 |
| Display: | 98.00.01 or 98.01.00 Corrupt data in firmware volume |
| Description: | Data corrupt has occurred in the firmware volume. |
| Remedy: | 1. Turn the product off, and then on. 2. Use the Clean Disk item in the Preboot menu. 3. Reload the firmware. 98.00.02 Corrupt data in the solutions volume |
| Error code: | 99.XX.YY |
| Display: | 99.XX.YY |
| Description: | A message of this form indicates a firmware installation error. |
| Remedy: | Reload the firmware. |
Название
HP 55A Тонер-картридж черный
HP 55X Тонер-картридж черный
Двойная упаковка тонер-картриджа HP-55X
HP Комплект картриджей со скрепками
HP Ремкомплект с печкой 220v
