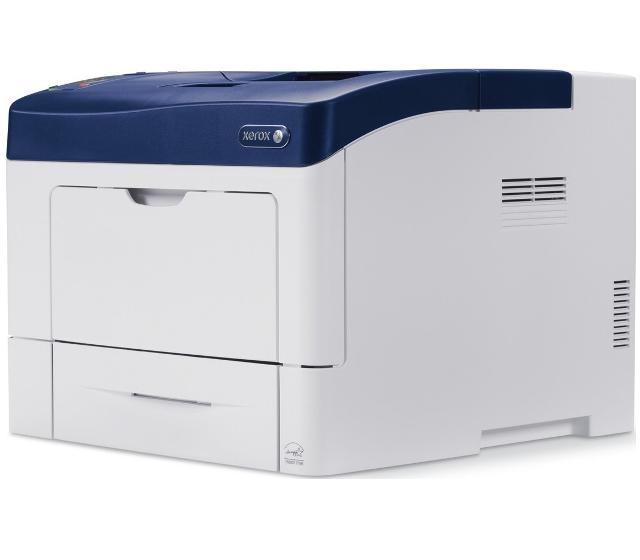
Xerox Phaser 3610
Рейтинг


Модули
(Подача и захват бумаги)
(Электронные компоненты)
(Комплекты)
(Узел термозакрепления)
(Узел переноса)
Детали None

| Деталь: | Дополнительный лоток подачи бумаги (550 листов) |
| Парткод: | 497K13620 |
| Деталь: | Кассета, в сборе |
| Парткод: | 050K71212 |
| Деталь: | Вал второго переноса, в сборе |
| Парткод: | 059K75560 |
| Цена: | 6 800 ₽ |
| Деталь: | LASER SCANNER ASSY |
| Парткод: | 062K24269 |
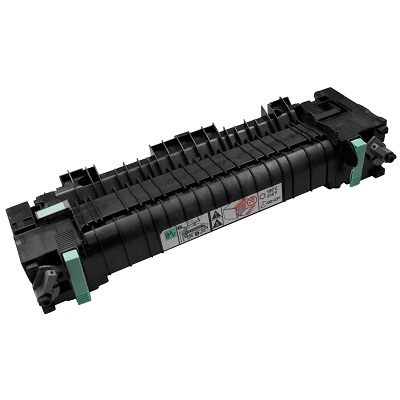
| Деталь: | Печь, в сборе (220В) |
| Парткод: | 126K35563 |
| Цена: | 25 600 ₽ |
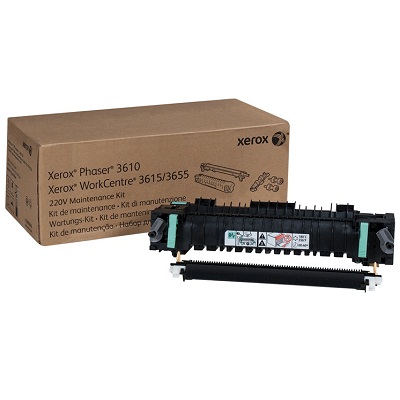
| Деталь: | Комплект из узла термозакрепления (220В) и вала переноса заряда |
| Парткод: | 115R00085 |
| Цена: | 36 300 ₽ |
| Деталь: | Дополнительный лоток подачи бумаги (550 листов) |
| Парткод: | 497K13620 |
| Деталь: | Кассета, в сборе |
| Парткод: | 050K71212 |
| Деталь: | Вал второго переноса, в сборе |
| Парткод: | 059K75560 |
| Цена: | 6 800 ₽ |
| Деталь: | LASER SCANNER ASSY |
| Парткод: | 062K24269 |
| Деталь: | Печь, в сборе (220В) |
| Парткод: | 126K35563 |
| Цена: | 25 600 ₽ |
| Деталь: | Комплект из узла термозакрепления (220В) и вала переноса заряда |
| Парткод: | 115R00085 |
| Цена: | 36 300 ₽ |
Коды ошибок
004-310
005-110, 005-112, 005-121
005-124, 005-900
005-301
010-317, 010-397
016-338, 016-920, 016-921, 016-922
016-359
016-369
016-404
016-405
016-500
016-501
016-502
016-503
016-504
016-505
016-506
016-507
016-520
016-521
016-522
016-523
016-524
016-527
016-530
016-541
016-542
016-543
016-570
016-571
016-572
016-573
016-602
016-612
016-718
016-720
016-734
016-737
016-741
016-742
016-743
016-744
016-745
016-746
016-750
016-753
016-755
016-757
016-758
016-759
016-764
016-765
016-766
016-767
016-768
016-786
016-790
016-791
016-799
016-923
016-924
016-930
016-931
016-982
016-985
016-986
024-340
024-360
024-362
024-371
024-910
024-911, 024-912, 024-913
024-920
024-958
024-959 ... 024-963
026-720
026-721
027-446
027-452
031-521
031-522
031-523
031-524
031-525
031-526
031-527
031-528
031-529
031-530
031-531
031-532
031-533
031-534
031-535
031-536
031-537
031-539
031-540
031-541
031-542
031-543
031-544
031-545
031-546
031-547
031-548
031-549
031-550
031-551
031-552
031-574
031-575
031-576
031-578
031-579
031-580
031-581
031-582
031-584
031-585
031-587
031-588
031-590
031-594
031-595
031-598
041-340
041-347
042-313
042-330
042-700, 092-661
050-130
050-131, 077-107
050-132
050-134
050-135
050-136
050-137
050-138
050-139
050-140
050-141
050-142
061-370
062-277 ... 062-393
062-316
062-790
071-100
071-920
071-921
072-100, 073-100, 074-100
072-101, 073-101
072-102
072-211
073-211, 074-211
075-100
077-101
077-104
077-106, 077-108, 077-109
077-215, 077-217
077-300
077-304
077-312
091-914, 091-915, 091-921, 091-963
091-953
092-315
093-426
093-922
093-925, 093-926, 093-928, 093-973
093-933
116-210
116-312, 116-313
116-314
116-315
116-317
116-324
116-326
116-327
116-328
116-343
116-350
116-351, 116-352, 116-355
116-353, 116-356
116-361
116-362
116-363
116-364
116-366
116-368
116-369
116-390
116-396
116-719
116-721
116-722
116-987
117-315
117-321
117-331
117-338
117-340
117-344
117-350
117-361
117-362
117-363
117-365
117-367
118-311
123-314
123-333
123-399
131-397
131-398
131-399
133-231
133-234
133-235
133-236
133-237
133-238
133-239
133-240
133-241
133-242
133-243
133-244
133-246
133-247
133-248
133-249
133-251
133-252
133-253
133-254
133-259
133-260
133-261, 133-269
133-271
133-272
133-273
133-274
133-275
133-276
133-277
133-278
133-279
133-280
133-281
133-282
133-283
133-286
133-287
133-288
133-289
133-290
142-700
Описание
| Error code: | 004-310 |
| Description: | IOT Feeder I/F Failure. IOT-FEEDER communication error |
| Causes: | • Main Harness Assembly (PL18.2.3) • Drawer 1 Feeder Harness Assembly (PL10.1.13) • 550 Option Feeder Board (PL10.1.10) • MCU Board (PL18.1.13) |
| Remedy: | 1 Check the connections between the 550 Option Feeder Board and the MCU Board Are P/J27, DP/DJ271, and P/J419 connected securely? Go to step 2. Connect P/J27, DP/DJ271, and P/J419 securely. 2 Check the continuity between the 550 Option Feeder Board and the drawer connector Is each cable of P/J419<=>DP/DJ271 continuous? Go to step 3. Replace the Drawer 1 Feeder Harness Assembly. 3 Check the continuity between the MCU Board and the drawer connector Is each cable of P/J27<=>DP/DJ271 continuous? Go to step 4. Replace the Main Harness Assembly. 4 Check after replacing the 550 Option Feeder Board Replace the 550 Option Feeder Board. Does the error still occur? Replace the MCU Board. Finished. |
| Error code: | 005-110, 005-112, 005-121 |
| Description: | 005-110 PICKUP JAM 005-112 REVERSE JAM 005-121 |
| Remedy: | 1 • Does the original document match the device specification? Go to Step 2. Use the correct original document 2 • Is the DADF ASSEMBLY properly closed against the Platen Glass? Go to Step 3. Close the DADF ASSEMBLY properly 3 Check the connection between the DADF ASSEMBLY and the ESS PWB. • Is the P/J453 connected securely? Go to Step 4. Connect P/J453 securely 4 • Open the DADF cover, and check the original document transport path. • Is there any foreign substances or bits of paper found on the original document transport path? Remove the foreign substances and bits of paper, etc. Go to Step 5. 5 • Is the DADF PICK UP MODULE installed properly? Go to Step 6. Reinstall the DADF PICK UP MODULE 6 • Is the DADF PICK UP MODULE deformed or worn out? Replace (Pick-up Module Kit) Go to Step 7. 7 • Replace (DADF). • Does an error occur? Replace (ESS PWB). Troubleshooting complete. |
| Error code: | 005-124, 005-900 |
| Description: | 005-124 Virtual JAM 005-900 DADF STATIC JAM |
| Remedy: | 1 • Does the original document match the device specification? Go to Step 2. Use the correct original document 2 • Is the DADF ASSEMBLY properly closed against the Platen Glass? Go to Step 3. Close the DADF ASSEMBLY properly 3 Check the connection between the DADF ASSEMBLY and the ESS PWB. • Is the P/J453 connected securely? Go to Step 4. Connect P/J453 securely 4 • Open the DADF cover, and check the original document transport path. • Is there any foreign substances or bits of paper found on the original document transport path? Remove the foreign substances and bits of paper, etc. Go to Step 5. 5 • Is the DADF PICK UP MODULE installed properly? Go to Step 6. Reinstall the DADF PICK UP MODULE 6 • Is the DADF PICK UP MODULE deformed or worn out? Replace (Pick-up Module Kit) Go to Step 7. 7 • Replace (DADF). • Does an error occur? Replace (ESS PWB). Troubleshooting complete. |
| Error code: | 005-301 |
| Display: | Cover Open 005-301 Remove paper then Close ADF Cover |
| Description: | ADF Cover Open |
| Causes: | • DADF Assembly (PL51.1.2) • IP Board (PL18.1.22) |
| Remedy: | 1 Check the DADF cover Is the DADF cover closed properly? Go to step 2. Close the DADF cover properly. 2 Check the DADF Assembly connection Check the connection between the DADF Assembly and the IP Board. Is P/J1502 connected securely? Go to step 3. Connect P/J1502 securely. 3 Check after replacing the DADF Assembly Replace the DADF Assembly. Does the error still occur? Replace the IP Board. Finished. |
| Error code: | 010-317, 010-397 |
| Description: | 010-317 FUSING ASSEMBLY Detached 010-397 FUSING ASSEMBLY Failure 010-317: FUSING ASSEMBLY detached is detected. 010-397: The operation error of FUSING ASSEMBLY (Temperature anomaly error etc.) is detected. |
| Remedy: | 1 Check the installation of the FUSING ASSEMBLY. • Is the Drawer Connector between the FUSING ASSEMBLY and the Main unit free of broken/bent pins, foreign substances, burns, and etc., and is the unit installed properly? • Make sure that the FUSING ASSEMBLY has cooled down before performing the operation. Go to Step 2. Reinstall the FUSING ASSEMBLY 2 Check the connection between the FUSING ASSEMBLY and the MCU PWB, FUSING ASSEMBLY and the LVPS, as well as between the LVPS PWB - MCU PWB. • Are the FUSER HARNESS ASSEMBLY and the LVPS HARNESS ASSEMBLY connected securely? Go to Step 3. Securely connect the Fuser HARNESS ASSEMBLY and the LVPS HARNESS ASSEMBLY 3 • Replace the FUSER HARNESS ASSEMBLY. • Does an error occur? Go to Step 4. Troubleshooting complete. 4 • Replace the LVPS HARNESS ASSEMBLY. • Does an error occur? Go to Step 5. Troubleshooting complete. 5 • Replace (Fusing Assembly). Does an error occur? Go to Step 6. Troubleshooting complete. 6 • Replace (LVPS.) • Does an error occur? Replace (MCU PWB) Troubleshooting complete. |
| Error code: | 016-338, 016-920, 016-921, 016-922 |
| Description: | 016-338 Wireless Option Error 016-920/016-921/016-922 Wireless Setting Error Cause: 016-338:Wireless Driver starting error. 016-920:Timeout Error. 016-921:Download Error. 016-922:Session Overlap Error. |
| Remedy: | 016-338: Turn the power Off and On to check that the error recurs. Then proceed to the FIP. 016-920: The machine will recover after the OK or Close button is pressed or message is displayed for specified time. • A time-out error occurred. Contact the system administrator. • The WPS procedure between the wireless LAN access point (Registrar) timed out. Try connecting again. If the error persists, ensure that the error is replicated after the printer is powered Off and then On, and then proceed to the FIP. 016-921: The machine will recover after the OK or Close button is pressed or message is displayed for specified time. • An error occurred while connecting. Contact the system administrator. • An error occurred while connecting to the wireless LAN access point (Registrar) in WPS mode. Try connecting again. If the error persists, ensure that the error is replicated after the printer is powered Off and then On, and then proceed to the FIP. 016-922: The machine will recover after the OK or Close button is pressed or message is displayed for specified time. • Two or more wireless LAN access points (Registrars) have been found to operate in the WPS-PBC mode. • Set only one wireless access point (Registrar) to operate in the WPS-PBC mode, and execute the process again according to the procedure. If the error persists, ensure that the error is replicated after the printer is powered Off and then On, and then proceed to the FIP. 1 • Check the installation of the WIRELESS ADAPTER • Is the Connector between the WIRELESS ADAPTER and the ESS PWB free of broken/bent pins, foreign substances, burns, and etc., and is the unit installed properly? Go to Step 2. Reinstall the WIRELESS ADAPTER 2 • Replace the WIRELESS ADAPTER. • Does an error occur? Replace (ESS PWB) Troubleshooting complete. |
| Error code: | 016-359 |
| Description: | MRAM Fail Cause: MRAM Device Error |
| Remedy: | 1. Turn the power Off and On to check that the error recurs. 2. Update to the latest F/W. 3. If the problem cannot be solved, replace (ESS PWB). |
| Error code: | 016-369 |
| Description: | UI Panel - ESS Communication Fail Cause: Communication Fail with a UI Panel and ESS F/W. |
| Remedy: | 1 Check the connection between the CONTROL PANEL and the ESS PWB. • Is the UI HARNESS ASSEMBLY connected securely? Go to Step 2. Securely connect the UI HARNESS ASSEMBLY 2 • Replace the UI HARNESS ASSEMBLY. • Does an error occur? Go to Step 3. Troubleshooting complete. 3 • Replace the CONTROL PANEL. (Control Panel (3610) / Control Panel (3615)) • Does an error occur? Replace (ESS PWB) Troubleshooting complete. |
| Error code: | 016-404 |
| Description: | Certificate DB Error Cause: Certificate DB access error. |
| Remedy: | The Certificate DB is invalid. Initialize the Certificate DB and security setting and then restart the printer. |
| Error code: | 016-405 |
| Description: | Certificate DB Error Cause: Invalid security setting error. |
| Remedy: | Initialize the Certificate DB and security setting and then restart the printer. Contact the administrator for security resetting. |
| Error code: | 016-500 |
| Display: | Erase Flash Error Error 016-500 Restart Printer |
| Description: | Controller Download Flash Write Error Unable to write the Download File of Controller Main into the Flash ROM. |
| Causes: | SMTP server name is not correct. Set SMTP server name correctly or set by IP address. |
| Remedy: | 1. Turn the power OFF and ON. (If the contents of the Flash ROM is corrupted, the machine will boot up in Emergency Boot Download mode after Power ON.) 2. If the problem persists, replace the ESS/MCU PWB (PL 18.3). |
| Error code: | 016-501 |
| Display: | Write Flash Error 016-501 System Contact Support If Message Returns |
| Description: | Controller Boot Flash Write Error Unable to write the Download File of Controller Boot into the Flash ROM. |
| Causes: | • IP Board. (3010/3040) • IP Board. (3045) • MCU Board. |
| Remedy: | 1. Turn the power OFF and ON. 2. If the problem persists, replace the ESS/MCU PWB (PL 18.3). |
| Error code: | 016-502 |
| Display: | Write Flash Error 016-502 System Contact Support If Message Returns |
| Description: | UI Panel Download Flash Write Error Unable to write the Download File of UI Panel into the Flash ROM. |
| Causes: | • IP Board. (3010/3040) • IP Board. (3045) • MCU Board. |
| Remedy: | 1. Turn the power OFF and ON. 2. If the problem persists, replace the following parts in sequence: • ESS/MCU PWB (PL 18.3) • UI PWB (PL 1.10) |
| Error code: | 016-503 |
| Description: | SMTP Server Address Resolution Fail for Maillib Cause: SMTP server name resolution for email send failed. |
| Causes: | SMTP server name is not correct. Set SMTP server name correctly, or check the setting of DNS server. |
| Remedy: | The machine will recover after the OK or Close button is pressed or message is displayed for specified time. If the error persists: 1. On the CWIS, check SMTP server is set correctly. In addition, check if DNS server is set correctly. 2. Ensure that the error is replicated after the printer is powered Off and then On, and then replace (ESS PWB). |
| Error code: | 016-504 |
| Description: | UI panel Font Download Flash Write Error Unable to write the Download File of UI Panel Font into the Flash ROM |
| Causes: | POP3 server name is not correct. POP3 server name correctly, or check the setting of DNS server. |
| Remedy: | 1. Turn the power OFF and ON. 2. If the problem persists, replace the following parts in sequence: • Control Panel (PL 1.10) • ESS/MCU PWB (PL 18.3) |
| Error code: | 016-505 |
| Description: | POP Authentication Fail for Maillib Cause: Cannot login to POP3 server to send email. |
| Causes: | The certification information (user name and password) of POP3 is not correct. Set the certification information (user name and password) of POP3. |
| Remedy: | The machine will recover after the OK or Close button is pressed or message is displayed for specified time. If the error persists: 1. On CWIS, check if user name and password used for POP3 server are set correctly. In addition, check if DNS server is set correctly. 2. Ensure that the error is replicated after the printer is powered Off and then On, and then replace (ESS PWB). |
| Error code: | 016-506 |
| Description: | Required user entry item is empty Cause: Some item is not set. |
| Remedy: | The machine will recover after the OK or Close button is pressed or message is displayed for specified time. If the error persists: 1. On CWIS, check if SMTP server or POP3 server is set. 2. Ensure that the error is replicated after the printer is powered Off and then On, and then replace (ESS PWB). |
| Error code: | 016-507 |
| Description: | SMTP Authentication Fail for Maillib Cause: Cannot login to SMTP server to send email. |
| Remedy: | The machine will recover after the OK or Close button is pressed or message is displayed for specified time. If the error persists: 1. On CWIS, check if user name and password used for SMTP server are set correctly. 2. Ensure that the error is replicated after the printer is powered Off and then On, and then replace (ESS PWB). |
| Error code: | 016-520 |
| Description: | Applicable Error Code |
| Causes: | • IP Board (ESS) (SFP PL8.1.7; MFP PL8.1.2) • MCU Board (SFP PL8.2.13; MFP PL8.3.6) |
| Remedy: | 1 Does the error still occur when the power is turned Off and On? Go to step 2. Complete. 2 Check after replacing the IP Board. Replace the IP Board. Does the error still occur when the power is turned Off and On? Replace the MCU Board. Complete. |
| Error code: | 016-521 |
| Description: | Ipsec Certificate Error Cause: Remote device certification verification error. |
| Remedy: | 1. Contact administrator. Certificate of destination client is invalid. 2. Confirm certificate of destination client and reset. |
| Error code: | 016-522 |
| Description: | LDAP Certificate Error Cause: No client certificate exists. |
| Remedy: | 1. Contact administrator. The SSL client certificate is requested by LDAP server. Set the SSL client certificate to the device. 2. Set the LDAP correctly. |
| Error code: | 016-523 |
| Description: | LDAP Certificate Error Cause: Server certificate verification error. |
| Remedy: | 1. The SSL certificate of LDAP server is not trusted by the device. Register the root certificate of the LDAP server`s SSL certificate with the device. 2. Set the LDAP correctly. |
| Error code: | 016-524 |
| Description: | LDAP Certificate Error Cause: No server certificate exists. |
| Remedy: | 1. Change the SSL certificate of the LDAP server to the valid one. 2. Set the LDAP correctly. |
| Error code: | 016-527 |
| Description: | LDAP Certificate Error Cause: SSL authentication internal error. |
| Remedy: | 1. Contact administrator. The error has occurred inside the program. 2. Set the LDAP correctly. |
| Error code: | 016-530 |
| Description: | Applicable Error Code |
| Causes: | • IP Board (ESS) (MFP PL8.1.2) |
| Remedy: | 1 Check the LDAP settings Is LDAP set correctly? Go to step 4. Verify that LDAP settings are correct in CWIS. 2 Check the firmware version Is the firmware the latest version? Go to step 3. Update the firmware, then go to step 3. 3 Check the IP Board installation Reseat the IP Board. Does the error still occur when turning the power Off and On? Replace the IP Board. Complete. |
| Error code: | 016-541 |
| Description: | Wireless Certificate Error Cause: No certificate exits. |
| Remedy: | Initialize Wireless setting. |
| Error code: | 016-542 |
| Description: | Wireless Certificate Error Cause: Server certificate error. |
| Remedy: | Check server certificate. |
| Error code: | 016-543 |
| Description: | Wireless Certificate Error Cause: Certificate corruption error. |
| Remedy: | Initialize Wireless setting. |
| Error code: | 016-570 |
| Description: | No Response from USB-Host for Scan Job When any of the following has occurred as Scan to PC (USB) is in progress. • The command from the PC was disrupted for 5 seconds. • The machine has detected a communication error with the USB Device. • The sending of commands to the PC remained unsuccessful even when 500 ms has passed. (The time-out time is the time calculated from the size of the data being sent only when sending image data.) |
| Remedy: | 1. Press [Stop] on the UI Panel. 2. Check the connection of the USB Cable between this machine and the PC. 3. Check the status (is it powered OFF, frozen, etc.) of the PC. |
| Error code: | 016-571 |
| Description: | No Response from USB-Host for Print Job When any of the following has occurred as USB Print or Download data interpretation is in progress. • The command from the PC was disrupted for 2 minutes. • The machine has detected a communication error with the USB Device. • The sending of commands to the PC remained unsuccessful even when 500 ms has passed. NOTE: This Fault will clear automatically. (It will not be displayed on the UI Panel) |
| Remedy: | 1. Check the connection of the USB Cable between this machine and the PC. 2. Check the status (is it powered OFF, frozen, etc.) of the PC. |
| Error code: | 016-572 |
| Description: | Job ticket media error Cause: The paper attribute specified by XCPT (XPIF) cannot solve paper selection. |
| Remedy: | The machine will recover after the OK button is pressed or message is displayed for specified time. |
| Error code: | 016-573 |
| Description: | Job ticket parse error Cause: XPIF parser detects error other than those listed above. |
| Remedy: | The machine will recover after the OK button is pressed or message is displayed for specified time. |
| Error code: | 016-602 |
| Description: | System NVM Initialize Cause: At Power ON start-up, execute NVM clear. |
| Remedy: | The machine will recover after message is displayed for 3 seconds. No action is required. |
| Error code: | 016-612 |
| Description: | Invalid MAC Address Cause: MAC address is invalid. |
| Causes: | • Image Processor Board, PL9.1.27 |
| Remedy: | 1. Rewrite Mac address. 2. Update to the latest F/W. 3. If the error persists, ensure that the error is replicated after the printer is powered Off and then On, and then replace (ESS PWB). |
| Error code: | 016-718 |
| Display: | Memory Full 016-718 Printer Job too Large |
| Description: | Memory Over flow |
| Causes: | • Optional Memory Card (SFP PL8.1.15; MFP PL8.1.4) |
| Remedy: | 1 Check for memory expansion. Is additional memory installed? Is the additional memory installed properly? Go to step 2. Install additional memory. Or, reinstall it properly. 2 In the printer driver, set the Print Mode to “Standard”. Does the error persist during printing? Go to step 3. Complete. 3 In the Control Panel, go to Admin Menu > Maintenance (Mode) and delete data by executing Clear Storage. Does the error persist during printing? The current printing job process cannot be continued because the memory capacity is exceeded. Complete. |
| Error code: | 016-720 |
| Display: | PDL Request 016-720 Printer Data Violation |
| Description: | PDL Error |
| Causes: | • IP Board (ESS) (SFP PL8.1.7; MFP PL8.1.2) |
| Remedy: | 1 Check the cable between the Printer and PC (or Printer and Hub). - For local printer: USB cable (USB2.0) - For network printer: Ethernet cable (10Base-T/100Base-TX / 1000Base-T) Does the cable meet the specifications? Go to step 2. Use a cable that meets the specifications. - For local printer: USB cable (USB2.0) - For network printer: Ethernet cable(10Base-T/ 100Base-TX / 1000Base-T) 2 Plug and unplug the cable. (USB cable or I/F cable) Does the error still occur when printing? Go to step 3. Complete. 3 Replace the cable. (USB cable or I/F cable) Does the error still occur when the power is turned Off and On? Replace the IP Board. Complete. |
| Error code: | 016-734 |
| Description: | Download Signature Error Cause: Download file signature data is invalid. |
| Remedy: | 1. Turn the power Off and On to check that the error recurs. 2. Re-download the correct file. 3. Check the cable between the Printer and PC (or Printer and Hub). • For local printer: USB cable. • For network printer: Ethernet cable. 4. Take corrective actions at the host side. |
| Error code: | 016-737 |
| Display: | Format Error Error 016-737 Press OK |
| Description: | Download Errors The system firmware file is incorrect, corrupt, or communications to the printer failed. • 016-737: Format Error Press OK Button <Download Format Error> The file format is invalid. |
| Causes: | • IP Board, PL7.1.9/7.1.16 • MCU Board, PL7.2.2 |
| Remedy: | 1. Reseat all connectors on the IP Board and the MCU Board. Does the error persist? Go to step 2. Complete. 2. Replace the IP Board (Phaser 6020/6022 and WorkCentre 6025 MFP, WorkCentre 6027 MFP. Does the error persist? 1. SaveNVM to ESS 2. Replace the MCU Board. 3. LoadNVM from ESS Go to step 3. Complete. 3. Does the error persist? Contact your designated field support for assistance. Complete. |
| Error code: | 016-741 |
| Display: | Protection Error Error 016-741 Press OK |
| Description: | Download Protect Error Cause: Performed FW download although FW update is prohibited by panel settings. |
| Causes: | • Image Processor Board, PL9.1.20 |
| Remedy: | 1. Turn the power Off and On to check that the error recurs. 2. Re-download the correct file. 3. Check the cable between the Printer and PC (or Printer and Hub). • For local printer: USB cable. • For network printer: Ethernet cable. 4. Take corrective actions at the host side. |
| Error code: | 016-742 |
| Display: | Invalid ID Error 016-742 Press OK |
| Description: | Download ID Error Cause: Download file ID is invalid. |
| Causes: | • Image Processor Board, PL9.1.20 |
| Remedy: | 1. Turn the power Off and On to check that the error recurs. 2. Re-download the correct file. 3. Check the cable between the Printer and PC (or Printer and Hub). • For local printer: USB cable. • For network printer: Ethernet cable. 4. Take corrective actions at the host side. |
| Error code: | 016-743 |
| Display: | Range Chk Error Error 016-743 Press OK |
| Description: | Download Range Error Cause: At download, write-in destination address is invalid. Range check error. |
| Causes: | • Image Processor Board, PL9.1.20 |
| Remedy: | 1. Turn the power Off and On to check that the error recurs. 2. Re-download the correct file. 3. Check the cable between the Printer and PC (or Printer and Hub). • For local printer: USB cable. • For network printer: Ethernet cable. 4. Take corrective actions at the host side. |
| Error code: | 016-744 |
| Display: | Format Error 016-744 System Invalid Data |
| Description: | Download Check Sum Error Cause: Download file checksum is invalid. |
| Causes: | • IP Board. (3010/3040) • IP Board. (3045) • MCU Board. |
| Remedy: | 1. Turn the power Off and On to check that the error recurs. 2. Re-download the correct file. 3. Check the cable between the Printer and PC (or Printer and Hub). • For local printer: USB cable. • For network printer: Ethernet cable. 4. Take corrective actions at the host side. |
| Error code: | 016-745 |
| Display: | Format Error 016-745 System Invalid Data |
| Description: | Download header Error Cause: Download file header is invalid. |
| Causes: | • IP Board. (3010/3040) • IP Board. (3045) • MCU Board. |
| Remedy: | 1. Turn the power Off and On to check that the error recurs. 2. Re-download the correct file. 3. Check the cable between the Printer and PC (or Printer and Hub). • For local printer: USB cable. • For network printer: Ethernet cable. 4. Take corrective actions at the host side. |
| Error code: | 016-746 |
| Description: | Prohibit Error Cause: Download Prohibit Error. |
| Remedy: | 1. Turn the power Off and On to check that the error recurs. 2. Re-download the correct file. 3. Check the cable between the Printer and PC (or Printer and Hub). • For local printer: USB cable. • For network printer: Ethernet cable. 4. Take corrective actions at the host side. |
| Error code: | 016-750 |
| Description: | Job Ticket Error Cause: PDF print job ticket description error. |
| Remedy: | The machine will recover after the OK button is pressed or message is displayed for specified time. If the error persists, check the PDF data and then take corrective actions at the host side. |
| Error code: | 016-753 |
| Description: | PDL Emulation Error PDL emulation error has occurred |
| Causes: | • Control Panel |
| Remedy: | 1. If necessary, check whether the correct machine password has been instructed to the other machine. Does the error persist? Complete. |
| Error code: | 016-755 |
| Description: | PDF Print Prohibited Attempted to process a print-protected PDF file |
| Causes: | • Control Panel |
| Remedy: | 1. Cancel the print protection using Adobe Reader and try printing again. Does the error persist? Go To Step 2. Complete. 2. Check whether the version of the Controller ROM is the latest one, and upgrade the version if it is not the latest. Complete. |
| Error code: | 016-757 |
| Description: | Auditron - Invalid User |
| Remedy: | 1 Check the user‘s account setting in CWIS (http://xxx.xxx.xxx.xxx/ frameprinter.htm). Set the correct user‘s account (user name and password). Does the error still occur when printing? Complete. Update the firmware. |
| Error code: | 016-758 |
| Description: | Auditron - Disabled Function |
| Remedy: | 1 Check the Black&White setting. Set the Color Mode to Color. Does the error still occur when printing? Complete. Update the firmware. |
| Error code: | 016-759 |
| Description: | Auditron - Reached Limit |
| Remedy: | 1 Check the “XEROX Color Track” setting. Increase the page-number limit of User Registration. Does the error still occur when printing? Complete. Update the firmware. |
| Error code: | 016-764 |
| Display: | Connect Fail 016-764 Scan Job Failure |
| Description: | SMTP Server Connection Error Cause: Error occurs when connecting to SMTP server. |
| Causes: | • IP Board. • MCU Board. |
| Remedy: | The machine will recover after the OK button is pressed or message is displayed for specified time. If the error persists: 1. Contact the SMTP Server Administrator. • Check the network connection using the ping command. • Check the network setting.(E-Mail Server Settings / DNS settings) 2. Take corrective actions at the host side. |
| Error code: | 016-765 |
| Description: | SMTP Server HD Full Cause: Capacity of SMTP server is not enough. |
| Remedy: | The machine will recover after the OK button is pressed or message is displayed for specified time. If the error persists: 1. Contact the SMTP Server Administrator. 2. Retrieve E-mails in the SMTP Server HD and check the server capacity. 3. Take corrective actions at the host side. |
| Error code: | 016-766 |
| Display: | SMTP Error 016-766 Scan Job Failure |
| Description: | SMTP Server File System Error Cause: Error in SMTP server. |
| Causes: | • IP Board. • MCU Board. |
| Remedy: | The machine will recover after the OK button is pressed or message is displayed for specified time. If the error persists: 1. Contact the SMTP Server Administrator. 2. Check the SMTP Server Error. 3. Take corrective actions at the host side. |
| Error code: | 016-767 |
| Display: | Address Error 016-767 Scan Job Failure |
| Description: | Invalid Recipient Email Address Cause: Recipient email address is incorrect. |
| Causes: | • IP Board. • MCU Board. |
| Remedy: | The machine will recover after the OK button is pressed or message is displayed for specified time. If the error persists: 1. Check the email address and try scanning again. 2. Take corrective actions at the host side. |
| Error code: | 016-768 |
| Description: | Invalid Sender Address (Login Error) Cause: Sender email address is incorrect. |
| Remedy: | The machine will recover after the OK button is pressed or message is displayed for specified time. If the error persists: 1. Check the email address and try scanning again. 2. Take corrective actions at the host side. |
| Error code: | 016-786 |
| Description: | Data Send/Receive Timeout Error Cause: Timeout error occurs in scan data send/receive. |
| Remedy: | The machine will recover after the OK button is pressed or message is displayed for specified time. If the error persists: 1. Check if the network cable is disconnected or connected properly. When there is no problem with network cable, contact Server Administrator. 2. Perform the following in sequence. • " Network System Fault Check" • " Network-related Details Check Flow" 3. Take corrective actions at the host side. |
| Error code: | 016-790 |
| Description: | F2N Module Starting-up Cause: F2N module task is starting up, or IP address is not determined. |
| Causes: | • Scanner Controller Board, PL9.1.1 • Image Processor Board, PL9.1.20 • Multi-Protocol Card, PL9.1.23 |
| Remedy: | The machine will recover after the OK button is pressed or message is displayed for specified time. If the error persists: 1. Check if the network cable is disconnected or connected properly. When there is no problem with network cable, contact Server Administrator. 2. Take corrective actions at the host side. |
| Error code: | 016-791 |
| Display: | USB Memory was removed. 016-791 System Job Failure |
| Description: | USB Memory Removal Error (During Read) Cause: USB memory is removed while memory reading job is being executed. |
| Causes: | • Front USB Board. • IP Board. • MCU Board. |
| Remedy: | The machine will recover after the OK button is pressed or message is displayed for specified time. If the error persists: 1. Check the USB Memory. 2. Ensure that the error is replicated after the printer is powered Off and then On, and then change the USB. 3. Take corrective actions at the host side. |
| Error code: | 016-799 |
| Description: | Job Environment Violation |
| Causes: | • IP Board (ESS) (SFP PL8.1.7; MFP PL8.1.2) |
| Remedy: | 1 Check the paper size. Does the paper size in use meet the specifications? Go to step 3. Use paper that meets the specifications, then go to step 2. 2 Does the error still occur when printing? Go to step 3. Complete. 3 Do the Paper Size settings for Tray Settings > Tray 1 (or 2) match the size of the paper in use? Go to step 5. Go to step 4. 4 In the printer driver, specify the correct paper size. Does the error still occur when printing? Go to step 5. Complete. 5 Send a Windows test print to the printer. Does the error still occur when printing the Windows test print? Go to step 6. Complete. 6 Check the firmware version. Is the firmware the latest version? Replace the IP Board. Update the firmware. |
| Error code: | 016-923 |
| Description: | Wireless Password Error Cause: Wireless Password is wrong. |
| Remedy: | The machine will recover after the OK button is pressed or message is displayed for specified time. If the error persists: 1. Modify the setting WEP Key or WPA Pass phrase. 2. Change the password. |
| Error code: | 016-924 |
| Description: | Wireless Setting Error Cause: WEP AP Connected Error. |
| Remedy: | 1. Press set and try again. 2. Reinstall the WIRELESS ADAPTER. 3. If the problem cannot be solved, configure the wireless settings again. |
| Error code: | 016-930 |
| Description: | USB Host Error Cause: Warning when unsupported device is installed to USB host. • Detect installation of device of which class driver cannot be found. • Detect installation of device that class driver judges not to support. • Detect installation of Low-Speed device. |
| Remedy: | 1. Devices not available are connected to the USB port. • Remove the devices from the USB port. 2. If the error persists, ensure that the error is replicated after the printer is powered Off and then On, and then replace (ESS PWB). |
| Error code: | 016-931 |
| Description: | USB Hub Error Cause: • Warning to installation of hub that cannot be used to USB host. • Detect installation of hubs in more than supported number of stacks. |
| Remedy: | 1. The number of hub stages exceeds the specified value. • Reduce the number of the hub stages. 2. If the error persists, ensure that the error is replicated after the printer is powered Off and then On, and then replace (ESS PWB). |
| Error code: | 016-982 |
| Display: | Hard Drive Full Error 016-982 Press OK |
| Description: | Disk Full |
| Causes: | • IP Board (ESS) (SFP PL8.1.7; MFP PL8.1.2) • Optional Memory Card (SFP PL8.1.15; MFP PL8.1.4) |
| Remedy: | 1 Check the file data in the printer. Print or clear the stored files and data at the printer memory. Does the error still occur when printing? Go to step 2. Complete. 2 Print a small size file (like a Windows test page). Does the error still occur when printing? Go to step 3. Add an Optional Memory Card, or divide the printing job. 3 Is the customer using the recommended memory card? Go to step 4. Replace to the recommended memory card. 4 Reseat the Optional Memory Card. Does the error still occur when turning on the power? Go to step 5. Complete. 5 Replace the Optional Memory Card. Does the error still occur when turning on the power? Replace the IP Board. Complete. |
| Error code: | 016-985 |
| Display: | Mail Size Limits 016-985 Scan Job Failure |
| Description: | Scan Mail Size Limit Scanned mail size exceeds printer limitation. |
| Causes: | • IP Board, PL7.1.9 • MCU Board, PL7.2.2 |
| Remedy: | 1. Reseat all connectors on the IP Board and the MCU Board. Does the error persist? Go to step 2. Complete. 2. Replace the IP Board (Phaser 6020/6022 and WorkCentre 6025 MFP, WorkCentre 6027 MFP. Does the error persist when the power is turned on? 1. SaveNVM to ESS 2. Replace the MCU Board. 3. LoadNVM from ESS Complete. |
| Error code: | 016-986 |
| Display: | File Size Limit Error 016-986 Press OK |
| Description: | File Size Error Cause: As a result of conversion to the specified format, exceed the max file size specified for each format. |
| Causes: | • Scanner Controller Board, PL9.1.1 |
| Remedy: | The machine will recover after the OK button is pressed or message is displayed for specified time. If the error persists: 1. Degrade image quality. (Change scan resolution, etc.) 2. Change file format. 3. Divide the document into blocks and retry scanning block by block. 4. Ensure that the error is replicated after the printer is powered Off and then On, and then replace (ESS PWB). |
| Error code: | 024-340 |
| Display: | 024-340 Code:xxxxxxxx Restart Printer |
| Description: | IOT Firmware Error Detect Firmware Error |
| Causes: | • MCU Board (PL18.1.13) |
| Remedy: | 1 Check the version of the MCU Board firmware Is the MCU Board firmware of the latest version? Replace the MCU Board. Upgrade the firmware of the MCU Board. |
| Error code: | 024-360 |
| Display: | 024-360 System Restart Printer Contact Support If Message Returns |
| Description: | MCU DownLoad Error MCU-F/W download failure |
| Error code: | 024-362 |
| Description: | IOT Start Image Marking Timeout IOT internal error. |
| Causes: | • MCU Board (PL18.1.13) • IP Board (PL18.1.22) |
| Remedy: | 1 Check after replacing the MCU Board Replace the MCU Board. Does the error still occur? Replace the IP Board. Finished. |
| Error code: | 024-371 |
| Display: | 024-371 System Restart Printer Contact Support If Message Return |
| Description: | IOT-ESS Communication Fail Communication fail between IOT and ESS. |
| Remedy: | Replace the IP Board. |
| Error code: | 024-910 |
| Description: | Tray 1 size mismatch RAP After feeding from Tray 1, the lengths detected by the Registration Sensor and the Tray 1 Size Switch did not match. |
| Causes: | • Paper Size Switch, PL 2.1.6 • MCU PWB, PL 12.1.15 • Main Harness Assembly, PL 12.3.1 |
| Remedy: | Check for foreign substances, distortion and paper powder in the paper transport path. No distortion, foreign substances, or paper powder are found in the paper transport path. Y↓N→Clear away the foreign substances and paper powder. Correct the distortion. Feed paper from another tray. The problem occurs when paper is fed from another tray. Y↓N→Check the guide. The guide is set correctly. Y↓N→Set the guide correctly. Check the operation of the Guide Actuator. The Guide Actuator works. Y↓N→Set the guide correctly. Check the installation of the Tray 1 Paper Size Switch. The Tray 1 Paper Size Switch is installed correctly. Y↓N→Install the Tray 1 Paper Size Switch (PL 2.1) correctly. Go to the Tray 1 Paper Size Switch and check the connectors. Execute Component Control [089-100 Registration Sensor]. Manually activate the actuator of the Registration Sensor (PL 2.4). The display changes. Y↓N→Check the connection of P/J104. PJ104 is connected correctly. Y↓N→Connect P/J104. Check the wire between J104 and J403 for an open circuit or a short circuit. The wire between J104 and J403 is conducting without an open circuit or a short circuit. Y↓N→Repair the open circuit or short circuit. Measure the voltage between the MCU PWB P403B-13 (+) and GND (-). The voltage is approx. +5VDC. Y↓N→Replace the MCU PWB (PL 9.1). Measure the voltage between the MCU PWB P403B-8 (+) and GND (-). Actuate the Registration Sensor with paper. The voltage changes. Y↓N→Replace the Registration Sensor (PL 2.4). Replace the MCU PWB (PL 9.1). Replace the MCU PWB (PL 9.1). |
| Error code: | 024-911, 024-912, 024-913 |
| Description: | 024-911 Tray 2 Paper Size Mismatch 024-912 Tray 3 Paper Size Mismatch 024-913 Tray 4 Paper Size Mismatch Cause: 024-911: The size of paper in the Tray 2 does not match the specified print size. 024-912: The size of paper in the Tray 3 does not match the specified print size. 024-913: The size of paper in the Tray 4 does not match the specified print size. |
| Remedy: | 1. Open/close Tray, or reseat paper on manual feed tray. 2. Use the paper that meets the specifications. 3. Make sure that you are using the correct printer driver. 4. Check the Paper Size and Paper Type of the Tray Setting menu on the printer operator panel and the printer driver. 5. If the problem cannot be solved, replace the corresponding paper feed rolls. • FEED ROLL / NUDGER ROLL (PL 7.2 Tray 1/Optional Tray 550-Sheet Feeder (2/4)) • RETARD ROLL (PL 7.3 Tray 1/Optional Tray 550-Sheet Feeder (3/4)) • TAKE AWAYROLL ASSEMBLY (PL 7.2 Tray 1/Optional Tray 550-Sheet Feeder (2/4)) • TAKE AWAYROLL PINCH (PL 7.4 Tray 1/Optional Tray 550-Sheet Feeder (4/4)) • RUBBER ROLL ASSEMBLY (PL 2.2 Transport Assembly) • REGI PINCHROLL ASSEMBLY (PL 2.2 Transport Assembly) • REGI PINCH ROLL (PL 2.2 Transport Assembly) |
| Error code: | 024-920 |
| Description: | <IOT Standard Stacker Full> Center Tray Full is Detected. |
| Causes: | • Full Stack Sensor (PL17.1.11) • Sensor Harness Assembly (PL17.1.23) • MCU Board (PL18.1.13) |
| Remedy: | 1 Check the Full Stack Sensor operation Execute Digital Input diagnostic test 071-105, and check the Full Stack Sensor operation. Does it function normally? Replace the MCU Board. Go to step 2. 2 Check the Full Stack Sensor connection Check the connection between the Full Stack Sensor and the MCU Board. Are P/J154 and P/J15 connected securely? Go to step 3. Connect P/J154 and P/J15 securely. 3 Check the continuity between the Full Stack Sensor and the MCU Board Is each cable of P/J154<=>P/J15 continuous? Go to step 4. Replace the Sensor Harness Assembly. 4 Check the power to the Full Stack Sensor (+5 VDC) Check if the voltage between the MCU Board ground and the P/J15-4 pin is about +5 VDC. Replace the Full Stack Sensor. Refer to “+5 VDC Power FIP”. |
| Error code: | 024-958 |
| Display: | Paper Size Mismatch 024-958 Printer Load Paper then Press P AAAAA (or BBBBB) |
| Description: | Paper Size Mismatch The size of paper in the MFP (or PSI) does not match the specified print size. AAAAAA: Paper Size BBBBBB: Paper Type |
| Causes: | • Registration Sensor, PL2.3.5 • Registration roller bushing(s) and spring(s) |
| Remedy: | 1. Check the Regi Sensor in diagnostics. Does the display change when the actuator is moved? Go to step 2. Replace the Regi Sensor. 1. Check the registration rollers. Are all the rollers in contact with even pressure on each side? Are the registration pressure roller bushings and springs correctly installed? Go to step 3. Correct the registration roller installation issue. 1. Is the transfer roller mounted correctly and not binding? Replace the MCU Board 1. SaveNVM to ESS 2. Replace the MCU Board. 3. LoadNVM from ESS Correct the transfer roller mounting issue. |
| Error code: | 024-959 ... 024-963 |
| Description: | 024-959 Tray 1 No Suitable Paper 024-960 Tray 2 No Suitable Paper 024-961 Tray 3 No Suitable Paper 024-962 Tray 4 No Suitable Paper 024-963 MSI No Suitable Paper Cause: • Displayed when any of the following errors occur and tray setting needs to be changed after paper is loaded. • When paper source auto selection is selected, paper sizes of all existing trays do not match. (All Tray Size Mismatch) • When a tray is specified, no paper is loaded in the specified tray. (Specified Tray Emptied • When a tray is specified, paper size loaded in the specified tray does not match. (Specified Tray Size Mismatch • When Substitute Tray is Off and a paper type is specified, there is no tray loading the specified paper type. (Specified Tray Media Mismatch) |
| Remedy: | 1. Change tray setting, or cancel the job. 2. Use the paper that meets the specifications. 3. Check the Paper Size of the Tray Setting menu on the printer operator panel and the printer driver. |
| Error code: | 026-720 |
| Display: | USB Memory Full 026-720 Scan Job Failure |
| Description: | USB Memory Full Writing to USB memory failed. |
| Remedy: | Replace the IP Board. |
| Error code: | 026-721 |
| Display: | File Write Error 026-721 Scan Job Failure |
| Description: | USB Memory Write Error Writing to USB memory failed. |
| Remedy: | Replace the IP Board. |
| Error code: | 027-446 |
| Description: | IPv6 duplicate At start-up, detect duplicate IPv6 address on network. |
| Remedy: | Replace the IP Board. |
| Error code: | 027-452 |
| Description: | IPv4 duplicate At start-up, detect duplicate IPv4 address on network. |
| Remedy: | Replace the IP Board. |
| Error code: | 031-521 |
| Display: | SMB Error 031-521 Scan Login Error |
| Description: | SMB Error Cause: In SMB scan, login-able workstation is restricted. |
| Causes: | • IP Board. (3010/3040) • IP Board. (3045) • MCU Board. |
| Remedy: | The machine will recover after the OK or Close button is pressed or message is displayed for specified time. If the error persists: 1. About user settings, confirm the following with the system administrator. Restriction on loginable workstation. 2. Perform the following in sequence. • " Network System Fault Check" • " Network-related Details Check Flow" 3. Ensure that the error is replicated after the printer is powered Off and then On, and then replace (ESS PWB). |
| Error code: | 031-522 |
| Description: | SMB user authentication fail or SMB Scanner login fail Cause: In SMB scan, login access is rejected. Request is not allowed. |
| Remedy: | The machine will recover after the OK or Close button is pressed or message is displayed for specified time. If the error persists: 1. About user settings, confirm the following with the system administrator. Restriction on loginable workstation. 2. Perform the following in sequence. • " Network System Fault Check" • " Network-related Details Check Flow" 3. Ensure that the error is replicated after the printer is powered Off and then On, and then replace (ESS PWB). |
| Error code: | 031-523 |
| Description: | Problem with share name in SMB scan server Cause: Problem with share name in SMB scan server. |
| Remedy: | The machine will recover after the OK or Close button is pressed or message is displayed for specified time. If the error persists: 1. Check SMB Server connection, or check share name you specified. 2. Perform the following in sequence. • " Network System Fault Check" • " Network-related Details Check Flow" 3. Ensure that the error is replicated after the printer is powered Off and then On, and then replace (ESS PWB). |
| Error code: | 031-524 |
| Description: | SMB Scan User Overlimit |
| Causes: | • IP Board (ESS) (MFP PL8.1.2) |
| Remedy: | 1 Check the access limitation Does the system administrator set the access limit number? Ask to the system administrator. Go to step 2. 2 Check the server setting Is the User Limit of the Sharing tab in the sharing folder properties set to Maximum allowed? Go to step 3. Set to Maximum allowed. 3 Check the printer Turn the printer power Off and On. Does the error still occur when network scanning? Replace the IP Board. Complete. |
| Error code: | 031-525 |
| Description: | SMB scan client has no access right (Win9x) |
| Causes: | • IP Board (ESS) (MFP PL8.1.2) |
| Remedy: | 1 Check the client PC. Does the client PC use Windows 2000 or later? Go to step 2. Replace with Windows 2000 or later PC. 2 Check the printer. Turn the printer power Off and On. Does the error still occur when network scanning? Replace the IP Board. Complete. |
| Error code: | 031-526 |
| Display: | SMB Error 031-536 Scan Name Resolve Error |
| Description: | SMB Scan Host Name Resolution Fail Cause: SMB server name resolution failed. |
| Causes: | • IP Board. (3010/3040) • IP Board. (3045) • MCU Board. |
| Remedy: | The machine will recover after the OK or Close button is pressed or message is displayed for specified time. If the error persists: 1. Check DNS connection, or check if name of forwarding destination server is registered with DNS. 2. Perform the following in sequence. • " Network System Fault Check" • " Network-related Details Check Flow" 3. Ensure that the error is replicated after the printer is powered Off and then On, and then replace (ESS PWB). |
| Error code: | 031-527 |
| Description: | SMB Scan DNS Server Not Set Cause: DNS server is not set. |
| Remedy: | The machine will recover after the OK or Close button is pressed or message is displayed for specified time. If the error persists: 1. Set DNS address, or set forwarding destination server address as IP address. 2. Perform the following in sequence. • " Network System Fault Check" • " Network-related Details Check Flow" 3. Take corrective actions at the host side. |
| Error code: | 031-528 |
| Description: | In SMB scan, server connection error Cause: Cannot find SMB server. |
| Remedy: | The machine will recover after the OK or Close button is pressed or message is displayed for specified time. If the error persists: 1. Check if this device can communicate by network with the forwarding destination SMB server. • Check connection of network cable, then check the TCP/IP setting. • Check communication with Port 137(UDP), 138(UDP), and 139(TCP). 2. Check setting of WINS server and if server name can be resolved correctly. 3. Perform the following in sequence. • " Network System Fault Check" • " Network-related Details Check Flow" 4. Ensure that the error is replicated after the printer is powered Off and then On, and then replace (ESS PWB). |
| Error code: | 031-529 |
| Display: | SMB Error 031-536 Scan Name Resolve Error |
| Description: | Problem with SMB scan login name or password Cause: Invalid password (Win9x). |
| Causes: | • IP Board. (3010/3040) • IP Board. (3045) • MCU Board. |
| Remedy: | The machine will recover after the OK or Close button is pressed or message is displayed for specified time. If the error persists: 1. Check if password is correct. 2. Perform the following in sequence. • " Network System Fault Check" • " Network-related Details Check Flow" 3. Ensure that the error is replicated after the printer is powered Off and then On, and then replace (ESS PWB). |
| Error code: | 031-530 |
| Display: | SMB Error 031-530 Scan SMB Path Error |
| Description: | Problem with storage location of scanned image in SMB scan server Cause: Problem with storage location. |
| Causes: | • IP Board. (3010/3040) • IP Board. (3045) • MCU Board. |
| Remedy: | The machine will recover after the OK or Close button is pressed or message is displayed for specified time. If the error persists: 1. Check if the storage location is correct. 2. Storage location you specified is DFS setting and check if it is linked to other server. 3. Specify the linked server, share name, and storage location. 4. Perform the following in sequence. • " Network System Fault Check" • " Network-related Details Check Flow" 5. Ensure that the error is replicated after the printer is powered Off and then On, and then replace (ESS PWB). |
| Error code: | 031-531 |
| Description: | Couldn`t get file/folder name of SMB scan server Cause: Couldn`t get file/folder name of server. |
| Remedy: | The machine will recover after the OK or Close button is pressed or message is displayed for specified time. If the error persists: 1. Check access right of the folder you specified. 2. Perform the following in sequence. • " Network System Fault Check" • " Network-related Details Check Flow" 3. Ensure that the error is replicated after the printer is powered Off and then On, and then replace (ESS PWB). |
| Error code: | 031-532 |
| Description: | Suffix of SMB scan file name/folder name is over limit Cause: Suffix of file name/folder name is over limit. |
| Remedy: | The machine will recover after the OK or Close button is pressed or message is displayed for specified time. If the error persists: 1. Change file name/forwarding destination folder, or move or delete file in forwarding destination folder. 2. Perform the following in sequence. • " Network System Fault Check" • " Network-related Details Check Flow" 3. Take corrective actions at the host side. |
| Error code: | 031-533 |
| Display: | 031-533 Scan File Make Error |
| Description: | SMB Scan File Creation Fail Cause: Fail to create file. |
| Causes: | • IP Board. (3010/3040) • IP Board. (3045) • MCU Board. |
| Remedy: | The machine will recover after the OK or Close button is pressed or message is displayed for specified time. If the error persists: 1. Check if the file name you specified can be created in storage location. 2. Check if the file name you specified is not used by other user. 3. Check if file or folder whose name is the same as the one you specified already exists. 4. Perform the following in sequence. • " Network System Fault Check" • " Network-related Details Check Flow" 5. Take corrective actions at the host side. |
| Error code: | 031-534 |
| Display: | SMB Error 031-534 Scan Folder Make Error |
| Description: | SMB Scan Folder Creation Fail Cause: Fail to create folder. |
| Causes: | • IP Board. (3010/3040) • IP Board. (3045) • MCU Board. |
| Remedy: | The machine will recover after the OK or Close button is pressed or message is displayed for specified time. If the error persists: 1. Check if the file name you specified can be created in storage location. 2. Check if file or folder whose name is the same as the one you specified already exists. 3. Perform the following in sequence. • " Network System Fault Check" • " Network-related Details Check Flow" 4. Take corrective actions at the host side. |
| Error code: | 031-535 |
| Display: | SMB Error 031-535 Scan Delete File Error |
| Description: | SMB Scan File Deletion Fail Cause: Fail to delete file. |
| Causes: | • IP Board. (3010/3040) • IP Board. (3045) • MCU Board. |
| Remedy: | The machine will recover after the OK or Close button is pressed or message is displayed for specified time. If the error persists: 1. Check if other user is not operating file in storage location you specified. 2. Perform the following in sequence. • " Network System Fault Check" • " Network-related Details Check Flow" 3. Take corrective actions at the host side. |
| Error code: | 031-536 |
| Display: | SMB Error 031-536 Scan Delete Folder Error |
| Description: | SMB Scan Folder Deletion Fail Cause: Fail to delete folder. |
| Causes: | • IP Board. (3010/3040) • IP Board. (3045) • MCU Board. |
| Remedy: | The machine will recover after the OK or Close button is pressed or message is displayed for specified time. If the error persists: 1. Check if other user is not operating file in storage location you specified. 2. Perform the following in sequence. • " Network System Fault Check" • " Network-related Details Check Flow" 3. Take corrective actions at the host side. |
| Error code: | 031-537 |
| Display: | SMB Error 031-537 Scan Disk Full Error |
| Description: | No free space in storage location on SMB scan data server Cause: Storage location has no free space. |
| Causes: | • IP Board. (3010/3040) • IP Board. (3045) • MCU Board. |
| Remedy: | The machine will recover after the OK or Close button is pressed or message is displayed for specified time. If the error persists: 1. Check storage location has free space. 2. Perform the following in sequence. • " Network System Fault Check" • " Network-related Details Check Flow" 3. Take corrective actions at the host side. |
| Error code: | 031-539 |
| Description: | Invalid SMB server (Net BIOS) name is specified Cause: Invalid SMB server (Net BIOS) name is specified |
| Remedy: | The machine will recover after the OK or Close button is pressed or message is displayed for specified time. If the error persists: 1. Check if server name is correct. 2. Perform the following in sequence. • " Network System Fault Check" • " Network-related Details Check Flow" 3. Take corrective actions at the host side. |
| Error code: | 031-540 |
| Description: | SMB protocol error(4-007)Invalid scan domain name is specified Cause: Invalid domain name is specified. (User name is specified in domain user form) |
| Remedy: | The machine will recover after the OK or Close button is pressed or message is displayed for specified time. If the error persists: 1. Check if domain name is correct. 2. Perform the following in sequence. • " Network System Fault Check" • " Network-related Details Check Flow" 3. Take corrective actions at the host side. |
| Error code: | 031-541 |
| Description: | SMB protocol error (4-008) Invalid scan user name is specified Cause: Invalid scan user name is specified. |
| Remedy: | The machine will recover after the OK or Close button is pressed or message is displayed for specified time. If the error persists: 1. Check if login name (user name) is correct. 2. Perform the following in sequence. • " Network System Fault Check" • " Network-related Details Check Flow" 3. Ensure that the error is replicated after the printer is powered Off and then On, and then replace (ESS PWB). |
| Error code: | 031-542 |
| Description: | SMB(TCP/IP) is not active Cause: SMB(TCP/IP) is not active. |
| Remedy: | The machine will recover after the OK or Close button is pressed or message is displayed for specified time. If the error persists: 1. Wait for a short period of time and try the same operation again. 2. Perform the following in sequence. • " Network System Fault Check" • " Network-related Details Check Flow" 3. Take corrective actions at the host side. |
| Error code: | 031-543 |
| Description: | SMB protocol error(4-045)Scan login prohibited time Cause: Login prohibited time. |
| Remedy: | The machine will recover after the OK or Close button is pressed or message is displayed for specified time. If the error persists: 1. On user settings, check the Login permitted time with system administrator. 2. Perform the following in sequence. • " Network System Fault Check" • " Network-related Details Check Flow" 3. Take corrective actions at the host side. |
| Error code: | 031-544 |
| Description: | SMB protocol error(4-046) Password expired Cause: Password expired. |
| Remedy: | The machine will recover after the OK or Close button is pressed or message is displayed for specified time. If the error persists: 1. On user settings, check the password valid period with system administrator. 2. Perform the following in sequence. • " Network System Fault Check" • " Network-related Details Check Flow" 3. Take corrective actions at the host side. |
| Error code: | 031-545 |
| Description: | SMB protocol error(4-047) Password change is required Cause: Password change is required. |
| Remedy: | The machine will recover after the OK or Close button is pressed or message is displayed for specified time. If the error persists: 1. On user settings, check the necessity of password change with system administrator. 2. Perform the following in sequence. • " Network System Fault Check" • " Network-related Details Check Flow" 3. Take corrective actions at the host side. |
| Error code: | 031-546 |
| Description: | SMB protocol error(4-048)User is invalid Cause: User is invalid. |
| Remedy: | The machine will recover after the OK or Close button is pressed or message is displayed for specified time. If the error persists: 1. On user settings, check the user invalid setting with system administrator. 2. Perform the following in sequence. • " Network System Fault Check" • " Network-related Details Check Flow" 3. Ensure that the error is replicated after the printer is powered Off and then On, and then replace (ESS PWB). |
| Error code: | 031-547 |
| Description: | SMB protocol error(4-049)Lock-out Cause: User is locked out. |
| Remedy: | The machine will recover after the OK or Close button is pressed or message is displayed for specified time. If the error persists: 1. On user settings, check the user lock-out status with system administrator. 2. Perform the following in sequence. • " Network System Fault Check" • " Network-related Details Check Flow" 3. Ensure that the error is replicated after the printer is powered Off and then On, and then replace (ESS PWB). |
| Error code: | 031-548 |
| Description: | SMB protocol error (4-050) User is expired Cause: User is expired. |
| Remedy: | The machine will recover after the OK or Close button is pressed or message is displayed for specified time. If the error persists: 1. On user settings, check the user valid period with system administrator. 2. Perform the following in sequence. • " Network System Fault Check" • " Network-related Details Check Flow" 3. Take corrective actions at the host side. |
| Error code: | 031-549 |
| Description: | SMB protocol error (4-051) User is restricted. Null password is prohibited Cause: User is restricted. Null password is prohibited. |
| Remedy: | The machine will recover after the OK or Close button is pressed or message is displayed for specified time. If the error persists: 1. On server security settings, check the access permission of a password user. 2. Perform the following in sequence. • " Network System Fault Check" • " Network-related Details Check Flow" 3. Take corrective actions at the host side. |
| Error code: | 031-550 |
| Description: | SMB Scan Append Command Fail Cause: Have no append access right to the file. Server does not support SMB append command. |
| Remedy: | The machine will recover after the OK or Close button is pressed or message is displayed for specified time. If the error persists: 1. Check append access right to the file. Check server supports SMB append command. 2. Perform the following in sequence. • " Network System Fault Check" • " Network-related Details Check Flow" 3. Take corrective actions at the host side. |
| Error code: | 031-551 |
| Description: | SMB Scan Rename Command Fail Cause: Have no rename access right to the file. Server does not support SMB rename command. |
| Remedy: | The machine will recover after the OK or Close button is pressed or message is displayed for specified time. If the error persists: 1. Check rename access right to the file.Check server supports SMB rename command. 2. Perform the following in sequence. • " Network System Fault Check" • " Network-related Details Check Flow" 3. Take corrective actions at the host side. |
| Error code: | 031-552 |
| Description: | SMB scan Cause: Cancel is selected for processing in the case of file name duplication, and job is cancelled because of file name duplication. |
| Remedy: | The machine will recover after the OK or Close button is pressed or message is displayed for specified time. If the error persists: 1. Set other than"Cancel" for processing in the case of file name duplication, or change/delete the file name the same as the one specified in sending a destination folder. 2. Perform the following in sequence. • " Network System Fault Check" • " Network-related Details Check Flow" 3. Take corrective actions at the host side. |
| Error code: | 031-574 |
| Display: | FTP Error 031-574 Scan Name Resolve Error |
| Description: | FTP Scan Host Name Resolution Fail Cause: DNS library call error. |
| Causes: | • IP Board. • MCU Board. |
| Remedy: | The machine will recover after the OK or Close button is pressed or message is displayed for specified time. If the error persists: 1. Check DNS connection, or check if name of forwarding destination server is registered with DNS. 2. Take corrective actions at the host side. |
| Error code: | 031-575 |
| Display: | FTP Error 031-575 Scan Server Address Error |
| Description: | FTP Scan DNS Server Not Set Cause: DNS library call error. |
| Causes: | • IP Board. • MCU Board. |
| Remedy: | The machine will recover after the OK or Close button is pressed or message is displayed for specified time. If the error persists: 1. Set DNS address, or set forwarding destination server address as IP address. 2. Take corrective actions at the host side. |
| Error code: | 031-576 |
| Display: | FTP Error 031-576 Scan Server Not Found |
| Description: | Server Connection Error in FTP Scan Cause: Network connection failed. |
| Causes: | • IP Board. • MCU Board. |
| Remedy: | The machine will recover after the OK or Close button is pressed or message is displayed for specified time. If the error persists: 1. Check if this device can communicate with forwarding destination FTP server. • Check if server`s IP address is correct. • Check connection of network cable. 2. Take corrective actions at the host side. |
| Error code: | 031-578 |
| Display: | FTP Error 031-579 Scan FTP Path Error |
| Description: | FTP Scan Login Name or Password Error Cause: USER/PASS command failed. |
| Causes: | • IP Board. (3010/3040) • IP Board. (3045) • MCU Board. |
| Remedy: | The machine will recover after the OK or Close button is pressed or message is displayed for specified time. If the error persists: 1. Check if the login name (user name) and password are correct. 2. Take corrective actions at the host side. |
| Error code: | 031-579 |
| Display: | FTP Error 031-579 Scan FTP Path Error |
| Description: | Problem with Location FTP-scanned Image is Saved in Cause: Fail to move data to Repository Path. |
| Causes: | • IP Board. • MCU Board. |
| Remedy: | The machine will recover after the OK or Close button is pressed or message is displayed for specified time. If the error persists: 1. Check if storage location is correct. 2. Take corrective actions at the host side. |
| Error code: | 031-580 |
| Description: | Fail to get file name/folder name of FTP scan server Cause: NLST command failed. |
| Remedy: | The machine will recover after the OK or Close button is pressed or message is displayed for specified time. If the error persists: 1. Check server access right. 2. Take corrective actions at the host side. |
| Error code: | 031-581 |
| Description: | Suffix of FTP scan file name/folder name is over limit Cause: Same as left. |
| Remedy: | The machine will recover after the OK or Close button is pressed or message is displayed for specified time. If the error persists: 1. Change file name / forwarding destination folder, or move or delete file in forwarding destination folder. 2. Take corrective actions at the host side. |
| Error code: | 031-582 |
| Display: | FTP Error 031-582 Scan File Make Error |
| Description: | FTP Scan File Creation Fail Cause: STOR command failed. |
| Causes: | • IP Board. • MCU Board. |
| Remedy: | The machine will recover after the OK or Close button is pressed or message is displayed for specified time. If the error persists: 1. Check if the file name you specified can be created in storage location. 2. Check if there is free space in the storage location. 3. Take corrective actions at the host side. |
| Error code: | 031-584 |
| Display: | FTP Error 031-584 Scan Connect Error |
| Description: | FTP Scan Folder Creation Fail Cause: MKD command failed. |
| Causes: | • IP Board. • MCU Board. |
| Remedy: | The machine will recover after the OK or Close button is pressed or message is displayed for specified time. If the error persists: 1. Check if the folder name you specified can be created in storage location. 2. Check if the folder whose name is the same as the one you specified already exists. 3. Take corrective actions at the host side. |
| Error code: | 031-585 |
| Display: | FTP Error 031-585 Scan DEL Command Error |
| Description: | FTP Scan File Deletion Fail Cause: DEL command failed. |
| Causes: | • IP Board. • MCU Board. |
| Remedy: | The machine will recover after the OK or Close button is pressed or message is displayed for specified time. If the error persists: 1. Check server access right. 2. Take corrective actions at the host side. |
| Error code: | 031-587 |
| Display: | FTP Error 031-587 Scan RMD Command Error |
| Description: | FTP Scan Folder Deletion Fail Cause: RMD command failed. |
| Causes: | • IP Board. • MCU Board. |
| Remedy: | The machine will recover after the OK or Close button is pressed or message is displayed for specified time. If the error persists: 1. Check server access right. 2. Take corrective actions at the host side. |
| Error code: | 031-588 |
| Display: | FTP Error 031-588 Scan Write Error |
| Description: | FTP Scan Server Data Write Fail Cause: Data writing to FTP scan server has failed. |
| Causes: | • IP Board. • MCU Board. |
| Remedy: | The machine will recover after the OK or Close button is pressed or message is displayed for specified time. If the error persists: 1. Check if there is free space in storage location. 2. Take corrective actions at the host side. |
| Error code: | 031-590 |
| Description: | FTP Error Cause: Cancel is selected for processing in the case of file name duplication, and job is cancelled because of file name duplication. |
| Remedy: | The machine will recover after the OK or Close button is pressed or message is displayed for specified time. If the error persists: 1. Set other than"Cancel" for processing in the case of file name duplication, or change/delete file name the same as the one specified in sending destination folder. 2. Take corrective actions at the host side. |
| Error code: | 031-594 |
| Display: | FTP Error 031-594 Scan TYPE Command Error |
| Description: | FTP Scan TYPE Command Fail (Network Error) Cause: TYPE command failed. |
| Causes: | • IP Board. • MCU Board. |
| Remedy: | The machine will recover after the OK or Close button is pressed or message is displayed for specified time. If the error persists: 1. Do the same operation again. 2. If still not improved, contact the system administrator. 3. Check whether you have the access permission for appending files, or whether the server supports the append command of FTP. 4. Take corrective actions at the host side. |
| Error code: | 031-595 |
| Description: | FTP Scan PORT Command Fail (Network Error) Cause: PORT command failed. |
| Remedy: | The machine will recover after the OK or Close button is pressed or message is displayed for specified time. If the error persists: 1. Do the same operation again. 2. If still not improved, contact the system administrator. Check whether you have the access permission for renaming files, or whether the server supports the rename command of FTP. 3. Take corrective actions at the host side. |
| Error code: | 031-598 |
| Display: | FTP Error 031-598 Scan APPE Command Error |
| Description: | FTP Scan Append Command Fail Cause: APPE command failed. |
| Causes: | • IP Board. • MCU Board. |
| Remedy: | The machine will recover after the OK or Close button is pressed or message is displayed for specified time. If the error persists: 1. Check append access right to the file.Check server supports FTP append command. 2. Take corrective actions at the host side. |
| Error code: | 041-340 |
| Display: | 041-340 Code:xxxxxxxx Restart Printer |
| Description: | IOT NVRAM Error |
| Causes: | • Imaging Unit (PL4.1.21) • MCU Board (SFP PL8.2.13; MFP PL8.3.6) • EEPROM Board (SFP PL8.2.16; MFP PL8.3.4) • PHD XPRO Harness Assy (PL9.1.11) |
| Remedy: | 1 Does the error still occur after cycling the power On and Off several times? Go to step 2. Complete.a 2 Reseat the Imaging Unit and four Toner Cartridges. Does the error still occur when the power is turned Off and On? Go to step 3. Complete.a 3 Reseat the MCU Board. Does the error still occur when the power is turned Off and On? Go to step 4. Complete.a 4 Check the connectors for connection. Check the connections between the PWBA EEPROM and MCU Board. Are P/J 144, and P/J 42 connected surely? Go to step 6. Reconnect the connector(s) P/ J42 and P/ J144 securely, then go to step 5. 5 Does the error still occur when the power is turned Off and On? Go to step 6. Complete. 6 Check the PHD XPRO Harness Assy for continuity. Disconnect J42 from the MCU Board. Disconnect J144 from the EEPROM Board. Is each cable of J42 <=> J144 continuous? Go to step 7. Replace the PHD XPRO Harness Assy 7 Check the power to the EEPROM Board. Disconnect J42 from the MCU Board. Is the voltage across P42-3 <=> ground on the MCU Board, about +3.3 VDC? Replace the EEPROM Board Go to step 8. 8 Replace the MCU Board. Does the error still occur when the power is turned Off and On? Go to “Electrical Noise” on page 4-79. Complete. |
| Error code: | 041-347 |
| Description: | IOT I/F Failure Cause: MCU Internal Error (I/F part). |
| Remedy: | 1. Turn the power Off and On to check that the error recurs 2. Update to the latest F/W. 3. If the problem cannot be solved, replace the following parts in sequence. • (MCU PWB) • (ESS PWB) |
| Error code: | 042-313 |
| Display: | Fan Motor Error Error 042-313 Restart Printer |
| Description: | IOT Fan Motor Failure Detect Fan Motor Error |
| Causes: | • Main Fan (PL4.1.13) • Top Harness Assembly (PL18.2.5) • LVPS (PL18.1.34) • MCU Board (PL18.1.13) |
| Remedy: | 1 Check the Main Fan operation Execute Digital Output diagnostic test 042-001, and check the Main Fan rotation. Does the Main Fan function normally? Replace the MCU Board. Go to step 2. 2 Check the Main Fan installation Rotate the Main Fan manually. Is there an overload? Reinstall the Main Fan appropriately. Go to step 3. 3 Check the Main Fan connection Check the connection between the Main Fan and the LVPS. Is P/J503 connected securely? Go to step 4. Reconnect P/J503 securely. 4 Check the connections between the LVPS and the MCU Board Are P/J501 and P/J29 connected securely? Go to step 5. Reconnect P/J501 and P/J29 securely. 5 Check the continuity between the LVPS and the MCU Board Is each cable of P/J501<=>P/J29 continuous? Go to step 6. Replace the Top Harness Assembly. 6 Check after replacing the Main Fan Replace the Main Fan. Does the error still occur? Replace the LVPS. Finished. |
| Error code: | 042-330 |
| Description: | Rear Fan Failure Cause: MCU detects an error upon receiving error signal from the Rear Fan. |
| Remedy: | 1 • Execute the Diag Digital Output [042-001] to check the rotation of the Rear Fan. • Is it working properly? Replace (MCU PWB) Go to Step 2. 2 • Check the installation of the Rear Fan. • Manually rotate the Rear Fan. Is there any resistance? Reinstall the Rear Fan properly Go to Step 3. 3 • Check the connection between the Rear Fan and the LVPS, as well as between the LVPS PWB and the MCU PWB. • Are the REAR FAN HARNESS ASSEMBLY and the LVPS HARNESS ASSEMBLY connected securely? Go to Step 4. Securely connect the REAR FAN HARNESS ASSEMBLY and the LVPS HARNESS ASSEMBLY 4 • Replace the Rear Fan. PL Does an error occur? Go to Step 5. Troubleshooting complete. 5 • Replace the REAR FAN HARNESS ASSEMBLY. • Does an error occur? Go to Step 6. Troubleshooting complete. 6 • Replace the LVPS HARNESS ASSEMBLY. • Does an error occur? Go to Step 7. Troubleshooting complete. 7 • Replace (LVPS). • Does an error occur? Replace (MCU PWB) Troubleshooting complete. |
| Error code: | 042-700, 092-661 |
| Description: | 042-700 IOT Over Heat Stop 092-661 IOT Environment Sensor Error Cause: 042-700: The Temp. Sensor sensed high temperature. 092-661: The Temp. Sensor or the Humidity Sensor error was detected. |
| Remedy: | 042-700: • Printing has been suspended because inside of the printer is extraordinarily hot. • Start the operation after the Printer has cooled down. • Turn the power Off and On to check that the error recurs. Then proceed to the FIP. 092-661: Turn the power Off and On to check that the error recurs. Then proceed to the FIP. 1 Is there a heat source near the device? Remove the heat source Go to Step 2. 2 Are there any foreign substances in the Temp. Sensor /Humidity Sensor HVPS Detector? Remove the foreign substances Go to Step 3. 3 • Check the connection between the HVPS and the MCU PWB. • Is the HVPS HARNESS ASSEMBLY connected securely? Go to Step 4. Securely connect the HVPS HARNESS ASSEMBLY 4 • Replace the HVPS HARNESS ASSEMBLY. • Does an error occur? Go to Step 5. Troubleshooting complete. 5 • Replace (HVPS (3610)) (HVPS (3615)). • Does an error occur? Replace (MCU PWB) Troubleshooting complete. |
| Error code: | 050-130 |
| Description: | IOT Remain Zone Fusing Jam 051-130 is displayed in the UI. Either of the following error codes is registered in the Error Log. • 077-104 Regi Off Jam • 077-106 Exit On Jam • 077-108 Exit Off Early Jam • 077-109 Exit Off Jam Cause: When Dynamic Jam (cause) was detected: • 077-104 Regi Off Jam • 077-106 Exit On Jam • 077-108 Exit Off Early Jam • 077-109 Exit Off Jam When Static Jam (collateral) was detected: • Exit Sensor On |
| Remedy: | Paper jam has occurred. Remove the jammed paper. If there is no jammed paper, or the error still occurs after having removed the jammed paper, turn the power Off and On to check that the error recurs, then proceed to the appropriate FIP. • For 077-104 Regi Off Jam • For 077-106 Exit On Jam, 077-108 Exit Off Early Jam, and 077-109 Exit Off Jam, go to FIP 1. 284 |
| Error code: | 050-131, 077-107 |
| Description: | 050-131 IOT Remain Zone Duplex Jam 077-107 Duplex Regi On Jam 050-131 is displayed in the UI. 077-107 is registered in the Error Log. Cause: 050-131: When Dynamic Jam (cause) was detected: - 077-107 Duplex Regi On Jam 077-107: After the Invert Clutch turned ON, the Regi. Sensor did not turn ON within the specified time. |
| Remedy: | 1 Is there any foreign substances or bits of paper found on the paper transport path? Remove the foreign substances and bits of paper, etc. Go to Step 2. 2 Are the paper feed rolls installed properly? Go to Step 3. Reinstall the paper feed rolls 3 Are the paper feed rolls deformed or worn out? Replace the corresponding paper feed rolls Go to Step 4. 4 • Execute the Diag Digital Input [071-102] to check the operation of the Regi. Sensor HVPS. • Is the Regi. Sensor HVPS operating normally? Go to Step 5. Go to FIP 2.03 5 • Execute the Diag Digital Output [071- 008] to check the operation of the CLUTCH ASSEMBLY INVERT. • Is the CLUTCH ASSEMBLY INVERT operating normally? Step 6 Go to FIP 2.09 6 • Execute the Diag Digital Output [071- 001] to check the rotation of the MAIN DRIVE ASSEMBLY. • Is it working properly? Replace (MCU PWB) Go to FIP 2.15 |
| Error code: | 050-132 |
| Description: | IOT Remain Zone Regi + MSI + T1 + T2 Jam 050-132 is displayed in the UI. 077-106 is registered in the Error Log. Cause: When Dynamic Jam (cause) was detected: • 077-106 Exit On Jam When Static Jam (collateral) was detected: • Regi Sensor On |
| Remedy: | 1. Paper jam has occurred. Remove the jammed paper. 2. If there is no jammed paper, or the error still occurs after having removed the jammed paper, turn the power Off and On to check that the error recurs, then proceed to the FIP 1. 284. |
| Error code: | 050-134 |
| Description: | IOT Zone MSI + T1 Jam 051-134 is displayed in the UI. Either of the following error codes is registered in the Error Log. • 071-100 IOT Tray1 Misfeed Jam • 075-100 MSI Misfeed Jam Cause: When Dynamic Jam (cause) was detected: • 071-100 IOT Tray1 Misfeed Jam • 075-100 MSI Misfeed Jam |
| Remedy: | 1. Paper jam has occurred. Remove the jammed paper. 2. If there is no jammed paper, or the error still occurs after having removed the jammed paper, turn the power Off and On to check that the error recurs, then proceed to the FIP. • 071-100 IOT Tray1 Misfeed Jam, go to FIP 1. 273. • 075-100 MSI Misfeed Jam, go to FIP 1. 281. |
| Error code: | 050-135 |
| Description: | IOT Zone T2 + T3 + T4 + TR2 + TR3 Jam 050-135 is displayed in the UI. 073-101 is registered in the Error Log. Cause: When Dynamic Jam (cause) was detected: • 073-101 IOT Path3 SNS On Jam When Static Jam (collateral) was detected: • Tray2 Path Sensor On, Tray3 Path Sensor On, and Tray4 Path Sensor On |
| Remedy: | 1. Paper jam has occurred. Remove the jammed paper. 2. If there is no jammed paper, or the error still occurs after having removed the jammed paper, turn the power Off and On to check that the error recurs, then proceed to FIP 1. 277. |
| Error code: | 050-136 |
| Description: | IOT Zone T3 + T4 + TR3 Jam 050-136 is displayed in the UI. 072-101 is registered in the Error Log. Cause: When Dynamic Jam (cause) was detected: • 072-101 IOT Path2 SNS On Jam When Static Jam (collateral) was detected: • Tray3 Path Sensor On |
| Remedy: | 1. Paper jam has occurred. Remove the jammed paper. 2. If there is no jammed paper, or the error still occurs after having removed the jammed paper, turn the power Off and On to check that the error recurs, then proceed to FIP 1. 277. |
| Error code: | 050-137 |
| Description: | IOT Zone T2 + T3 + TR2 + TR3 Jam 050-137 is displayed in the UI. 072-102 is registered in the Error Log. Cause: When Dynamic Jam (cause) was detected: • 072-102 IOT Option Regi On Jam When Static Jam (collateral) was detected: • Tray2 Path Sensor On and Tray3 Path Sensor On |
| Remedy: | 1. Paper jam has occurred. Remove the jammed paper. 2. If there is no jammed paper, or the error still occurs after having removed the jammed paper, turn the power Off and On to check that the error recurs, then proceed to FIP 1. 278. |
| Error code: | 050-138 |
| Description: | 050-138 IOT Zone T3 + TR2 + TR3 Jam 050-138 is displayed in the UI. 072-102 is registered in the Error Log. Cause: When Dynamic Jam (cause) was detected: • 072-102 IOT Option Regi On Jam When Static Jam (collateral) was detected: • Tray3 Path Sensor On |
| Remedy: | 1. Paper jam has occurred. Remove the jammed paper. 2. If there is no jammed paper, or the error still occurs after having removed the jammed paper, turn the power Off and On to check that the error recurs, then proceed to the FIP 1. 278. |
| Error code: | 050-139 |
| Description: | IOT Zone T2 + TR2 Jam 050-139 is displayed in the UI. 072-100 is registered in the Error Log. Cause: When Dynamic Jam (cause) was detected: • 072-100 IOT Tray2 Misfeed Jam When Static Jam (collateral) was detected: • Tray2 Path Sensor On |
| Remedy: | 1. Paper jam has occurred. Remove the jammed paper. 2. If there is no jammed paper, or the error still occurs after having removed the jammed paper, turn the power Off and On to check that the error recurs, then proceed to the FIP 1. 276. |
| Error code: | 050-140 |
| Description: | IOT Zone T3 + TR2 Jam 050-140 is displayed in the UI. 073-100 is registered in the Error Log. Cause: When Dynamic Jam (cause) was detected: • 073-100 IOT Tray3 Misfeed Jam |
| Remedy: | 1. Paper jam has occurred. Remove the jammed paper. 2. If there is no jammed paper, or the error still occurs after having removed the jammed paper, turn the power Off and On to check that the error recurs, then proceed to the FIP 1. 276. |
| Error code: | 050-141 |
| Description: | IOT Zone T4 + TR3 Jam 050-141 is displayed in the UI. 074-100 is registered in the Error Log. Cause: When Dynamic Jam (cause) was detected: • 074-100 IOT Tray4 Misfeed Jam When Static Jam (collateral) was detected: • Tray4 Path Sensor On |
| Remedy: | 1. Paper jam has occurred. Remove the jammed paper. 2. If there is no jammed paper, or the error still occurs after having removed the jammed paper, turn the power Off and On to check that the error recurs, then proceed to the FIP 1. 276. |
| Error code: | 050-142 |
| Description: | IOT Remain Zone Regi + MSI + T1 Jam 050-142 is displayed in the UI. 077-106 is registered in the Error Log. Cause: When Dynamic Jam (cause) was detected: • 077-106 Exit On Jam When Static Jam (collateral) was detected: • Regi Sensor On |
| Remedy: | 1. Paper jam has occurred. Remove the jammed paper. 2. If there is no jammed paper, or the error still occurs after having removed the jammed paper, turn the power Off and On to check that the error recurs, then proceed to the FIP 1. 284. |
| Error code: | 061-370 |
| Display: | 061-370 Printer Code:xxxxxxxx Restart Printer |
| Description: | IOT ROS Failure Detect ROS Failure |
| Causes: | • Laser Unit (PL2.1.1) • Top Harness Assembly (PL18.2.5) • LVPS (PL18.1.34) • MCU Board (PL18.1.13) |
| Remedy: | 1 Check the Laser Unit connection Check the connection between the Laser Unit and the MCU Board, and the connection between the Laser Unit and the PWBA LVPS. Are P/J36, P/J11, and PJ43 connected securely? Go to step 2. Connect P/J36, P/J11, and PJ43 securely. 2 Check the continuity between the LVPS and the Laser Unit Is each cable of P/J43<=>P/J431 continuous? Go to step 3. Replace the Top Harness Assembly. 3 Check the power to the Laser Unit (+5 VDC) Close the interlock switch(es), and check if the voltage between the LVPS ground and the P/J43-2 pin is about +5 VDC. Go to step 4. Replace the LVPS. 4 Check the power to the Laser Unit (+24 VDC) Close the interlock switch(es), and check if the voltage between the MCU Board ground and the P/J36-1 pin is about +24 VDC. Go to step 5. Refer to “+24 VDC Power FIP”. 5 Check the power to the Laser Unit (+3.3 VDC) Check if the voltage between the MCU Board ground and the P/J11-1 pin is about +3.3 VDC. Go to step 6. Refer to “+3.3 VDC Power FIP”. 6 Check after replacing the Laser Unit Replace the Laser Unit. Does the error still occur? Replace the MCU Board. Finished. |
| Error code: | 062-277 ... 062-393 |
| Description: | 062-277: IIT internal communication error. 062-311: IIT failure initialization error. 062-317: Interference buffer full was detected at the time of DADF scan. 062-318: A Scan setup did not meet the deadline into Page Gap. 062-319: A PLL lock was not carried out before 1stScan start, but the lock has separated during continuation. 062-320: Scanning error. 062-321: Unexecutable error. (carriage is at the locked position, etc.) 062-322: Parameter error. 062-360: Carriage home position error. 062-371: IIT failure Lamp error. 062-393: CCD ASIC communication error. |
| Remedy: | 062-277/062-311/062-317/062-318/062-319/062-321/062-322/062-360/062-371/062-393: • Turn the power Off and On to check that the error recurs. Then proceed to the FIP. 062-320: 1. Check the file data in the printer. Print or clear the stored files and data at the printer memory. 2. Perform a black and white scan. 3. If the error occurs again, proceed to the FIP. 1 Check the connection between the IIT ASSEMBLY and the ESS PWB. • Are the P/J451 and the P/J452 connected securely? Go to Step 2. Connect that P/J451 and P/J452 are secure 2 • Replace (IIT Assembly). • Does an error occur? Replace (ESS PWB) Troubleshooting complete. |
| Error code: | 062-316 |
| Description: | DADF Motor Fail Cause: Detect DADF Motor Fail. |
| Remedy: | 1 Are there any foreign substances in the DADF Motor Drive Section? Remove the foreign substances. Go to Step 2. 2 Check the connection between the DADF ASSEMBLY and the ESS PWB. • Is the P/J453 connected securely? Go to Step 3. Connect P/J453 securely 3 • Replace (DADF). • Does an error occur? Replace (ESS PWB). Troubleshooting complete. |
| Error code: | 062-790 |
| Display: | Confirm 062-790 Deleted by Limit |
| Description: | Copy Limit |
| Causes: | • IIT Assembly (PL51.1.3) • IP Board (PL18.1.22) |
| Remedy: | 1 Check the IIT Assembly connection Check the connection between the IIT Assembly and the IP Board. Are P/J1401 and P/J1501 connected securely? Go to step 2. Connect P/J1401 and P/J1501 securely. 2 Check after replacing the IIT Assembly Replace the IIT Assembly. Does the error still occur? Replace the IP Board. Finished. |
| Error code: | 071-100 |
| Description: | IOT Tray1 Misfeed JAM Detect Tray1 Misfeed JAM |
| Causes: | • Regi Sensor [Regi Chute Assembly] (PL15.2.1) • Feed Clutch (PL15.2.6) • Paper Transport Motor [Drive Assembly] (PL3.1.1) • Feed Roller Assembly (PL15.2.7) • Tray Retard Holder Assembly (PL9.1.3) • Regi Harness Assembly (PL15.2.8) • MCU Board (PL18.1.13) |
| Remedy: | 1 Check the Tray 1 installation Is Tray 1 installed properly? Go to step 2. Install Tray 1 properly. 2 Check the paper path Are there any foreign objects, or paper pieces, etc. on the paper path? Remove the foreign objects, or paper pieces, etc. Go to step 3. 3 Check the paper feed roller Is the paper feed roller (the roller on the possible causative parts list) installed properly? Go to step 4. Reinstall the paper feed roller. 4 Check the paper feed roller Is the paper feed roller (the roller on the possible causative parts list) deformed or worn out? Replace the paper feed roller. Go to step 5. 5 Check the Regi Sensor operation Execute Digital Input diagnostic test 071-103, and check the Regi Sensor operation. Does the Regi Sensor function normally? Go to step 6. 6 Check the Feed Clutch operation Execute Digital Output diagnostic test 071-008, and check the Feed Clutch operation. Does the Feed Clutch function normally? Go to step 7. 7 Check the Paper Transport Motor operation Execute Digital Output diagnostic test 071-004, and check the Paper Transport Motor rotation. Does the Paper Transport Motor function normally? Replace the MCU Board. |
| Error code: | 071-920 |
| Description: | Waiting to Print Side 2 Load Printed Pages into the NNN Cause: Waiting for side 2 to be set for manual duplex print (Tray). |
| Remedy: | Set the Paper correctly. Press OK button within the specified time. |
| Error code: | 071-921 |
| Description: | Manual Duplex Print Cause: Waiting for Set key to be pressed after setting side 2 for manual duplex print (Tray). |
| Remedy: | Set the Paper correctly. Press OK button within the specified time. |
| Error code: | 072-100, 073-100, 074-100 |
| Description: | 072-100 IOT Tray2 Misfeed Jam 073-100 IOT Tray3 Misfeed Jam 074-100 IOT Tray4 Misfeed Jam Cause: 072-100: 050-139 is displayed in the UI. After the Tray 2 Feed Clutch turned ON, the Tray 2 Path Sensor did not turn ON within the specified time. 073-100: 050-140 is displayed in the UI. After the Tray 3 Feed Clutch turned ON, the Tray 3 Path Sensor did not turn ON within the specified time. 074-100: 050-141 is displayed in the UI. After the Tray 4 Feed Clutch turned ON, the Tray 4 Path Sensor did not turn ON within the specified time. |
| Remedy: | 1 Is there any foreign substances or bits of paper found on the paper transport path? Remove the foreign substances and bits of paper, etc. Go to Step 2. 2 Are the paper feed rolls installed properly? Go to Step 3. Reinstall the corresponding paper feed rolls 3 Are the paper feed rolls deformed or worn out? Replace the corresponding paper feed rolls Go to Step 4. 4 • Execute the Diag Digital Input Tray 2: 071- 119 / Tray 3:071-120 / Tray 4:071-121 to check the operation of the Path Sensor. • Is the Path Sensor operating normally? Go to Step 5. Go to FIP 2.07 5 • Execute the Diag Digital Output Tray 2: 071-018 / Tray 3:071-019 / Tray 4:071-020 to check the operation of the OPTIONAL FEEDER CLUTCH ASSEMBLY. • Is the OPTIONAL FEEDER CLUTCH ASSEMBLY operating normally? Go to Step 6. Go to FIP 2.12 6 • Execute the Diag Digital Output Tray 2: 071-009 / Tray 3:071-012 / Tray 4:071-015 to check the rotation of the MOTORASSEMBLY OPTION. • Is it working properly? Go to Step 7. Go to FIP 2.17 7 • Replace (Feeder Assembly). • Does an error occur? Replace (MCU PWB) Troubleshooting complete. |
| Error code: | 072-101, 073-101 |
| Description: | 072-101 IOT Path 2 SNS On Jam 073-101 IOT Path 3 SNS On Jam Cause: 072-101: 050-136 is displayed in the UI. The Tray 2 Path Sensor did not turn ON within the specified time after the Tray 3 Path Sensor turned ON. 073-101: 050-135 is displayed in the UI. The Tray 3 Path Sensor did not turn ON within the specified time after the Tray 4 Path Sensor turned ON. |
| Remedy: | 1 Is there any foreign substances or bits of paper found on the paper transport path? Remove the foreign substances and bits of paper, etc. Go to Step 2. 2 Are the paper feed rolls installed properly? Go to Step 3. Reinstall the corresponding paper feed rolls 3 Are the paper feed rolls deformed or worn out? Replace the corresponding paper feed rolls Go to Step 4. 4 • Execute the Diag Digital Input Tray 2: 071- 119 / Tray 3:071-120 / Tray 4:071-121 to check the operation of the Path Sensor. • Is the Path Sensor operating normally? Go to Step 5. Go to FIP 2.07 5 • Execute the Diag Digital Output Tray 2: 071-018 / Tray 3:071-019 / Tray 4:071-020 to check the operation of the OPTIONAL FEEDER CLUTCH ASSEMBLY. • Is the OPTIONAL FEEDER CLUTCH ASSEMBLY operating normally? Go to Step 6. Go to FIP 2.13 6 • Execute the Diag Digital Output Tray 2: 071-009 / Tray 3:071-012 / Tray 4:071-015 to check the rotation of the OPTIONAL TRAY MOTOR-ASSEMBLY. • Is it working properly? Go to Step 7. Go to FIP 2.17 7 • Replace (Feeder Assembly). • Does an error occur? Replace (MCU PWB) Troubleshooting complete. |
| Error code: | 072-102 |
| Description: | Feed Out Sensor 2 On Jam During paper feed from Tray 2, the Feed Out Sensor 2 did not turn ON within the specified time after the Tray 2 Feed Motor On. |
| Remedy: | Check the following: • The Feed Out Sensor 2 (Input Check [072-106] for operation failure. (PL 10.5) • The STM Take Away Motor (Output Check [072-007] for operation failure. (PL 10.6) • The STM Take Away Roll Clutch (Output Check [072-005] for operation failure. (PL 10.6) • The Tray 2 Feed/Lift Up Motor (Output Check [072-002] (Feed)) for operation failure. (PL 10.3) • The T/A Roll 2, Feed Roll, Nudger Roll, and Pinch Roll for transportation failure due to contamination, wear, and deterioration. • The LH Cover for improper latching. • The Drive Gear for wear and damage. • A paper transportation failure due to foreign substances on the paper path. • Usage of out of spec paper. If no problem is found, replace the STM PWB. (PL 10.6) |
| Error code: | 072-211 |
| Description: | IOT Option Feeder2 Failure Detect Feeder2 Failure |
| Causes: | • Main Harness Assembly (PL18.2.3) • Drawer 1 Feeder Harness Assembly (PL10.1.13) • 550 Option Feeder Board (PL10.1.10) • MCU Board (PL18.1.13) |
| Remedy: | 1 Check the connections between the 550 Option Feeder Board and the MCU Board Are P/J27, DP/DJ271, and P/J419 connected securely? Go to step 2. Connect P/J27, DP/DJ271, and P/J419 securely. 2 Check the continuity between the 550 Option Feeder Board and the drawer connector Is each cable of P/J419<=>DP/DJ271 continuous? Go to step 3. Replace the Drawer 1 Feeder Harness Assembly. 3 Check the continuity between the MCU Board and the drawer connector Is each cable of P/J27<=>DP/DJ271 continuous? Go to step 4. Replace the Main Harness Assembly. 4 Check after replacing the 550 Option Feeder Board Replace the 550 Option Feeder Board. Does the error still occur? Replace the MCU Board. Finished. |
| Error code: | 073-211, 074-211 |
| Description: | 073-211 Feeder 3 Error 074-211 Feeder 4 Error Cause: 073-211: IOT Option Feeder3 Failure. 074-211: IOT Option Feeder4 Failure. |
| Remedy: | 1 Check the operation of the OPTIONAL TRAY MOTOR ASSEMBLY • Execute the Diag Digital Output Tray 3:071- 012 / Tray 4:071-015 to check the rotation of the OPTIONAL TRAY MOTOR ASSEMBLY. • Is it working properly? Go to Step 2. Go to FIP 2.17 2 Check the connection between the OPTIONAL TRAY PWB ASSEMBLY (Upper) and the OPTIONAL TRAY PWB ASSEMBLY (Lower). • Are the FEEDER HARNESS ASSEMBLY DRAWER 2 (P/J423P/J4231) and the FEEDER HARNESS ASSEMBLY DRAWER 1 (P/J4231P/J419) connected securely? Go to Step 3. Securely connect the FEEDER HARNESS ASSEMBLY DRAWER 2 and the FEEDER HARNESS ASSEMBLY DRAWER 1 3 • Replace the FEEDER HARNESS ASSEMBLY DRAWER 2. • Does an error occur? Go to Step 4. Troubleshooting complete. 4 • Replace the FEEDER HARNESS ASSEMBLY DRAWER 1. • Does an error occur? Go to Step 5. Troubleshooting complete. 5 • Replace(Optional Tray PWB Assembly) • Does an error occur? Go to Step 6. Troubleshooting complete. 6 • Replace (Feeder Assembly). • Does an error occur? Replace (MCU PWB) Troubleshooting complete. |
| Error code: | 075-100 |
| Display: | Paper Jam 075-100 Printer Jam at Feed |
| Description: | MSI Misfeed JAM Detect VSYNC On JAM(TBD) |
| Causes: | • Regi Sensor [Regi Chute Assembly] (PL15.2.1) • Bypass Tray Feed Solenoid (PL13.2.9) • Paper Transport Motor [Drive Assembly] (PL3.1.1) • Feed Roller Assembly (PL13.2.10) • Retard Holder Assembly (PL13.3.14) • TA1 Roller Assembly (PL13.1.2) • TA2 Roller Assembly (PL13.1.3) • Bypass Tray Harness Assembly (PL13.2.5) • MCU Board (PL18.1.13) |
| Remedy: | 1 Check the Bypass Tray installation Is the Bypass Tray installed properly? Go to step 2. Install the Bypass Tray properly. 2 Check the paper path Are there any foreign objects, or paper pieces, etc. in the paper path? Remove foreign objects, or paper pieces, etc. Go to step 3. 3 Check the paper feed roller Is the paper feed roller (the roller on the possible causative parts list) installed properly? Go to step 4. Reinstall the paper feed roller. 4 Check the paper feed roller Is the paper feed roller (the roller on the possible causative parts list) deformed or worn out? Replace the paper feed roller. Go to step 5. 5 Check the Regi Sensor operation Execute Digital Input diagnostic test 071-103, and check the Regi Sensor operation. Does the Regi Sensor function normally? Go to step 6. 6 Check the Bypass Tray Feed Solenoid operation Execute Digital Output diagnostic test 071-007, and check the Bypass Tray Feed Solenoid operation. Does the Bypass Tray Feed Solenoid function normally? Go to step 7. 7 Check the Paper Transport Motor operation Execute Digital Output diagnostic test 071-004, and check the Paper Transport Motor rotation. Does the Paper Transport Motor function normally? Replace the MCU Board. |
| Error code: | 077-101 |
| Description: | VSYNC ON JAM Detect VSYNC On JAM |
| Remedy: | Replace the MCU Board. |
| Error code: | 077-104 |
| Display: | Paper Jam 077-104 Printer Jam at Exit |
| Description: | RegOff JAM Detect RegOff JAM |
| Causes: | • Regi Sensor [Regi Chute Assembly] (PL15.2.1) • Exit Sensor (PL17.1.11) • Regi Clutch (PL15.1.8) • Paper Transport Motor / Main Motor [Drive Assembly] (PL3.1.1) • Regi Harness Assembly (PL15.2.8) • MCU Board (PL18.1.13) |
| Remedy: | 1 Check the paper path Are there any foreign objects, or paper pieces, etc. on the paper path? Remove the foreign objects, or paper pieces, etc. Go to step 2. 2 Check the paper feed roller Is the paper feed roller (the roller on the possible causative parts list) installed properly? Go to step 3. Reinstall the paper feed roller. 3 Check the paper feed roller Is the paper feed roller (the roller on the possible causative parts list) deformed or worn out? Replace the paper feed roller. Go to step 4. 4 Check the Regi Sensor operation Execute Digital Input diagnostic test 071-103, and check the Regi Sensor operation. Does the Regi Sensor function normally? Go to step 5. 5 Check the Regi Clutch operation Execute Digital Output diagnostic test 071-010, and check the Regi Clutch operation. Does the Regi Clutch function normally? Go to step 6. 6 Check the Paper Transport Motor operation Execute Digital Output diagnostic test 071-004, and check the Paper Transport Motor rotation. Does the Paper Transport Motor function normally? Go to step 7. 7 Check the Exit Sensor operation Execute Digital Input diagnostic test 071-104, and check the Exit Sensor operation. Does the Exit Sensor function normally? Go to step 8. 8 Check the Main Motor operation Execute Digital Output diagnostic test 071-001, and check the Main Motor rotation. Does the Main Motor function normally? Replace the MCU Board. |
| Error code: | 077-106, 077-108, 077-109 |
| Description: | 077-106 Exit On Jam 077-108 Exit Off early Jam 077-109 Exit Off Jam Cause: 077-106: Either of the following error codes is displayed in the UI. 050-130 - 050-132 - 050-142 The Exit Sensor does not turn ON within the specified time after the Regi Clutch turned On. 077-108: 050-130 is displayed in the UI. After the Exit Sensor turned ON, the Exit Sensor turned OFF before the specified time. 077-109: 050-130 is displayed in the UI. After the Regi. Sensor turned OFF, the Exit Sensor did not turn OFF within the specified time. |
| Remedy: | 1 • Is there any foreign substances or bits of paper found on the paper transport path? Note: Make sure that the FUSING ASSEMBLY has cooled down before performing the operation. Remove the foreign substances and bits of paper, etc. Go to Step 2. 2 Are the paper feed rolls installed properly? Go to Step 3. Reinstall the corresponding paper feed rolls 3 Are the paper feed rolls deformed or worn out? Replace the corresponding paper feed rolls Go to Step 4. 4 • Execute the Diag Digital Input [071-103] to check the operation of the EXIT SENSOR. • Is the EXIT SENSOR operating normally? Go to Step 5. Go to FIP 2.01 5 • Execute the Diag Digital Input [071-102] to check the operation of the REGISENSOR HVPS. • Is the REGI-SENSOR HVPS operating normally? Go to Step 6. Go to FIP 2.03 6 • Execute the Diag Digital Output [071-007] to check the operation of the EXIT CLUTCH ASSEMBLY. • Is the EXIT CLUTCH ASSEMBLY operating normally? Go to Step 7. Go to FIP 2.08 7 • Execute the Diag Digital Output [071-006] to check the operation of the REGI. CLUTCH. • Is the REGI. CLUTCH operating normally? Go to Step 8. Go to FIP 2.10 8 • Execute the Diag Digital Output [071-001] to check the rotation of the MAIN DRIVE ASSEMBLY. • Is it working properly? Replace (MCU PWB) Go to FIP 2.15 |
| Error code: | 077-215, 077-217 |
| Description: | 077-215 IOT Duplex Error 077-217 Duplex Miss Configuration Cause: Duplex Unit Configuration error is detected. |
| Remedy: | Turn the power Off and On to check that the error recurs, then replace the Duplex Unit. |
| Error code: | 077-300 |
| Description: | IOT Cover Front Open FrontCover Open. Beep sounds after FrontCover remains open for 3 minutes. |
| Causes: | • Front Cover Sensor (PL18.1.45) • MCU Board (PL18.1.13) |
| Remedy: | 1 Check the Front Cover Sensor operation Execute Digital Input diagnostic test 041-302, and check the Front Cover Sensor operation. Does it function normally? Replace the MCU Board. Go to step 2. 2 Check the Front Cover Sensor connection Check the connection between the Front Cover Sensor and the MCU Board. Are P/J145 and P/J14 connected securely? Go to step 3. Connect P/J145 and P/J14 securely. 3 Check the power to the Front Cover Sensor (+5 VDC) Check if the voltage between the MCU Board ground and the P/J14-9 pin is about +5 VDC. Replace the Front Cover Sensor. |
| Error code: | 077-304 |
| Display: | Close Rear Cover 077-304 Printer Rear Cover is Open |
| Description: | IOT Cover Rear Open Rear Cover Open |
| Causes: | • Rear Interlock Switch (PL19.1.21) • LVPS (PL18.1.34) |
| Remedy: | 1 Check the Rear Interlock Switch operation Execute Digital Input diagnostic test 041-301, and check the Rear Interlock Switch operation. Does it function normally? Replace the MCU Board. Go to step 2. 2 Check the Rear Interlock Switch connection Check the connection between the Rear Interlock Switch and the LVPS. Is P/J41 connected securely? Go to step 3. Connect P/J41 securely. 3 Check after replacing the Rear Interlock Switch Replace the Rear Interlock Switch. Does the error still occur? Replace the LVPS. Finished. |
| Error code: | 077-312 |
| Description: | Tray Configure Error Combination of trays was illegal. |
| Error code: | 091-914, 091-915, 091-921, 091-963 |
| Description: | 091-914 IOT Drum Communication Fail 091-915 Drum CRUM Data Broken Fail 091-921 IOT Drum Detached 091-963 IOT Drum CRUM ID Error Cause: 091-914: Communication failure with Drum CRUM was detected. 091-915: Malfunction of Drum CRUM was detected. 091-921: It was detected that the Drum CRUM is not at the specified position.(Loose CRUM) 091-963: The Drum CRUM ID error was detected. |
| Remedy: | 1 Is the DRUM CARTRIDGE installed properly, with no foreign substances at the contact point between the CRUM in the DRUM CARTRIDGE and the XEROGRAPHIC CONNECTOR ASSEMBLY? Go to Step 2. Reinstall the DRUM CARTRIDGE 2 Is the DRUM CARTRIDGE, which is installed in the device, a genuine product? Go to Step 3. Replace the DRUM CARTRIDGE with a genuine product 3 Is the connection terminal of the CRUM part in the DRUM CARTRIDGE damaged? Replace the DRUM CARTRIDGE Go to Step 4. 4 Is the connection terminal of the XEROGRAPHIC CONNECTOR ASSEMBLY damaged? Replace (Xerographic Connector Assembly) Go to Step 5. 5 • Check the connection between the XEROGRAPHIC CONNECTOR ASSEMBLY and the MCU PWB. • Is the XEROGRAPHIC CRUM HARNESS ASSEMBLY (P/J254 - P/J25) connected securely? Go to Step 6. Securely connect the XEROGRAPHIC CRUM HARNESS ASSEMBLY 6 • Replace the DRUM CARTRIDGE. • Does an error occur? Go to Step 7. Troubleshooting complete. 7 • Replace (Xerographic Connector Assembly) • Does an error occur? Go to Step 8. Troubleshooting complete. 8 • Replace the XEROGRAPHIC CRUM HARNESS ASSEMBLY. • Does an error occur? Replace (MCU PWB) Troubleshooting complete. |
| Error code: | 091-953 |
| Description: | Drum Tape Staying Cause: The remaining Tape of the Drum Cartridge was detected. |
| Remedy: | Remove the Drum Cartridge Tape. |
| Error code: | 092-315 |
| Description: | ATC Fail RAP The frequency at which the ATC Average Fail or the ATC Amplitude Fail has been occurring has exceeded the threshold value. NOTE: • Although this Fault can be cleared by turning the power OFF and ON and it will be possible to output a few sheets of printouts, when this Fault has occurred a certain number of times, it will no longer be clearable by turning the power OFF and ON. To clear it, clear the value of NVM location [752-022] (ATC Average Fail) or NVM location [752-023] (ATC Amplitude Fail) to "0" (NVM Read/Write). If the machine is not repaired back to normal status, this Fault will occur again during the operation. • When turning the power OFF, turn OFF the power switch first and then the main power switch. |
| Remedy: | Check the following: • The connection between the MCU PWB P/J413 and the Xero/Developer Cartridge P/ J615 for open circuit, short circuit, and poor contact • The Toner Dispense Motor for revolution failure: Component Control [093-002] (PL 8.2) • The Toner Cartridge for internal toner blockage If no problems are found, replace the following parts in sequence: • Drum Cartridge (PL 8.1) • MCU PWB (PL 18.2) |
| Error code: | 093-426 |
| Display: | Ready to Print 093-42X Printer Cartridge is Close to Life |
| Description: | IOT X Toner Near Life K |
| Remedy: | Replace the Black Toner Cartridge. |
| Error code: | 093-922 |
| Description: | Toner Low Density Cause: Low concentration of the Toner was detected. |
| Remedy: | 1 • Remove the TONER CARTRIDGE, shake it a few times, and then reinstall it. • Does an error occur? Go to Step 2. Troubleshooting complete. 2 • Remove the DRUM CARTRIDGE. • Is the contact points of the DRUM CARTRIDGE clean, and correctly installed? Go to Step 3. Clean the contact points and reinstall the DRUM CARTRIDGE 3 • Replace the TONER CARTRIDGE. • Does an error occur? Go to Step 4. Troubleshooting complete. 4 • Replace the DRUM CARTRIDGE. • Does an error occur? Replace (MCU PWB) Troubleshooting complete. |
| Error code: | 093-925, 093-926, 093-928, 093-973 |
| Description: | 093-925 Toner CRUM Error 093-926 Toner CRUM ID Error 093-928 Toner Type Error 093-973 Toner Detached Cause: 093-925: The Toner CRUM error was detected. 093-926: The Toner CRUM ID error was detected. 093-928: The Toner Type Error was detected. 093-973: Toner Detached |
| Remedy: | 1 Is the DRUM CARTRIDGE installed properly, with no foreign substances at the contact point between the CRUM in the TONER CARTRIDGE and theTONER DISPENSE CRUM ASSEMBLY? Go to Step 2. Reinstall the TONER CARTRIDGE 2 Is the TONER CARTRIDGE, which is installed in the device, a genuine product? Go to Step 3. Replace the TONER CARTRIDGE with a genuine product 3 Is the connection terminal of the CRUM part in the TONER CARTRIDGE damaged? Replace the TONER CARTRIDGE Go to Step 4. 4 Is the connection terminal of the TONER DISPENSE CRUM ASSEMBLY damaged? Replace (Toner Dispense CRUM Assembly) Go to Step 5. 5 • Check the connection between the CONNECTOR ASSEMBLY, the CRUM TONER, and the MCU PWB. • Is the XEROGRAPHIC CRUM HARNESS ASSEMBLY(P/J253 - P/J25) connected securely? Go to Step 6. Securely connect the XEROGRAPHIC CRUM HARNESS ASSEMBLY 6 • Replace the TONER CARTRIDGE. • Does an error occur? Go to Step 7. Troubleshooting complete. 7 • Replace (MCU PWB) • Does an error occur? Go to Step 8. Troubleshooting complete. 8 • Replace the XEROGRAPHIC CRUM HARNESS ASSEMBLY • Does an error occur? Replace (MCU PWB) Troubleshooting complete. |
| Error code: | 093-933 |
| Display: | Replace Cart. 093-93X Printer Replace Cartridge |
| Description: | IOT X Toner Life Over K |
| Remedy: | Replace the Black Toner Cartridge. |
| Error code: | 116-210 |
| Display: | 116-210 System Restart Printer Contact Support If Message Returns |
| Description: | USB Host Error Cause: Fatal error of USB Host driver. |
| Causes: | • IP Board. (3010/3040) • IP Board. (3045) • MCU Board. |
| Remedy: | 1. Turn the power Off and On to check that the error recurs. 2. Update to the latest F/W. 3. If the problem cannot be solved, replace (ESS PWB). |
| Error code: | 116-312, 116-313 |
| Description: | 116-312 Encryption Key Error 116-313 Encryption Setting Error Cause: 116-312: Encryption key mismatch. 116-313: Encryption setting mismatch. |
| Causes: | • HDD Productivity Kit, PL 12.4.20 |
| Remedy: | 1 Is the Connector (P/J221) between the SD CARD and the ESS PWB free of broken/bent pins, foreign substances, burns, and etc., and is the unit installed properly? Go to Step 2. Reinstall the SD CARD 2 • Re-set up the security of the SD CARD. • Does an error occur? Go to Step 3. Troubleshooting complete. 3 • Replace the SD CARD. • Does an error occur? Replace (ESS PWB) Troubleshooting complete. |
| Error code: | 116-314 |
| Display: | 116-314 System Restart Printer Contact Support If Message Returns |
| Description: | MAC Address Error Cause: On Board Network MAC Address Checksum Error. |
| Causes: | • IP Board. (3010/3040) • IP Board. (3045) • MCU Board. |
| Remedy: | 1. Turn the power Off and On to check that the error recurs, then replace (ESS PWB). |
| Error code: | 116-315 |
| Display: | RAM Error Error 116-315 Restart Printer |
| Description: | ESS On Board RAM W/R Check Fail Cause: Detected by On Board RAM W/R Check at the time of initialization. |
| Causes: | • 1 GB DDR2 DIMM (Standard), PL 12.4.2 • I/P PWB, PL 12.4.1 |
| Remedy: | 1. Turn the power Off and On to check that the error recurs. 2. Update to the latest F/W. 3. If the problem cannot be solved, replace (ESS PWB). |
| Error code: | 116-317 |
| Display: | Controller Error Error 116-317 Restart Printer |
| Description: | Configuration NG BSD-ON: The device was started up with a run prohibited Controller Firmware. |
| Causes: | • I/P PWB, PL 12.4.1 |
| Remedy: | Upgrade the Controller software or contact the Support Department. |
| Error code: | 116-324 |
| Description: | Exception Fail The CPU has rebooted due to the occurrence of an exception. |
| Causes: | • 1 GB DDR2 DIMM (Standard), PL 12.4.2 • I/P PWB, PL 12.4.1 • HDD Productivity Kit, PL 12.4.20 |
| Remedy: | Upgrade the Controller software or contact the Support Department. |
| Error code: | 116-326 |
| Display: | 116-326 System Restart Printer Contact Support If Message Returns |
| Description: | ESS NVRAM2 W/R Check Fail Cause: Detected by master NVRAM W/R check. |
| Causes: | • IP Board. (3010/3040) • IP Board. (3045) • MCU Board. |
| Remedy: | 1. Turn the power Off and On to check that the error recurs, then replace (ESS PWB). |
| Error code: | 116-327 |
| Description: | ESS Instruction Cache Error Cause: CPU instruction cache error. |
| Causes: | • Image Processor Board, PL8.1.9 |
| Remedy: | 1. Turn the power Off and On to check that the error recurs. 2. Update to the latest F/W. 3. If the problem cannot be solved, replace (ESS PWB). |
| Error code: | 116-328 |
| Description: | ESS Data Cache Error Cause: Communication fail between 1 CPU network and ESS F/W. |
| Causes: | • Image Processor Board, PL8.1.9 |
| Remedy: | 1. Turn the power Off and On to check that the error recurs. 2. Update to the latest F/W. 3. If the problem cannot be solved, replace (ESS PWB). |
| Error code: | 116-343 |
| Description: | ASIC Fail Cause: ASIC-related Fatal Error. |
| Causes: | • Image Processor PWB, PL 12.4.1 |
| Remedy: | 1. Turn the power Off and On to check that the error recurs. 2. Update to the latest F/W. 3. If the problem cannot be solved, replace (ESS PWB). |
| Error code: | 116-350 |
| Description: | On Board Network Communication Fail Cause: Communication fail between 1 CPU network and ESS F/W. |
| Causes: | • Image Processor Board, PL8.1.9 |
| Remedy: | 1. Turn the power Off and On to check that the error recurs. 2. Perform the following in sequence • " Network System Fault Check" • " Network-related Details Check Flow" 3. Update to the latest F/W. 4. If the error persists, ensure that the error is replicated after the printer is powered Off and then On, and then replace (ESS PWB). |
| Error code: | 116-351, 116-352, 116-355 |
| Description: | Network Error Cause: 116-351: On Board Network Ethernet BIST parity/RAM R/W Error. 116-352: On Board Network Internal Loop back Error. 116-355: On Board Network Fatal Error. |
| Remedy: | 1. Turn the power Off and On to check that the error recurs. 2. Perform the following in sequence • " Network System Fault Check" • " Network-related Details Check Flow" 3. Update to the latest F/W. 4. If the error persists, ensure that the error is replicated after the printer is powered Off and then On, and then replace (ESS PWB). |
| Error code: | 116-353, 116-356 |
| Description: | 116-353 ESS SD CARD Fail 116-356 SD CARD Overwrite Error Cause: 116-353: Detect SD CARD Error. 116-356: Error has occurred during SD CARD overwrite. |
| Remedy: | 1 Is the Connector (P/J221) between the SD CARD and the ESS PWB free of broken/bent pins, foreign substances, burns, and etc., and is the unit installed properly? Go to Step 2. Reinstall the SD CARD 2 • Replace the SD CARD. • Does an error occur? Replace (ESS PWB) Troubleshooting complete. |
| Error code: | 116-361 |
| Description: | PCI Bus #0 Error Detected Cause: PCI Bus #0 Uncorrectable Error Detected. (Connected with Remora EX(x4 port)) |
| Causes: | When accessing HDD, the serious error of HDD is caused. Powering OFF and ON, and if the trouble is not recovered yet, execute the followings. Execute the HDD defect test of DC355 Hard Disk Program. If it cannot resolve the trouble, replace HDD. When it is not recovered yet, Replace ESS PWB. |
| Remedy: | 1. Turn the power Off and On to check that the error recurs. 2. Update to the latest F/W. 3. If the problem cannot be solved, replace (ESS PWB). |
| Error code: | 116-362 |
| Description: | PCI Bus #0 Host Bridge Controller Error Cause: PCI Bus #0 Host Bridge Controller Error. (Connected with Remora EX port) |
| Causes: | An error is caused when processing the software in ESS PWB, and the process cannot be continued after that. Replace ESS PWB. |
| Remedy: | 1. Turn the power Off and On to check that the error recurs. 2. Update to the latest F/W. 3. If the problem cannot be solved, replace (ESS PWB). |
| Error code: | 116-363 |
| Description: | PCI Bus #1 Host Bridge Controller Error Cause: PCI Bus #1 Host Bridge Controller Error. (Connected with Remora EX port.) |
| Causes: | An error is caused when processing the software in ESS PWB, and the process cannot be continued after that. Replace ESS PWB. |
| Remedy: | 1. Turn the power Off and On to check that the error recurs. 2. Update to the latest F/W. 3. If the problem cannot be solved, replace (ESS PWB). |
| Error code: | 116-364 |
| Description: | Timer Fail Cause: Timer error is detected. |
| Causes: | • Image Processor PWB, PL 12.4.1 |
| Remedy: | 1. Turn the power Off and On to check that the error recurs. 2. Update to the latest F/W. 3. If the problem cannot be solved, set the RTC correctly. |
| Error code: | 116-366 |
| Description: | PCI Bus #1 Error Detected> Cause: PCI Bus #1 Uncorrectable Error Detected. (Connected with RemoraEX(x1 port)) |
| Causes: | An error is caused when processing the software in ESS PWB, and the process cannot be continued after that. When it is not recovered by powering OFF and On, replace ESS PWB |
| Remedy: | 1. Turn the power Off and On to check that the error recurs. 2. Update to the latest F/W. 3. If the problem cannot be solved, replace (ESS PWB). |
| Error code: | 116-368 |
| Description: | PCI Error Messages received from Bus #0 - Device #1 Cause: Remora EX PCI x1 port Error. (Device ID 0x65 (x1)) |
| Causes: | An error is caused when processing the software in ESS PWB, and the process cannot be continued after that. Replace ESS PWB. |
| Remedy: | 1. Turn the power Off and On to check that the error recurs. 2. Update to the latest F/W. 3. If the problem cannot be solved, replace (ESS PWB). |
| Error code: | 116-369 |
| Description: | PCI Error Messages received from Bus #0 - Device #0 Cause: Remove EX PCI x4 port Error. (Device ID 0x64 (x4)) |
| Remedy: | 1. Turn the power Off and On to check that the error recurs. 2. Update to the latest F/W. 3. If the problem cannot be solved, replace (ESS PWB). |
| Error code: | 116-390 |
| Description: | ESS NVRAM1 SIZE And ID Check Fail Cause: Detected by consistency check between NVRAM size requested by the system and actual size and consistency check of ID recorded at the first power-on. |
| Remedy: | 1. Turn the power Off and On to check that the error recurs. 2. Update to the latest F/W. 3. If the problem cannot be solved, replace (ESS PWB). |
| Error code: | 116-396 |
| Description: | Fatal Error Related to Maillib Other Errors (of File 2 Net Library) Cause: S/W bug. |
| Causes: | The serious error of Mail IO is caused. An error is caused when processing the software, and the process cannot be continued after that. Replace ESS PWB. |
| Remedy: | 1. Turn the power Off and On to check that the error recurs. 2. Perform the following in sequence • " Network System Fault Check" • " Network-related Details Check Flow" 3. Update to the latest F/W. 4. If the error persists, ensure that the error is replicated after the printer is powered Off and then On, and then replace (ESS PWB). |
| Error code: | 116-719 |
| Description: | XPIF Parameter Cancelled Cause: Due to conflict among multiple print instructions, print instructions are ignored. |
| Remedy: | Make sure that you are using the correct printer driver. |
| Error code: | 116-721 |
| Description: | Collate Full |
| Remedy: | 1 Cycle the power Off, then On. Does the error still occur? Go to step 2. Complete. 2 Check RAM Disk size settings. Does the error occur when printing after reducing the size setting of the RAM Disk? Split the document into blocks to decrease the number of pages to be collated. Complete. |
| Error code: | 116-722 |
| Description: | WSD (Web Services on Device) Scan destination error Cause: The scan job cannot be executed on the device-driven Web Services on Device Scan, because the destination PC has been stopped. |
| Remedy: | The machine will recover after the OK button is pressed or message is displayed for specified time. If the error persists: 1. Check the destination PC. 2. Perform the following in sequence. • " Network System Fault Check" • " Network-related Details Check Flow" 3. Take corrective actions at the host side. |
| Error code: | 116-987 |
| Description: | Fatal Error Related to Format Library Cause: S/W bug. |
| Remedy: | 1. Turn the power Off and On to check that the error recurs. 2. Perform the following in sequence • " Network System Fault Check" • " Network-related Details Check Flow" 3. Update to the latest F/W. 4. If the error persists, ensure that the error is replicated after the printer is powered Off and then On, and then replace (ESS PWB). |
| Error code: | 117-315 |
| Description: | EEPROM Driver Error Cause: EEPROM Driver program error. |
| Remedy: | 1. Turn the power Off and On to check that the error recurs. 2. Update to the latest F/W. |
| Error code: | 117-321 |
| Description: | Device Memory Error Cause: SD CARD Type Invalid. |
| Remedy: | 1 Is the regular SD CARD used? Go to Step 2. Use the regular SD CARD 2 Is the Connector (P/J221) between the SD CARD and the ESS PWB free of broken/bent pins, foreign substances, burns, and etc., and is the unit installed properly? Go to Step 3. Reinstall the SD CARD 3 • Replace the SD CARD. • Does an error occur? Replace (ESS PWB) Troubleshooting complete. |
| Error code: | 117-331 |
| Description: | IPS Error Cause: In relation to IPS, the following internal error has occurred. • OS function return value error • DSP program load fail |
| Remedy: | 1. Turn the power Off and On to check that the error recurs. 2. Update to the latest F/W. 3. If the problem cannot be solved, replace (ESS PWB). |
| Error code: | 117-338 |
| Description: | Enable Device Memory Error Cause: Invalid, although SD CARD was detected. This error will be outputted if SD CARD is removed where the power is on. |
| Remedy: | 1 Is the Connector (P/J221) between the SD CARD and the ESS PWB free of broken/bent pins, foreign substances, burns, and etc., and is the unit installed properly? Replace the SD CARD. Reinstall the SD CARD |
| Error code: | 117-340 |
| Description: | Controller Error Cause: HOOK task error. |
| Remedy: | 1. Turn the power Off and On to check that the error recurs, then update to the latest F/W. 2. If the problem cannot be solved, replace the following parts in sequence. • (Fax PWB) • (ESS PWB) |
| Error code: | 117-344 |
| Description: | FAX Error Cause: FLASHFILE task error. |
| Remedy: | 1. Turn the power Off and On to check that the error recurs, then update to the latest F/W. 2. If the problem cannot be solved, replace the following parts in sequence. • (Fax PWB) • (ESS PWB) |
| Error code: | 117-350 |
| Description: | Controller Error Cause: Task initialization (start) error. |
| Remedy: | 1. Turn the power Off and On to check that the error recurs. 2. Update to the latest F/W. 3. If the problem cannot be solved, replace (ESS PWB). |
| Error code: | 117-361 |
| Description: | IIT Parameter Verify NG Cause: IIT registration adjustment value verification NG. (Checked only at production process) |
| Remedy: | 1. Turn the power Off and On to check that the error recurs. 2. Update to the latest F/W. |
| Error code: | 117-362 |
| Description: | EEPROM Sum Check Error Cause: EEPROM sum check value error. |
| Remedy: | 1. Turn the power Off and On to check that the error recurs. 2. Update to the latest F/W. |
| Error code: | 117-363 |
| Description: | NVM Sum Check Error Cause: NVM sum check value error. |
| Remedy: | 1. Turn the power Off and On to check that the error recurs. 2. Update to the latest F/W. |
| Error code: | 117-365 |
| Description: | Low Voltage Cause: RTC detected Low Voltage. RTC clock setting and content of SRAM are invalid. Initialize them. |
| Causes: | • Image Processor Board, PL10.6.6 |
| Remedy: | 1. Turn the power Off and On to check that the error recurs. 2. Update to the latest F/W. 3. If the problem cannot be solved, replace (ESS PWB). |
| Error code: | 117-367 |
| Description: | FXIF error Cause: An error occurred on FXIF (such as the Video Underrun error). |
| Remedy: | 1. Turn the power Off and On to check that the error recurs. 2. Then update to the latest F/W. 3. If the problem cannot be solved, replace the following parts in sequence. • (ESS PWB) • (IIT Assembly) |
| Error code: | 118-311 |
| Description: | Google Cloud Print Software Error Cause: A critical internal error has occurred. |
| Remedy: | 1. Check the settings, and try again. 2. Contact customer support if the issue reoccurs. 3. Perform the following in sequence. • " Network System Fault Check" • " Network-related Details Check Flow" 4. Update to the latest F/W. 5. If the error persists, ensure that the error is replicated after the printer is powered Off and then On, and then replace (ESS PWB). |
| Error code: | 123-314 |
| Description: | Image Processor Board Error |
| Causes: | • IP Board (ESS) (SFP PL8.1.7; MFP PL8.1.2) |
| Remedy: | 1 Does the error still occur when the power is turned Off and On? Replace the Image Processor Board. Complete. |
| Error code: | 123-333 |
| Description: | Panel FW transmission error Cause: An error which occurred when the Panel Main FW transmission was performed from ESS. |
| Remedy: | 1. Turn the power Off and On to check that the error recurs. 2. Update to the latest F/W. 3. If the error persists, ensure that the error is replicated after the printer is powered Off and then On, and then replace the following parts in sequence. • (Fax PWB) • (ESS PWB) |
| Error code: | 123-399 |
| Description: | Panel Device Reboot Error Cause: An error which was caused by an unexpected reboot, such as reboot due to static electricity. |
| Remedy: | 1. Turn the power Off and On to check that the error recurs, then update to the latest F/W. 2. If the problem cannot be solved, replace (Control Panel (3610)) (Control Panel (3615)) |
| Error code: | 131-397 |
| Description: | File2Net Fatal Error Cause: File2Net fatal error. S/W bug. |
| Causes: | • Image Processor Board, PL10.6.6 |
| Remedy: | 1. Turn the power Off and On to check that the error recurs. 2. Perform the following in sequence • " Network System Fault Check" • " Network-related Details Check Flow" 3. Update to the latest F/W. 4. If the error persists, ensure that the error is replicated after the printer is powered Off and then On, and then replace (ESS PWB). |
| Error code: | 131-398 |
| Description: | SMB client Fatal Error Cause: SMB Client fatal error. |
| Remedy: | 1. Turn the power Off and On, perform the same operation and check whether the problem is reoccurring. 2. If the problem still persists, perform the following in sequence. • " Network System Fault Check" • " Network-related Details Check Flow" 3. Take corrective actions at the host side. |
| Error code: | 131-399 |
| Description: | FTP client Fatal Error Cause: FTP Client fatal error. |
| Remedy: | 1. Turn the power Off and On, perform the same operation and check whether the problem is reoccurring. 2. If the problem still persists, perform the following in sequence. • " Network System Fault Check" • " Network-related Details Check Flow" 3. Take corrective actions at the host side. |
| Error code: | 133-231 |
| Description: | T_FAXCOM Data Receive I/F Error Cause: T_FAXCOM<->Data processing I/F error. |
| Remedy: | 1. Turn the power Off and On to check that the error recurs, then update to the latest F/W. 2. If the problem cannot be solved, replace the following parts in sequence. • (Fax PWB) • (ESS PWB) |
| Error code: | 133-234 |
| Description: | JBIG Parameter Error Cause: JBIG parameter error. |
| Remedy: | 1. Turn the power Off and On to check that the error recurs. 2. Update to the latest F/W. 3. If the problem cannot be solved, replace the following parts in sequence. • (Fax PWB) • (ESS PWB) |
| Error code: | 133-235 |
| Description: | MHR Parameter Error Cause: MHR parameter error. |
| Remedy: | 1. Turn the power Off and On to check that the error recurs. 2. Update to the latest F/W. 3. If the problem cannot be solved, replace the following parts in sequence. • (Fax PWB) • (ESS PWB) |
| Error code: | 133-236 |
| Description: | MHR Encode Error Cause: MHR encode error. |
| Remedy: | 1. Turn the power Off and On to check that the error recurs. 2. Update to the latest F/W. 3. If the problem cannot be solved, replace the following parts in sequence. • (Fax PWB) • (ESS PWB) |
| Error code: | 133-237 |
| Description: | MHR Input Buffer Error Cause: Data error of MHR input buffer. |
| Remedy: | 1. Turn the power Off and On to check that the error recurs. 2. Update to the latest F/W. 3. If the problem cannot be solved, replace the following parts in sequence. • (Fax PWB) • (ESS PWB) |
| Error code: | 133-238 |
| Description: | MHR Output Buffer Error Cause: Data error of MHR output buffer. |
| Remedy: | 1. Turn the power Off and On to check that the error recurs. 2. Update to the latest F/W. 3. If the problem cannot be solved, replace the following parts in sequence. • (Fax PWB) • (ESS PWB) |
| Error code: | 133-239 |
| Description: | FAX ECM Buffer Address Error Cause: At FAX send/receive, address to get from and write in ECM buffer is wrong. |
| Remedy: | 1. Turn the power Off and On to check that the error recurs. 2. Update to the latest F/W. 3. If the problem cannot be solved, replace the following parts in sequence. • (Fax PWB) • (ESS PWB) |
| Error code: | 133-240 |
| Description: | Resolution Change Error Cause: Resolution error in FAX send resolution conversion. |
| Remedy: | 1. Turn the power Off and On to check that the error recurs. 2. Update to the latest F/W. 3. If the problem cannot be solved, replace the following parts in sequence. • (Fax PWB) • (ESS PWB) |
| Error code: | 133-241 |
| Description: | Memory Pool Get Error Cause: Memory pool get error. (OS error) |
| Remedy: | 1. Turn the power Off and On to check that the error recurs. 2. Update to the latest F/W. 3. If the problem cannot be solved, replace the following parts in sequence. • (Fax PWB) • (ESS PWB) |
| Error code: | 133-242 |
| Description: | Memory Pool Release Error Cause: Memory pool release error. (OS error) |
| Remedy: | 1. Turn the power Off and On to check that the error recurs. 2. Update to the latest F/W. 3. If the problem cannot be solved, replace the following parts in sequence. • (Fax PWB) • (ESS PWB) |
| Error code: | 133-243 |
| Description: | Message Send Error Cause: Message send error. (OS error) |
| Remedy: | 1. Turn the power Off and On to check that the error recurs. 2. Update to the latest F/W. 3. If the problem cannot be solved, replace the following parts in sequence. • (Fax PWB) • (ESS PWB) |
| Error code: | 133-244 |
| Description: | Message Receive Error Cause: Message receive error. (OS error) |
| Remedy: | 1. Turn the power Off and On to check that the error recurs. 2. Update to the latest F/W. 3. If the problem cannot be solved, replace the following parts in sequence. • (Fax PWB) • (ESS PWB) |
| Error code: | 133-246 |
| Description: | Memory Pool Get Error Cause: Memory pool get error. (OS error) |
| Remedy: | 1. Turn the power Off and On to check that the error recurs. 2. Update to the latest F/W. 3. If the problem cannot be solved, replace the following parts in sequence. • (Fax PWB) • (ESS PWB) |
| Error code: | 133-247 |
| Description: | Message Send Error Cause: Message send error. (OS error) |
| Remedy: | 1. Turn the power Off and On to check that the error recurs. 2. Update to the latest F/W. 3. If the problem cannot be solved, replace the following parts in sequence. • (Fax PWB) • (ESS PWB) |
| Error code: | 133-248 |
| Description: | Memory Pool Release Error Cause: Memory pool release error. (OS error) |
| Remedy: | 1. Turn the power Off and On to check that the error recurs. 2. Update to the latest F/W. 3. If the problem cannot be solved, replace the following parts in sequence. • (Fax PWB) • (ESS PWB) |
| Error code: | 133-249 |
| Description: | Message Receive Error Cause: Message receive error. (OS error) |
| Remedy: | 1. Turn the power Off and On to check that the error recurs. 2. Update to the latest F/W. 3. If the problem cannot be solved, replace the following parts in sequence. • (Fax PWB) • (ESS PWB) |
| Error code: | 133-251 |
| Description: | File Open Error Cause: File open error. |
| Remedy: | 1. Turn the power Off and On to check that the error recurs. 2. Update to the latest F/W. 3. If the problem cannot be solved, replace the following parts in sequence. • (Fax PWB) • (ESS PWB) |
| Error code: | 133-252 |
| Description: | File Close Error Cause: File close error. |
| Remedy: | 1. Turn the power Off and On to check that the error recurs. 2. Update to the latest F/W. 3. If the problem cannot be solved, replace the following parts in sequence. • (Fax PWB) • (ESS PWB) |
| Error code: | 133-253 |
| Description: | File Erase Error Cause: File erase error. |
| Remedy: | 1. Turn the power Off and On to check that the error recurs. 2. Update to the latest F/W. 3. If the problem cannot be solved, replace the following parts in sequence. • (Fax PWB) • (ESS PWB) |
| Error code: | 133-254 |
| Description: | Memory Full Cause: Cannot secure memory necessary to print. |
| Remedy: | 1. Turn the power Off and On to check that the error recurs. 2. Update to the latest F/W. 3. If the problem cannot be solved, replace the following parts in sequence. • (Fax PWB) • (ESS PWB) |
| Error code: | 133-259 |
| Description: | OS Call Error Cause: OS Call error. |
| Remedy: | 1. Turn the power Off and On to check that the error recurs. 2. Update to the latest F/W. 3. If the problem cannot be solved, replace (ESS PWB). |
| Error code: | 133-260 |
| Description: | File Open Error Cause: File open error. |
| Remedy: | 1. Turn the power Off and On to check that the error recurs. 2. Update to the latest F/W. 3. If the problem cannot be solved, replace (ESS PWB). |
| Error code: | 133-261, 133-269 |
| Description: | File Close Error Cause: File close error. |
| Remedy: | 1. Turn the power Off and On to check that the error recurs. 2. If the problem cannot be solved, replace the following parts in sequence. • (Fax PWB) • (ESS PWB) |
| Error code: | 133-271 |
| Description: | Memory Pool Get Error Cause: Memory pool get error. (OS error) |
| Remedy: | 1. Turn the power Off and On to check that the error recurs. 2. Update to the latest F/W. 3. If the problem cannot be solved, replace (ESS PWB). |
| Error code: | 133-272 |
| Description: | Message Send Error Cause: Message send error. (OS error) |
| Remedy: | 1. Turn the power Off and On to check that the error recurs. 2. Update to the latest F/W. 3. If the problem cannot be solved, replace (ESS PWB). |
| Error code: | 133-273 |
| Description: | Memory Pool Release Error Cause: Memory pool release error. (OS error) |
| Remedy: | 1. Turn the power Off and On to check that the error recurs. 2. Update to the latest F/W. 3. If the problem cannot be solved, replace (ESS PWB). |
| Error code: | 133-274 |
| Description: | Message Receive Error Cause: Message receive error. (OS error) |
| Remedy: | 1. Turn the power Off and On to check that the error recurs. 2. Update to the latest F/W. 3. If the problem cannot be solved, replace (ESS PWB). |
| Error code: | 133-275 |
| Description: | OS Call Error Cause: OS Call error. |
| Remedy: | 1. Turn the power Off and On to check that the error recurs. 2. Update to the latest F/W. 3. If the problem cannot be solved, replace (ESS PWB). |
| Error code: | 133-276 |
| Description: | File Open Error Cause: File open error. |
| Remedy: | 1. Turn the power Off and On to check that the error recurs. 2. Update to the latest F/W. 3. If the problem cannot be solved, replace (ESS PWB). |
| Error code: | 133-277 |
| Description: | File Close Error Cause: File close error. |
| Remedy: | 1. Turn the power Off and On to check that the error recurs. 2. Update to the latest F/W. 3. If the problem cannot be solved, replace (ESS PWB). |
| Error code: | 133-278 |
| Description: | File Erase Error Cause: File erase error. |
| Remedy: | 1. Turn the power Off and On to check that the error recurs. 2. Update to the latest F/W. 3. If the problem cannot be solved, replace the following parts in sequence. • (Fax PWB) • (ESS PWB) |
| Error code: | 133-279 |
| Description: | FAX CODEC I/F Error Cause: FAX CODEC I/F error. |
| Remedy: | 1. Turn the power Off and On to check that the error recurs. 2. Check the telephone line connection. Reconnect the telephone line connector. 3. Check the sending side fax. Receive the fax data from a good fax machine. 4. Update to the latest F/W. 5. If the error persists, ensure that the error is replicated after the printer is powered Off and then On, and then replace the following parts in sequence. • (Fax PWB) • (ESS PWB) |
| Error code: | 133-280 |
| Description: | ERR_FAX_TIME Cause: FAX timer error. |
| Remedy: | 1. Turn the power Off and On to check that the error recurs. 2. Update to the latest F/W. 3. If the problem cannot be solved, replace the following parts in sequence. • (Fax PWB) • (ESS PWB) |
| Error code: | 133-281 |
| Description: | Power Off Report Create Fail Cause: Failed in creating power-off report. |
| Remedy: | 1. Turn the power Off and On to check that the error recurs. 2. Update to the latest F/W. 3. If the problem cannot be solved, replace (ESS PWB). |
| Error code: | 133-282 |
| Description: | Memory Pool Get Error Cause: Memory pool get error. (OS error) |
| Remedy: | 1. Turn the power Off and On to check that the error recurs. 2. Update to the latest F/W. 3. If the problem cannot be solved, replace (ESS PWB). |
| Error code: | 133-283 |
| Description: | Message Send Error Cause: Message send error. (OS error) |
| Remedy: | 1. Turn the power Off and On to check that the error recurs. 2. Update to the latest F/W. 3. If the problem cannot be solved, replace (ESS PWB). |
| Error code: | 133-286 |
| Description: | OS Call Error Cause: OS Call error. |
| Remedy: | 1. Turn the power Off and On to check that the error recurs. 2. Update to the latest F/W. 3. If the problem cannot be solved, replace (ESS PWB). |
| Error code: | 133-287 |
| Description: | File Open Error Cause: File open error. |
| Remedy: | 1. Turn the power Off and On to check that the error recurs. 2. Update to the latest F/W. 3. If the problem cannot be solved, replace (ESS PWB). |
| Error code: | 133-288 |
| Description: | File Close Error Cause: File close error. |
| Remedy: | 1. Turn the power Off and On to check that the error recurs. 2. Update to the latest F/W. 3. If the problem cannot be solved, replace (ESS PWB). |
| Error code: | 133-289 |
| Description: | File Erase Error Cause: File erase error. |
| Remedy: | 1. Turn the power Off and On to check that the error recurs. 2. Update to the latest F/W. 3. If the problem cannot be solved, replace (ESS PWB). |
| Error code: | 133-290 |
| Description: | Print Decode Error Cause: At JBIG data print decode, decode error occurred three successive times. |
| Remedy: | 1. Turn the power Off and On to check that the error recurs. 2. Check the telephone line connection. Reconnect the telephone line connector. 3. Check the sending side fax. Receive the fax data from a good fax machine. 4. Update to the latest F/W. 5. If the error persists, ensure that the error is replicated after the printer is powered Off and then On, and then replace the following parts in sequence. • (Fax PWB) • (ESS PWB) |
| Error code: | 142-700 |
| Description: | IOT Over Heat Forced Half Speed Cause: Half-speed operation was forced due to abnormally high temperature inside the IOT. |
| Remedy: | 1. No action is required. 2. Start the operation after the Printer has cooled down. |
Название
XEROX Тонер-картридж черный (5900 стр.)
XEROX Тонер-картридж черный (14100 стр.)
XEROX Тонер-картридж черный (25300 стр.)
XEROX Копи-картридж / фотобарабан
XEROX Ремкомплект с печкой 220v
XEROX Ролики подачи бумаги
XEROX Узел термозакрепления в сборе 220V
